Installation package options
Jira Data Center comes with several deployment options. The first choice you need to make is where you would like to deploy Jira. If you want to deploy Jira to AWS or Azure, Atlassian provides quick-start templates so that you can get up and running quickly.
If you want to deploy Jira to your hardware or other cloud vendors, or simply want to manage how you want the deployment to be, you can use the installation packages available. Jira installation packages come in two flavors:
- Executable installer: The executable installer provides a wizard-driven interface that will walk you through the entire installation process. It even comes with a Java installer to save you some time.
- TAR.GZ or ZIP archive: The archive package is similar to the executable installer, except it does not have an installation wizard, does not bundle Java, and will not configure Jira to run as a service.
You will also need to perform some post-installation steps manually, such as configuring Jira as a service. However, you do get the advantage of learning what goes on under the hood.
In our exercise, we will be using the installer package, but we will also cover the post-installation steps so that you have a good understanding of the various configuration options available. We will start by installing Java.
Installing Java
Since we will be using the installer package that’s bundled with Java, you can skip this section. However, if you are using the archive option, you need to make sure that you have Java installed on your system.
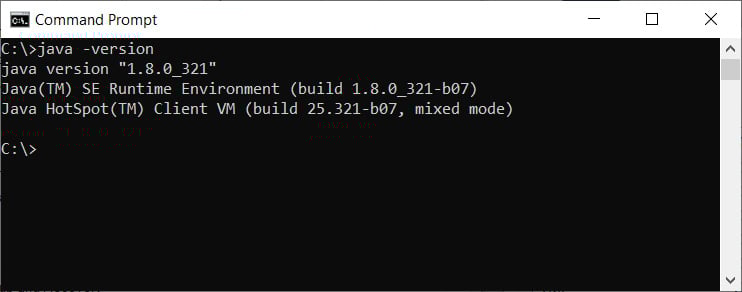
Jira 8 requires JRE version 8 as a minimum to run. You can verify the version of Java you have by running the following command in Command Prompt:
java -version
The preceding command tells you which version of Java is running on your system, as shown in the following screenshot:

Figure 1.2 – Java version
If you do not see a similar output, then chances are you do not have Java installed. You will need to perform the following steps to set up your Java environment. Start by installing Java on your system:
- Download the latest Java 8 or 11 from https://www.java.com/en/download/manual.jsp.
Note
At the time of writing, the latest version of Java 8 is JDK 8 Update 321.
- Double-click on the downloaded installation file to start the installation wizard.
- Select where you would like to install Java. Alternatively, you can simply accept the default values. The location where you install JDK will be referred to as
JAVA_HOMEfor the remainder of this book. - Create a new environment variable named
JAVA_HOMEwith the value set to the full path of the location where you installed Java. You can do this as follows:- Open the System Properties window by going to About your PC from the Windows Start menu.
- Select the Advanced system settings option.
- Click on the Environment Variable button from the new popup:

Figure 1.3 – The JAVA_HOME environment variable
- Add a new variable (either User or System) called
JAVA_HOMEand set its value to where you installed Java.
Now that you have a good understanding of Jira Data Center, the basic system requirements, and the various installation options, we are ready to deploy our own Jira instances.


