Providing access to your team
When you create your first Looker instance, you become its owner and administrator. You can then provide access to the rest of your team. Remember, by default, with the Standard edition, Looker gives you 12 free user allocations with the Standard version – 2 developers and 10 standard users. The Standard edition is tailored for small teams with up to 50 internal platform users.
For your free trial space, it is best to add only the colleagues who will actively participate in testing Looker with you.
How to do it...
To add your colleagues to your Looker free trial instance you will need to do the following:
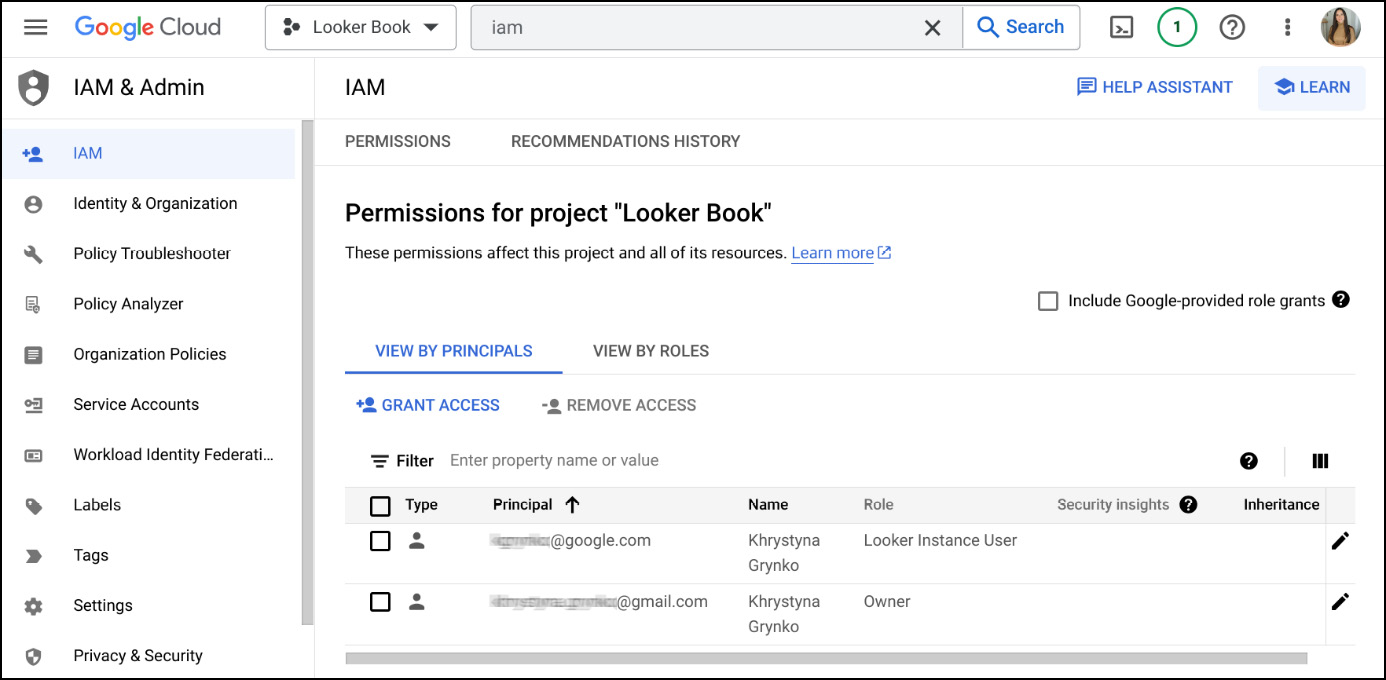
- In the GC console, go to the IAM & Admin section.
- Click on the IAM tab.
- Click on GRANT ACCESS (Figure 1.10).

Figure 1.10 – Cloud IAM
- In New principals, add an email (should be a Google account) or multiple emails of your co-testers.
- In Select a role, type
Lookerto filter, then assign your colleagues the same Looker role you have (for example, Looker Admin) to ensure they have the same level of access as you during the trial. - Send the Looker instance URL to the person that you provided access to (to find your instance URL, see Figure 1.8).
- When they click on the link or copy and paste it into the browser, they will be asked to authenticate with their Google account.
- Once authenticated, your colleagues will see the same Looker Welcome page you saw when first connected to Looker.
Important note
When managing user permissions in Looker, it’s important to grant access based on specific needs. While collaboration is key, admin access should be reserved cautiously. For most colleagues, assigning “Looker instance user” status is sufficient.
See also
- Other (more advanced) user roles and connection options will be discussed later in this book: Chapter 9, Administering and Monitoring Looker.


