Working inside the material editor
Let's get started with the material editor! This is the place where the magic will happen and also where we'll spend most of our time during this cookbook. Better get well acquainted with it then! As with everything inside Unreal, you'll be able to see that this space for creating materials is a very flexible one—full of customizable panels, rearrangeable windows, and expandable areas. You can place them however you want!
Because of its modular nature, some of the initial questions we need to tackle are the following ones: how do we start creating materials and where do we look for the most commonly used parameters? Having different panels means having to look for different functionalities in each of them, so we'll need to know how to find our way around the editor. We won't stop there though—the editor is packed with plenty of useful little tools that will make our jobs as material creators that much easier, and knowing where they live is one of the first mandatory steps.
So, without further ado, let's use the project we have already set up in the previous recipe as our starting point and let's start creating our first material!
Getting ready
There's not much we need to do at this point—all thanks to having previously created the basic blank project. That's the reason we created it in the first place, so we can start working on our materials straight away. Having set up the studio scene is all we need at this point.
In spite of this, don't feel obliged to use the level we created in the first recipe. Any other one will do, as long as there are some lights in it that help you visualize your world. That's the advantage of the PBR workflow, that whatever we create following its principles will work across different lighting scenarios. Let's jump right in!
How to do it...
It's now time to take a look at how the material editor works, at the same time as we create our first material. This editor includes many different tools and functionalities within it, so there are plenty of things to take a look at!
Note
Remember that you can bring the material editor up by just creating a new material and double-clicking on it.
The first important thing we will be doing is to actually create a material. Of course, this is a very trivial action and there's not much to explain—just right-click anywhere on the content browser and select the Create Basic Asset | Material option. What is important is knowing how to name and organize our contents. Even though keeping the Content Browser organized is not the main goal of this chapter, I didn't want to pass up on the opportunity to briefly talk about that.
One good way of keeping things tidy is to organize the folder structure in categories (Materials, Characters, Weapons, Environment...) and naming the different assets using Unreal's recommended syntax. You can find more about that on several discussion forums or on Epic Games' wiki:
- Unreal Engine 4 style guide: https://github.com/Allar/ue4-style-guide
- Assets naming convention: https://wiki.unrealengine.com/Assets_Naming_Convention
The second important thing we want to be doing is to make sure that the layout we are looking at is the default one, just so that the images we will be including later on match what you'll be seeing in your monitor. To do that, go to Window | Reset Layout, as shown in the following screenshot:
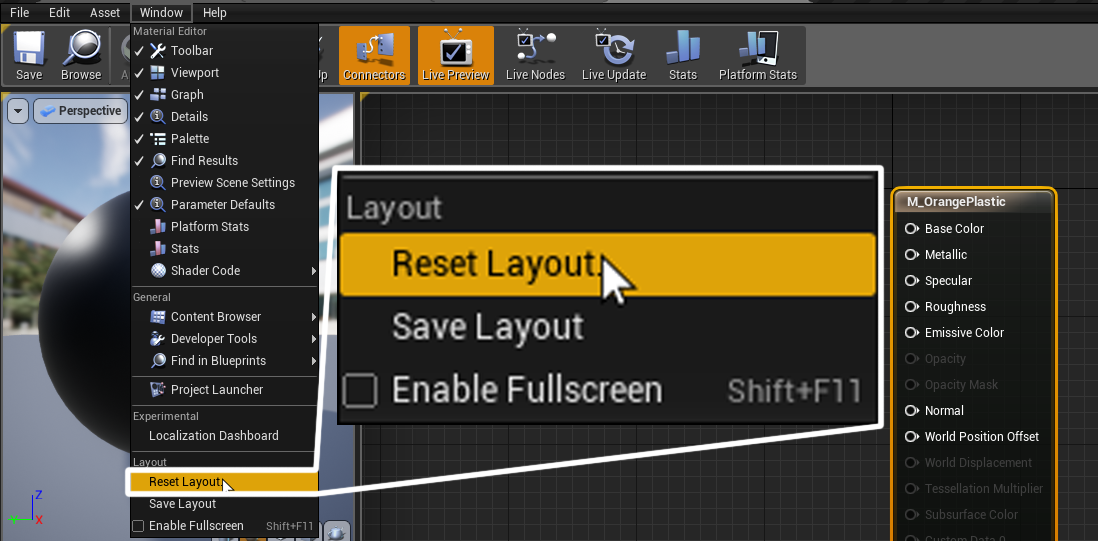
Remember that resetting the layout to its default state can still make things not look perfectly equal between your screen and mine—that's because settings such as the screen resolution or its aspect ratio can hide panels or make them imperceptibly small. Feel free to move things around until you reach a layout that works for you!
Now that we've made sure that we are looking at the same screen, let's turn our attention to the material editor itself and the different parts that constitute it. By default, this is what we should be looking at:
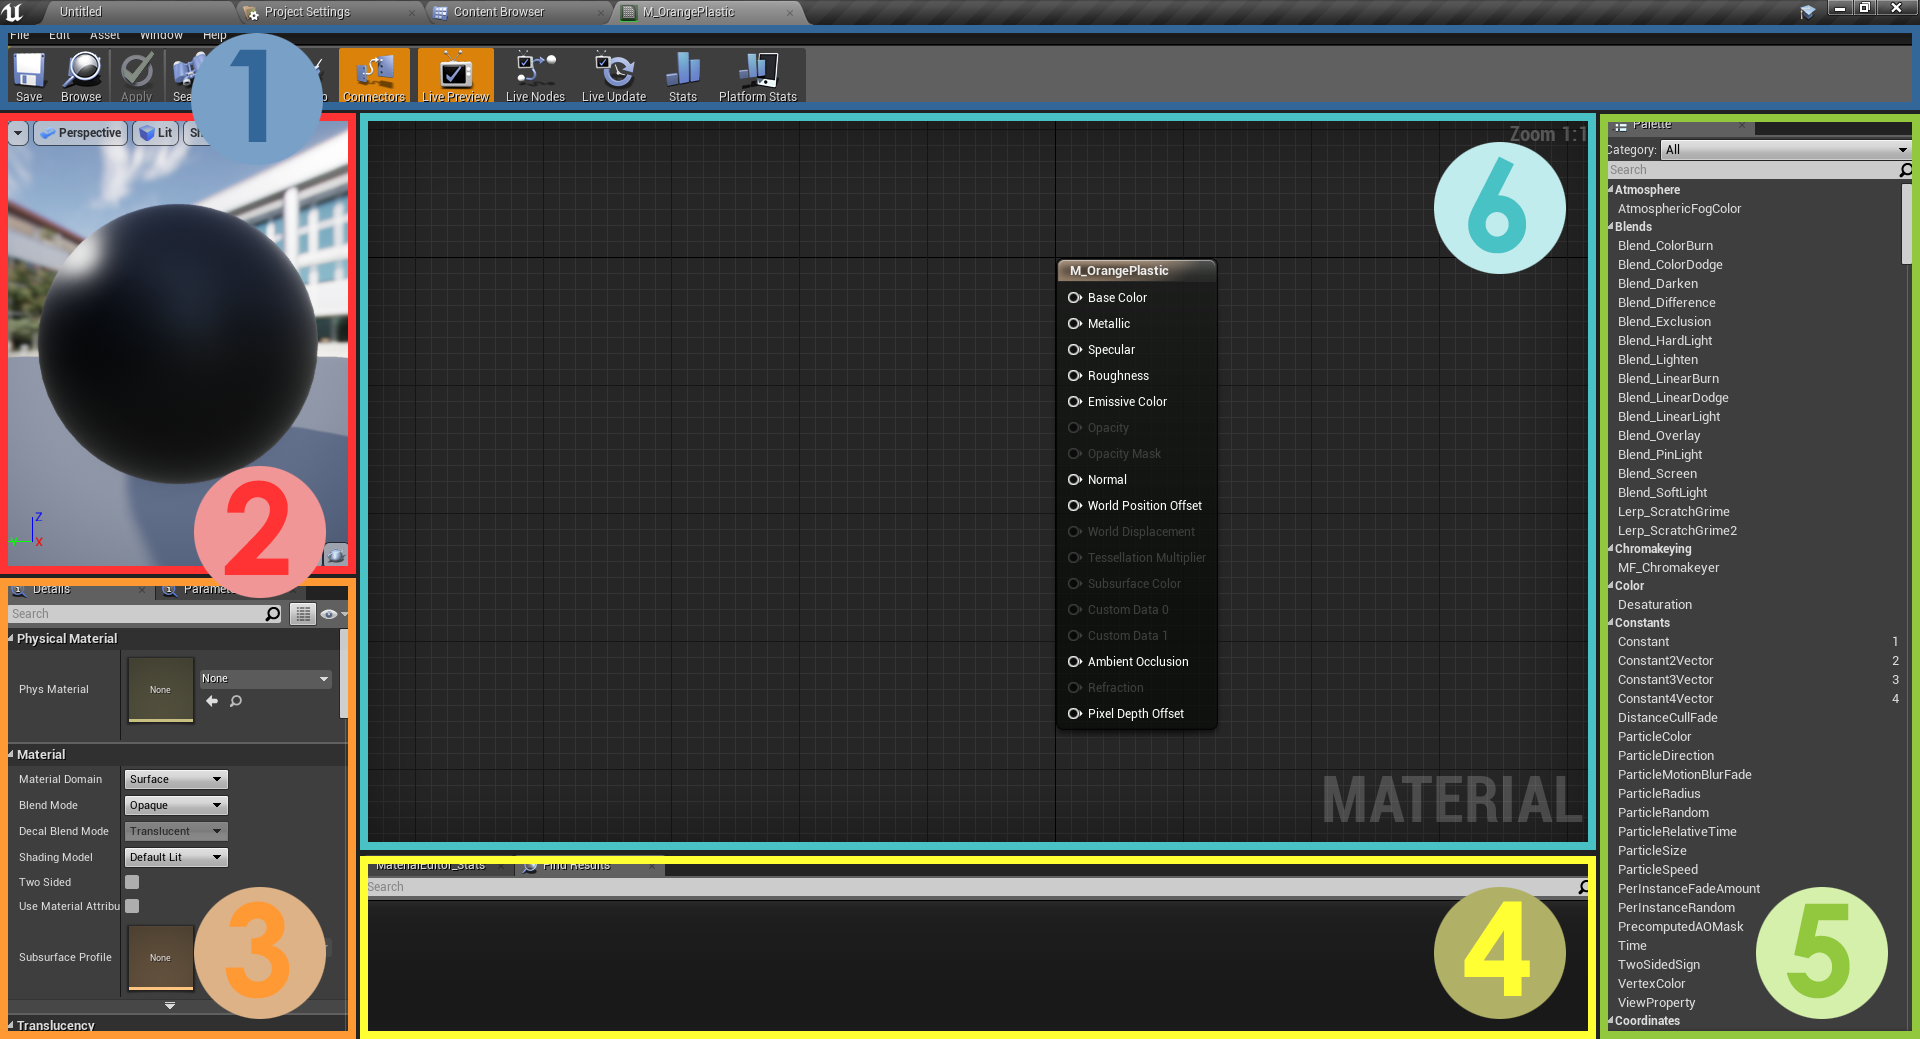
- The first part of the material editor is the
Toolbar, a common section that you'll find in many other places within the engine. It lets you save your progress or apply any changes that you've made to your materials amongst other things. - The second panel is the
Viewport, where we'll be able to see what our material looks like. You can rotate the view, zoom in or out, and change the lighting setup of that window. - The
Detailspanel (3) is a very useful one, for here is where we can start to define the properties of the materials that we want to create. Its contents vary depending on what is selected in the main graph editor (the panel numbered6). - The
Statsand theFind Resultspanels (4) is where you can take a look at how costly your materials are or how many textures they are using. - The
material nodePalette(5) is a library of different nodes and functions that we'll use to modify the materials we create. - The
main graph editor(6) is where the action happens, and where most of the functionality that you want to include in your materials needs to be visually scripted.
Now that we've taken a look at the different parts that make up the material editor in Unreal, we can start creating our own first simple material—a plastic. I find plastics to be a very straightforward type—even though we could make them as complicated as we want to. So, let's explore how we would go about at creating it:
- Take a look at the main graph. By default, every time you create a new material, you should be looking at a central main node. You will see multiple pins, which are the elements where we want to connect the different elements we will be creating.
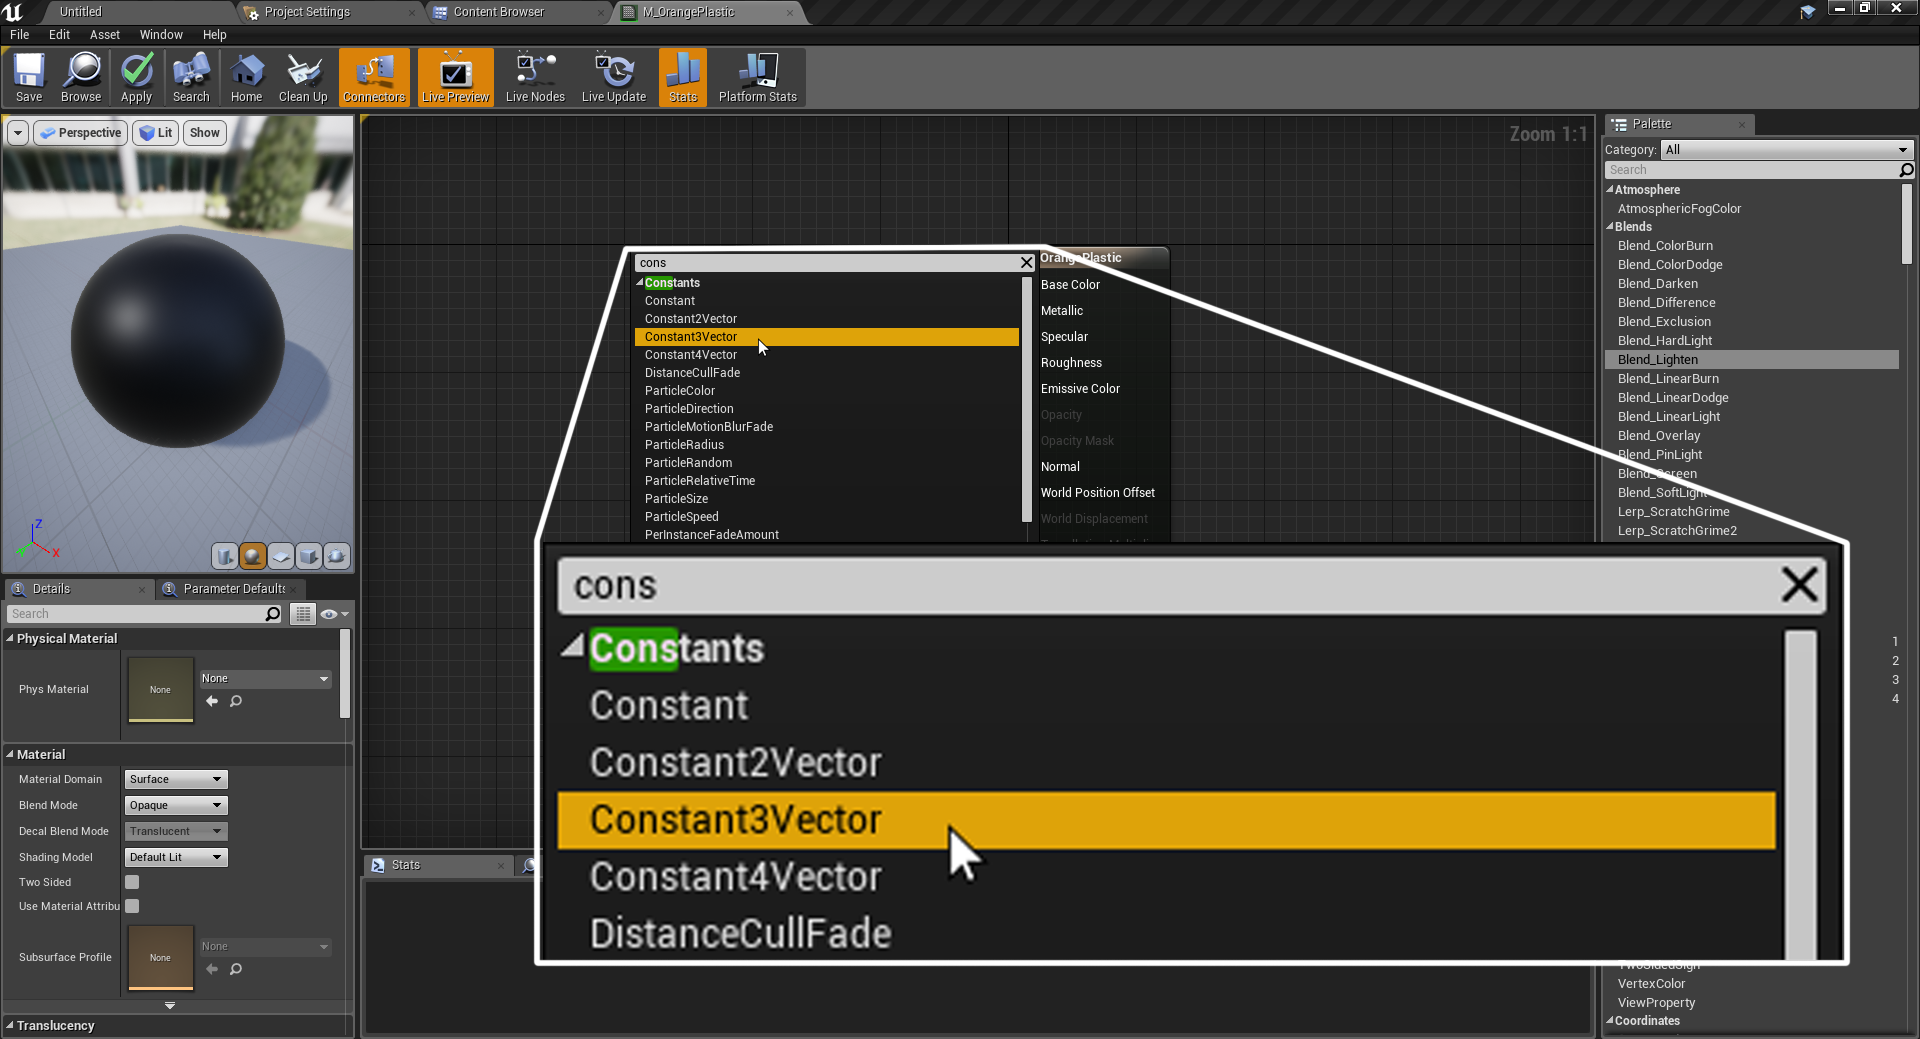
- Right-click on the main graph, preferably to the left of the main material node, and start typing
constant. As you start to write, notice how the auto-completion system starts to show several options:Constant,Constant2Vector,Constant3Vector,and so on. SelectConstant3Vector, as shown in the following screenshot:
- Having chosen that option, you will be able to see that a new node has now appeared. You can now connect it to the
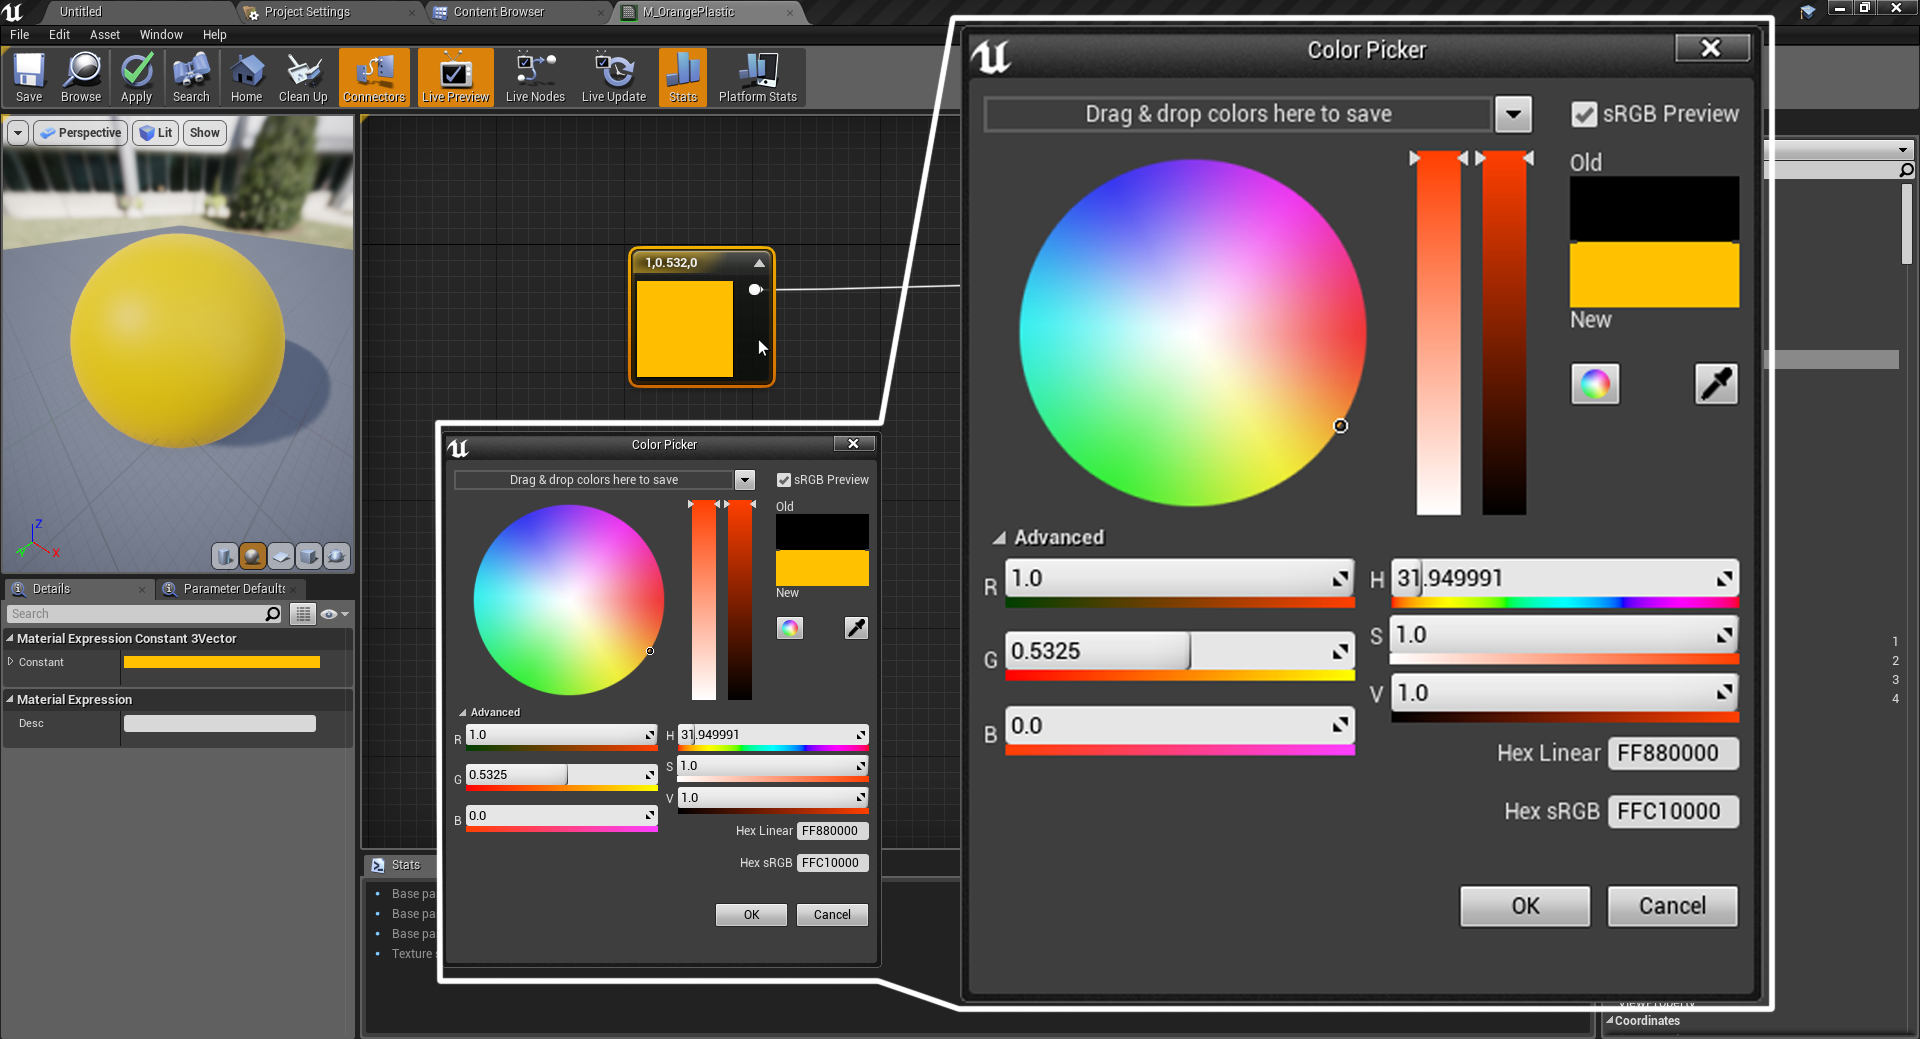
Base Colorof the material node. If you are on the constant node, take a look at theDetailspanel and you'll be able to see that there are a couple settings that you can tweak. Since we want to move away from the default blackish appearance that the material now has, click on the black rectangle to the right of where it saysConstantand use the color wheel to change its current value. I'm going to go with orange:
Note
There's more to the base color property than meets the eye! Apart from the different options that are available to select a color, you might be interested to know that the actual value that gets connected to the material slot matters beyond the color choice. Certain materials have a measured intensity to them, and you can check that out on the following website: https://docs.unrealengine.com/en-us/Engine/Rendering/Materials/PhysicallyBased.
It's not something that you should concern yourself with at this stage, but can come in handy in the future!
At the moment, we can see that we have managed to modify the color of our material. We can now change how sharp the reflections are, as we want to go for a plastic look. In order to do so, we need to modify the Roughness parameter with another different constant. Instead of right-clicking and typing, let's choose it from the palette menu instead.
- Navigate to the
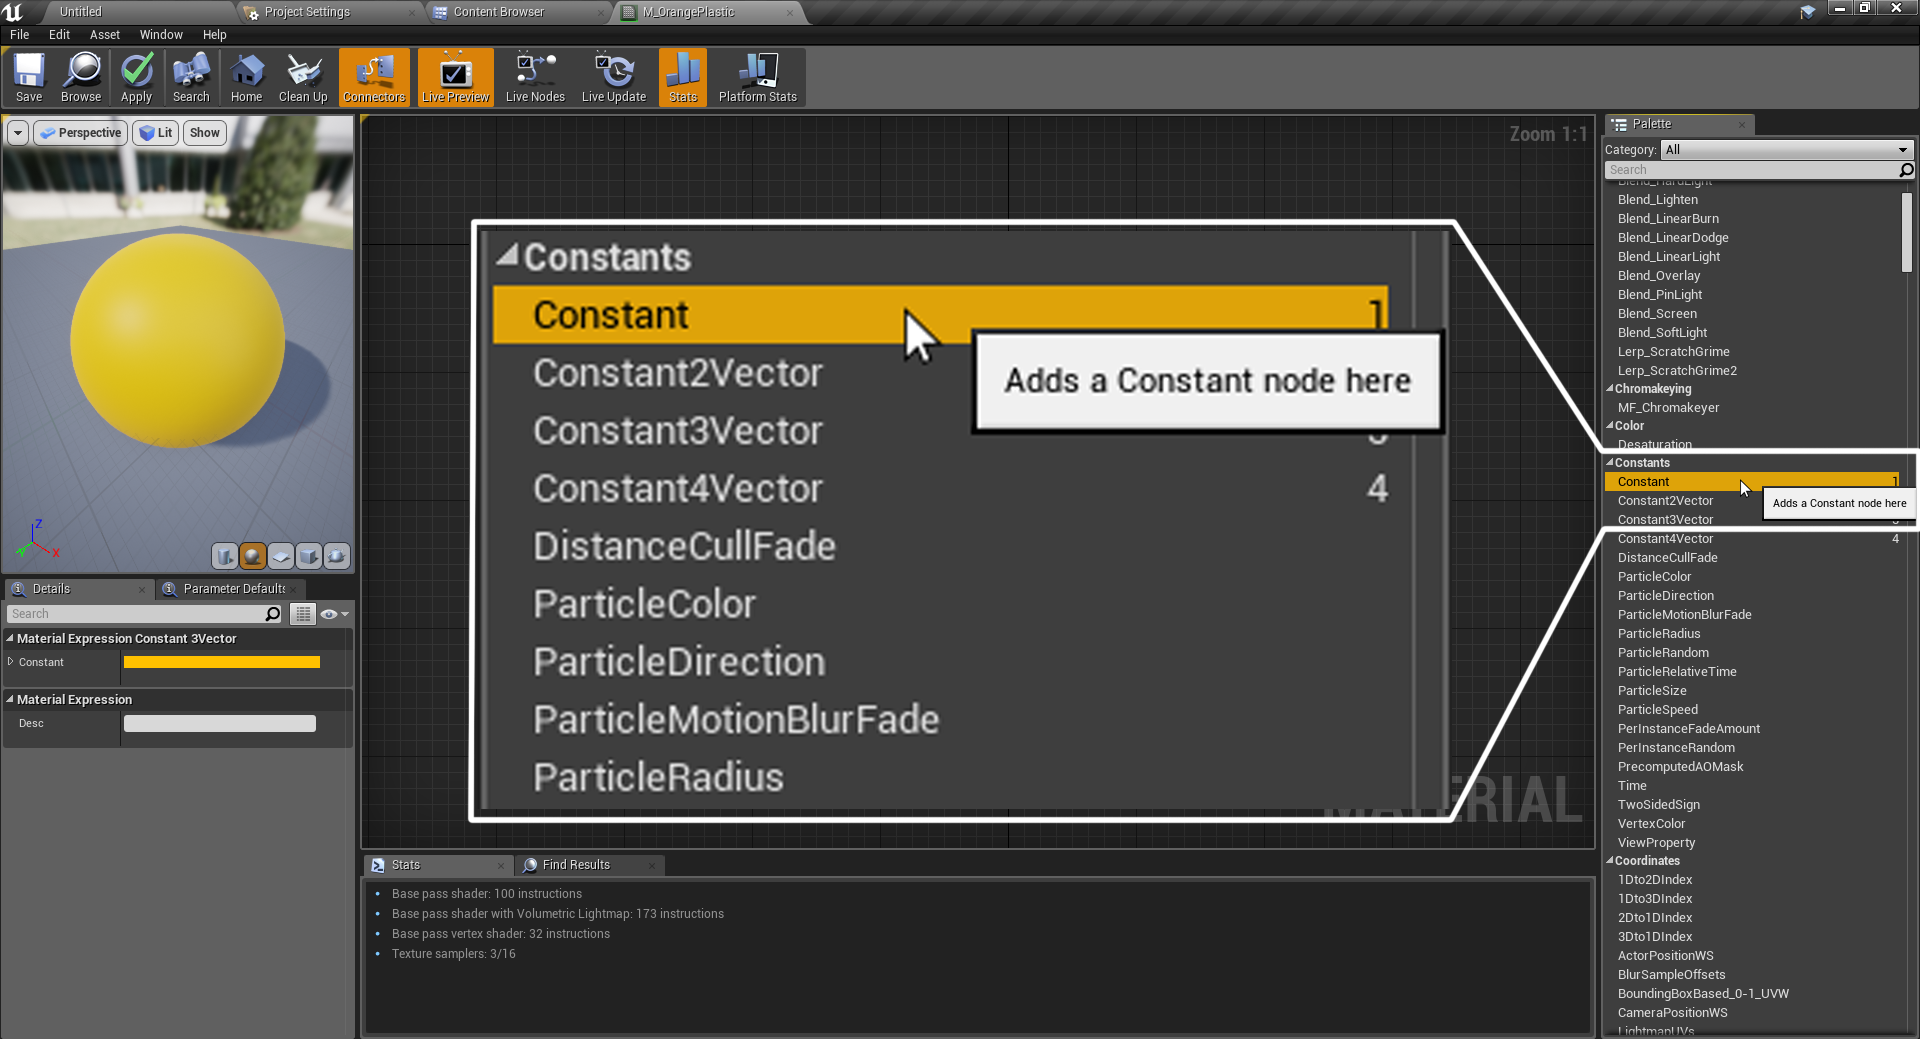
Palettesection, and look for theConstantcategory. We want to select the first option in there, aptly named like this subsection itself. Alternatively, you can type its name in the search box at the top of the panel:
- A new, smaller node should have now appeared. Unlike the previous one, we don't have the option to select a color—we need to type in a value. Let's go with something low, about
0.2. Connect it to theRoughnesspin.
If you look at the preview viewport, you will notice that the appearance of the material has now changed. It looks like the reflections from the environment are much sharper than before. This is happening thanks to the previously created constant pin, which, using a value closer to 0 (or black), makes the reflections stand out that much more. Whiter values decrease the sharpness of those reflections or, in other words, make the surface appear much more rough.
Having done so, we are now in a position where we can finally apply this material to a model inside of our scene. Let's go back to the main level and look at the Modes panel, particularly to the Basic section. Drag and drop a cube into the main level, and assign it the following values inside of the Details panel just so we are looking at the same:
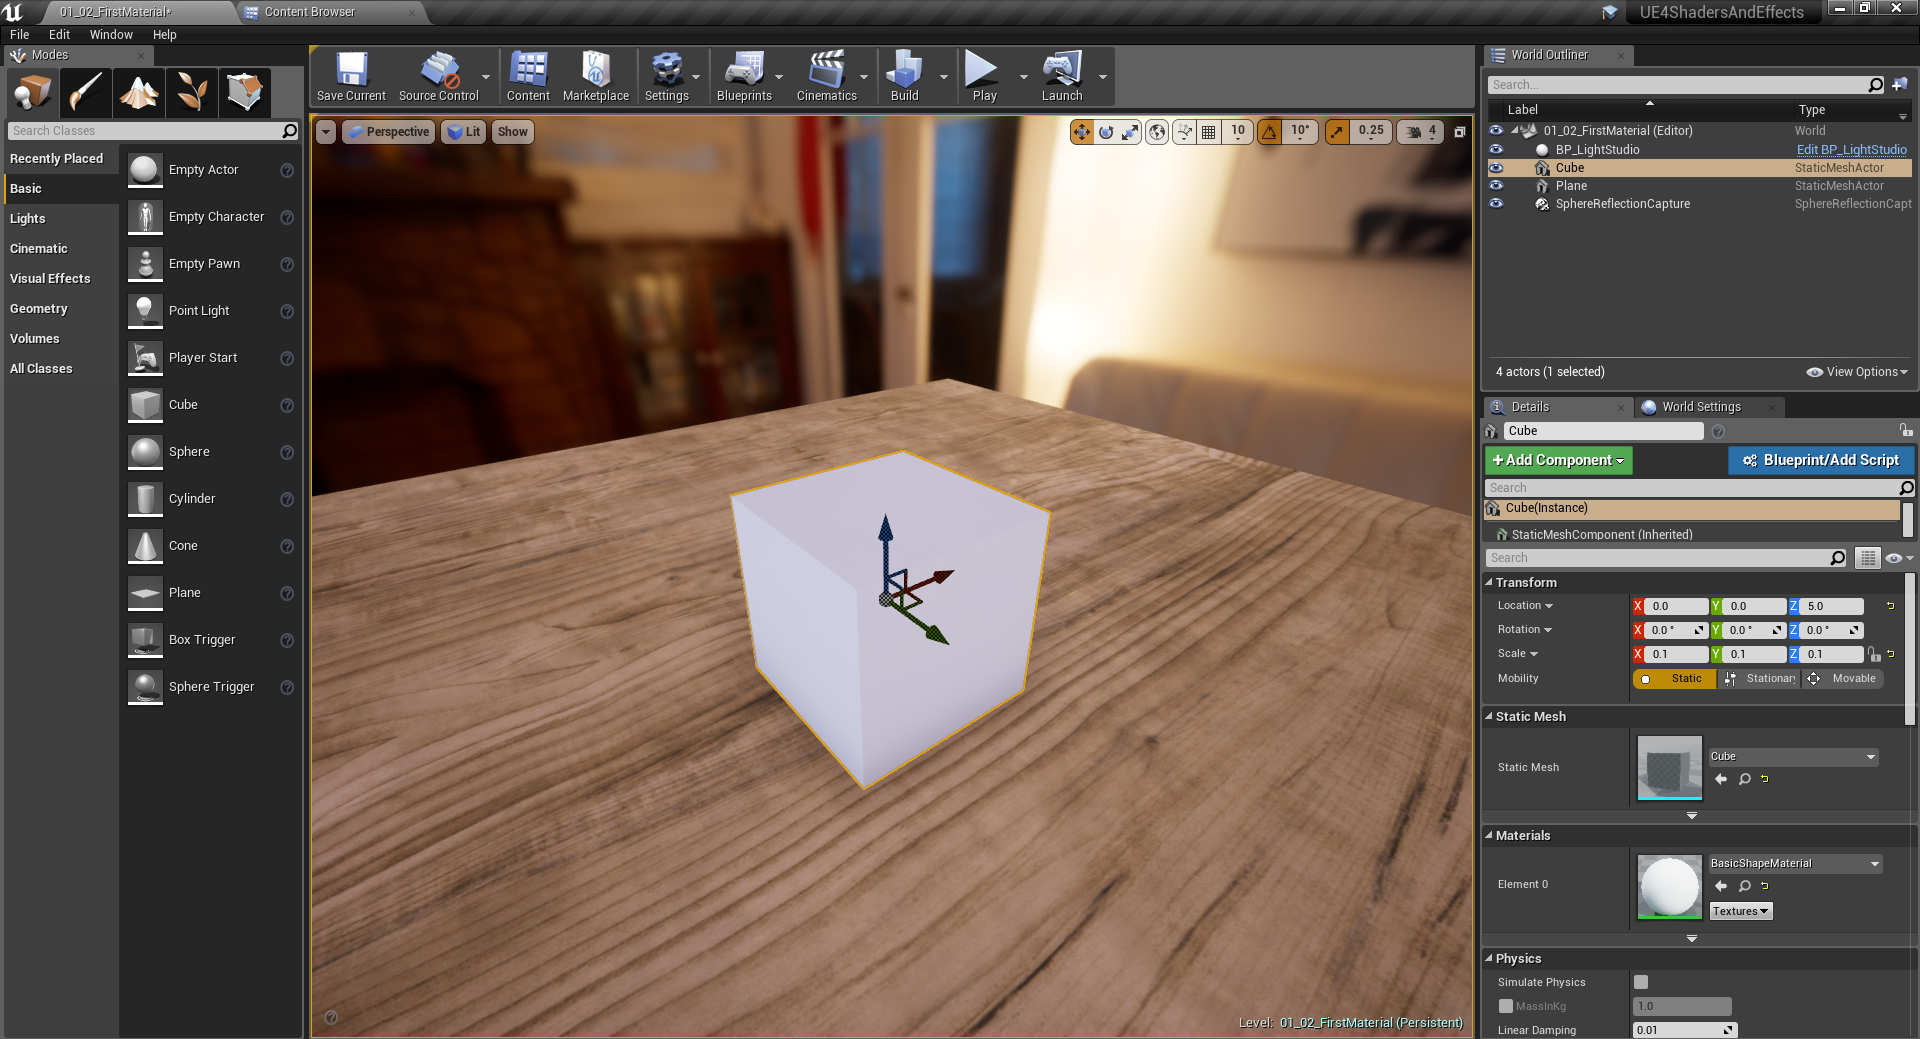
Reducing the size of the cube will make it fit better into our scene. Now head over to the Materials section of the Details panel, and click on the drop-down menu. Look for the newly created material and assign it to our cube. Finally, click on the Build icon located on the toolbar as follows:
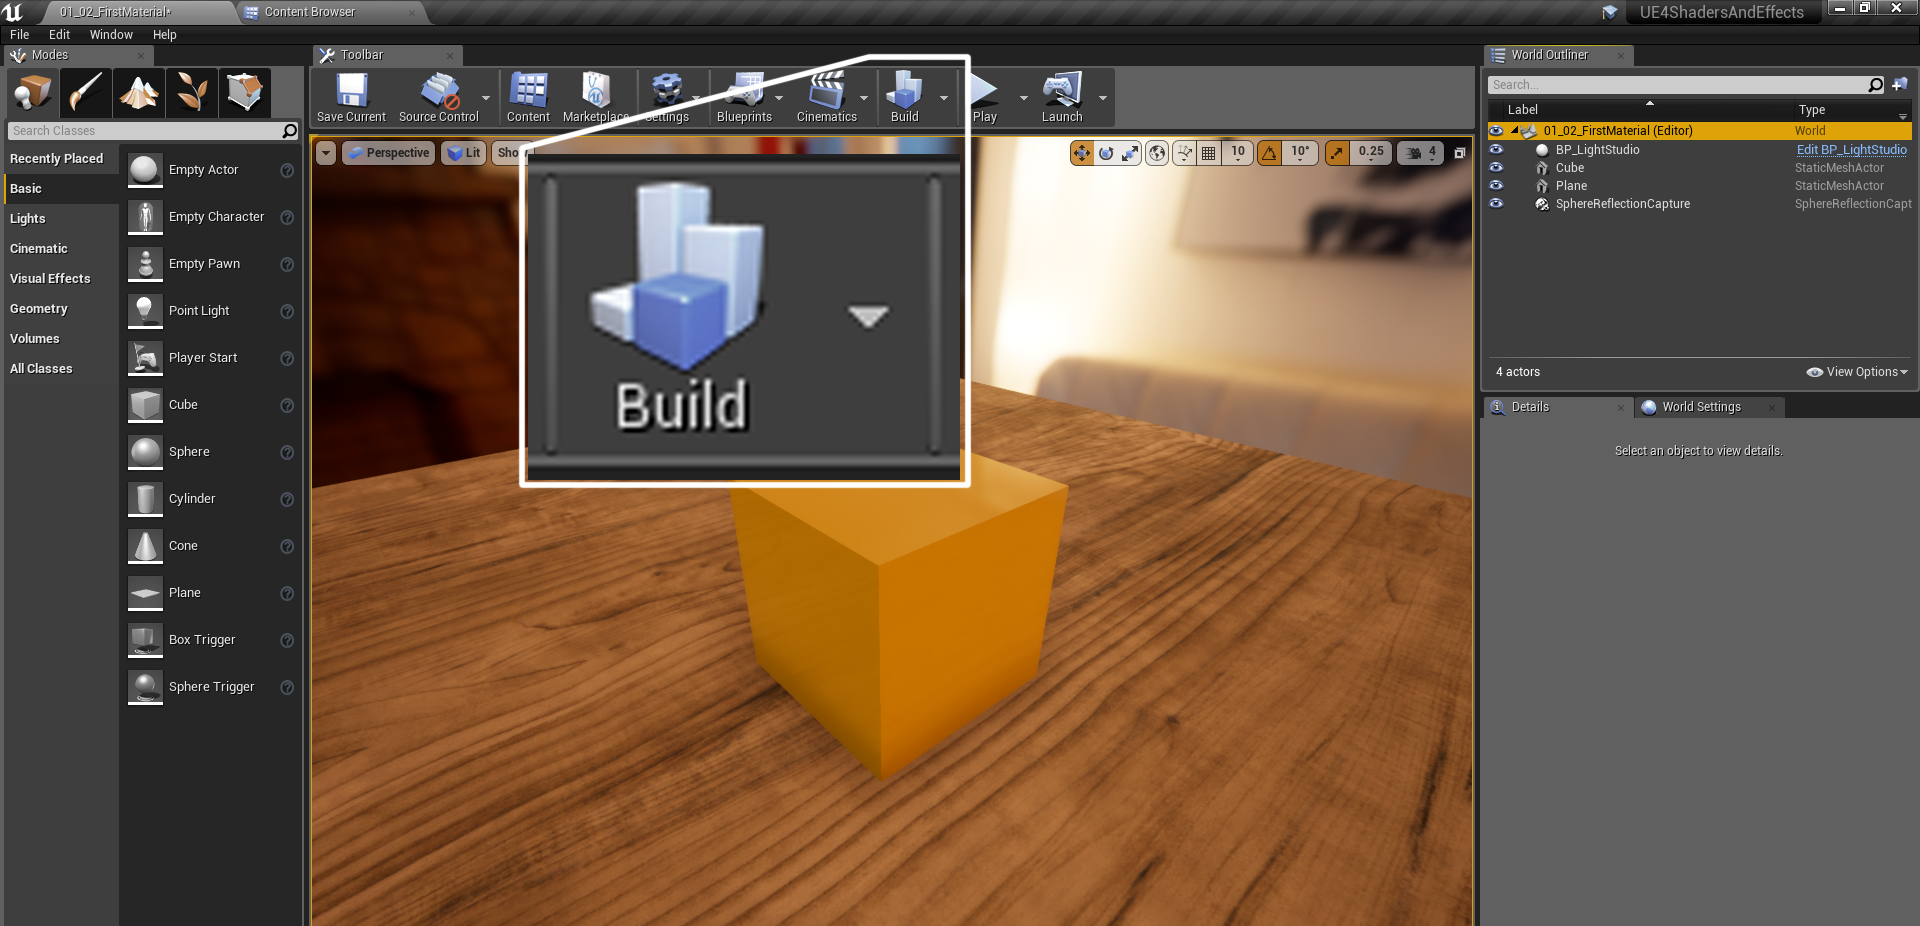
And there it is! We now have our material applied to a simple model, being displayed on the scene we had previously created. Even though this has served as a small introduction to a much bigger world, we've now gone over most of the panels and tools that we'll be using in the material editor. See you in the next recipe!
How it works...
We've used the present recipe to learn about the material editor and we've also created our first material. Knowing what each section does within the editor will help a lot in the immediate future, as what we've just done is but a prelude to our real target—creating a physically based material. Now we are in a much better position to tackle that goal, so let's look at it in the next recipe!
Before moving on though, let's check the nodes that we have used to create this simple material. From an artist's point of view, the names that the engine has given to something like a color value or a grayscale value can seem a bit confusing. It might be difficult to establish a connection between the name of the Constant3Vector node and our idea of a color. But there is a reason for all of this!
The idea behind that naming convention is that these nodes can be used beyond the color values we have just assigned them. At the end of the day, a simple constant can be used in many different scenarios—such as depicting a grayscale value, using it as a brightness multiplier, or as a parameter inside a material function. Don't worry if you haven't seen these other uses yet, we will—the point is, the names that these nodes were given tell us that there are more uses beyond the ones we've seen.
With that in mind, it might be better to think of those elements we've been using in more mathematical terms. For instance, think of a color as an Red Green Blue (RGB) value, which is what we are defining with that previous Constant3Vector node. If you want to use an RGB value alongside an alpha one, why not use the Constant4Vector, which allows for a fourth input? Even though we are at a very early stage, it is always good to familiarize ourselves with the different expressions the engine uses.


