Search icon CANCEL
Arrow left icon
Explore Products
Best Sellers
New Releases
Books
Videos
Audiobooks
Learning Hub
Conferences
Free Learning
Arrow right icon
Arrow up icon
GO TO TOP
Professional Image Editing Made Easy with Affinity Photo

You're reading from   Professional Image Editing Made Easy with Affinity Photo Apply Affinity Photo fundamentals to your workflows to edit, enhance, and create great images

Arrow left icon
Product type Paperback
Published in May 2023
Publisher Packt
ISBN-13 9781800560789
Length 464 pages
Edition 1st Edition
Arrow right icon
Author (1):
Arrow left icon
Jeremy Hazel Jeremy Hazel
Author Profile Icon Jeremy Hazel
Jeremy Hazel
Arrow right icon
View More author details
Toc

Table of Contents (25) Chapters Close

Preface 1. Part 1: Foundational and Navigation Basics for Affinity Photo
2. Chapter 1: Fundamentals of Vector versus Raster Art and Basics of the Interface FREE CHAPTER 3. Chapter 2: Opening Your First Document 4. Chapter 3: Layer Fundamentals – The Heart of Affinity Photo 5. Chapter 4: The Basics of Masking in Affinity Photo 6. Chapter 5: Selection and How to Achieve It in Affinity Photo 7. Part 2: Fundamental Concepts Used to Create a Simple Edit
8. Chapter 6: Cropping and Composition 9. Chapter 7: Basics of Workflows and Balancing Dark and Light 10. Chapter 8: Blend Mode Fundamentals 11. Chapter 9: Basics of Stock Brushes in Affinity Photo 12. Chapter 10: Working with Color in Affinity Photo 13. Part 3 : The Practical Applications of Affinity Photo
14. Chapter 11: Compositing in Affinity Photo 15. Chapter 12: Photo Restoration and Portrait Retouching in Affinity Photo 16. Chapter 13: Advanced Color Concepts and Grading 17. Chapter 14: Destructive Filters and Tools in Affinity Photo 18. Chapter 15: Creative Effects and Specialty Brushes in Affinity Photo 19. Part 4: Finishing Your Edit and Building Your Own Artistic Palette
20. Chapter 16: Working with Text and Shapes in Affinity Photo 21. Chapter 17: Editing in Other Personas in Affinity Photo 22. Chapter 18: Exporting and Artist Efficiency Tips 23. Index 24. Other Books You May Enjoy

Placing an image into an existing project

Let’s look at the steps to do just that:

  1. Open a New document as shown in the previous section with the settings you want it to have.
  2. Go to the File menu in the upper left-hand corner and click on Place….
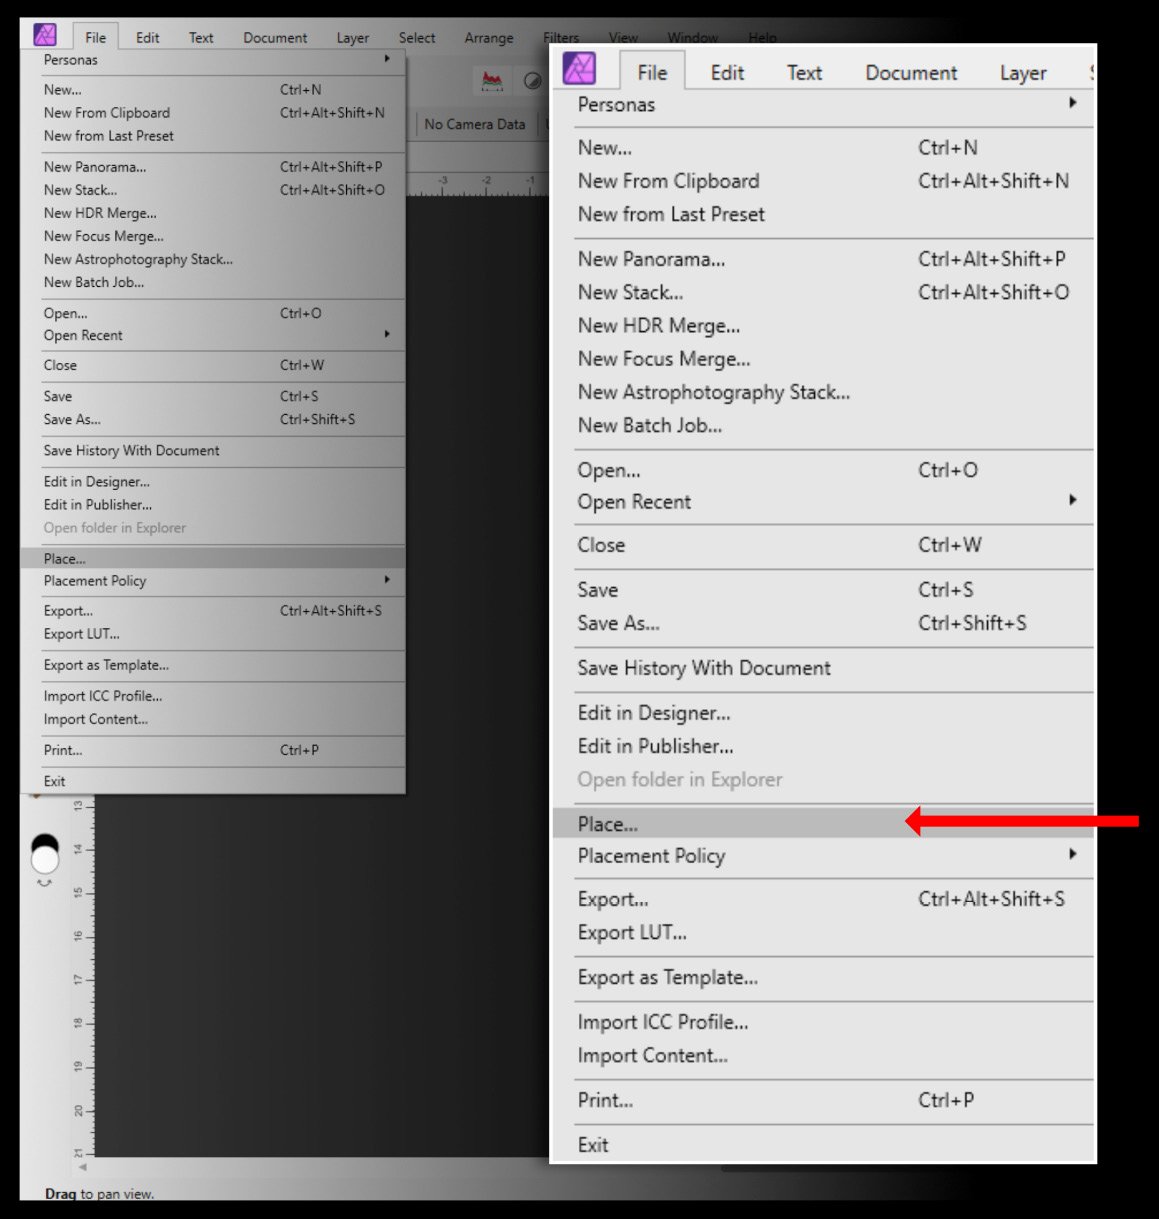
Figure 2.7 – Placing an image in an existing document

Figure 2.7 – Placing an image in an existing document

  1. Locate the file you want to place.
  2. Click and drag the file to the size you want in the image:
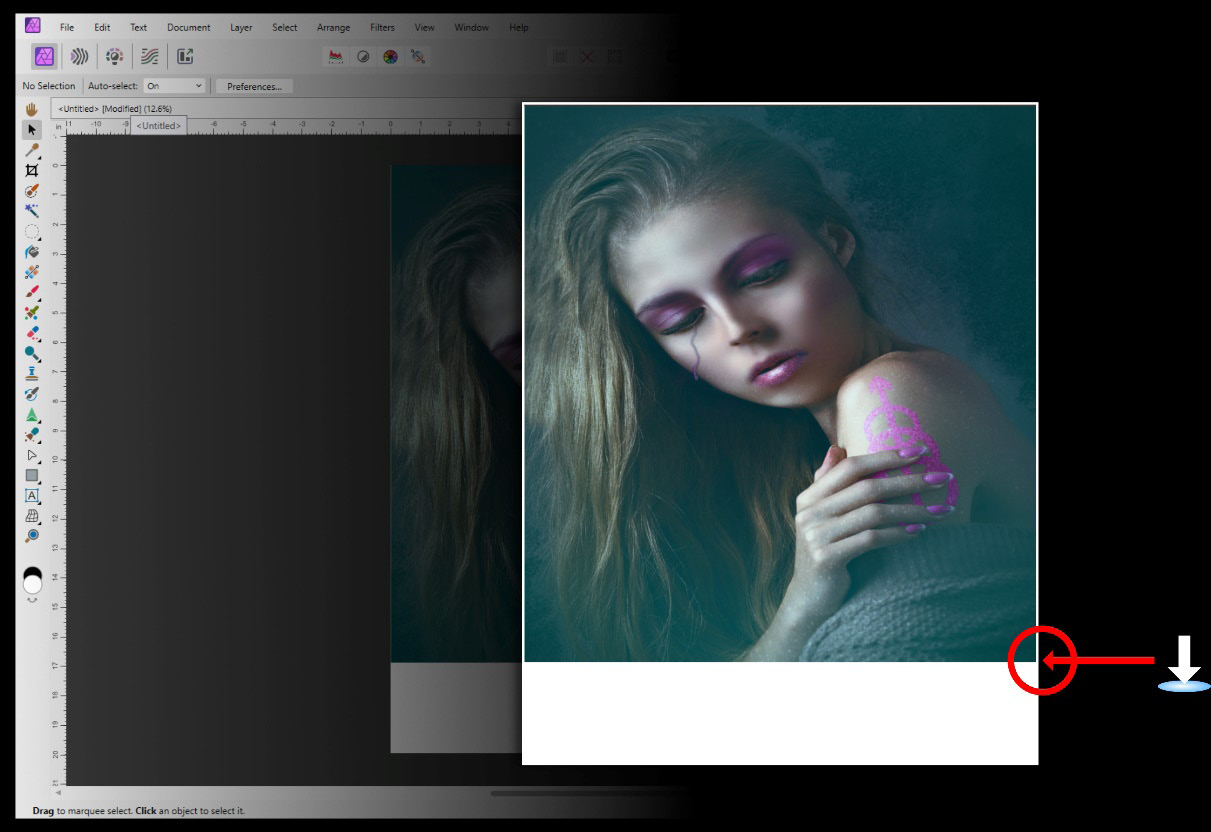
Figure 2.8 – The icon for placing the image

Figure 2.8 – The icon for placing the image

Now that we have planned the image, let’s resize it next.

lock icon The rest of the chapter is locked
Register for a free Packt account to unlock a world of extra content!
A free Packt account unlocks extra newsletters, articles, discounted offers, and much more. Start advancing your knowledge today.
Unlock this book and the full library FREE for 7 days
Get unlimited access to 7000+ expert-authored eBooks and videos courses covering every tech area you can think of
Renews at €18.99/month. Cancel anytime