Search icon CANCEL
Subscription
0
Cart icon
Your Cart (0 item)
Close icon
You have no products in your basket yet
Save more on your purchases! discount-offer-chevron-icon
Savings automatically calculated. No voucher code required.
Arrow left icon
Explore Products
Best Sellers
New Releases
Books
Videos
Audiobooks
Learning Hub
Newsletter Hub
Free Learning
Arrow right icon
timer SALE ENDS IN
0 Days
:
00 Hours
:
00 Minutes
:
00 Seconds
Arrow up icon
GO TO TOP
Learn OpenShift

You're reading from   Learn OpenShift Deploy, build, manage, and migrate applications with OpenShift Origin 3.9

Arrow left icon
Product type Paperback
Published in Jul 2018
Publisher Packt
ISBN-13 9781788992329
Length 504 pages
Edition 1st Edition
Languages
Arrow right icon
Authors (3):
Arrow left icon
Denis Zuev Denis Zuev
Author Profile Icon Denis Zuev
Denis Zuev
Aleksey Usov Aleksey Usov
Author Profile Icon Aleksey Usov
Aleksey Usov
Artemii Kropachev Artemii Kropachev
Author Profile Icon Artemii Kropachev
Artemii Kropachev
Arrow right icon
View More author details
Toc

Table of Contents (24) Chapters Close

Preface 1. Containers and Docker Overview FREE CHAPTER 2. Kubernetes Overview 3. CRI-O Overview 4. OpenShift Overview 5. Building an OpenShift Lab 6. OpenShift Installation 7. Managing Persistent Storage 8. Core OpenShift Concepts 9. Advanced OpenShift Concepts 10. Security in OpenShift 11. Managing OpenShift Networking 12. Deploying Simple Applications in OpenShift 13. Deploying Multi-Tier Applications Using Templates 14. Building Application Images from Dockerfile 15. Building PHP Applications from Source Code 16. Building a Multi-Tier Application from Source Code 17. CI/CD Pipelines in OpenShift 18. OpenShift HA Architecture Overview 19. OpenShift HA Design for Single and Multiple DCs 20. Network Design for OpenShift HA 21. What is New in OpenShift 3.9? 22. Assessments 23. Other Books You May Enjoy

Managing images using Docker CLI

The first step in running and using a container on your server or laptop is to search and pull a Docker image from the Docker registry using the docker search command.

Let's search for the web server container. The command to do so is:

$ docker search httpd
NAME DESCRIPTION STARS OFFICIAL AUTOMATED
httpd ... 1569 [OK]
hypriot/rpi-busybox-httpd ... 40
centos/httpd 15 [OK]
centos/httpd-24-centos7 ... 9

Alternatively, we can go to https://hub.docker.com/ and type httpd in the search window. It will give us something similar to the docker search httpd results:
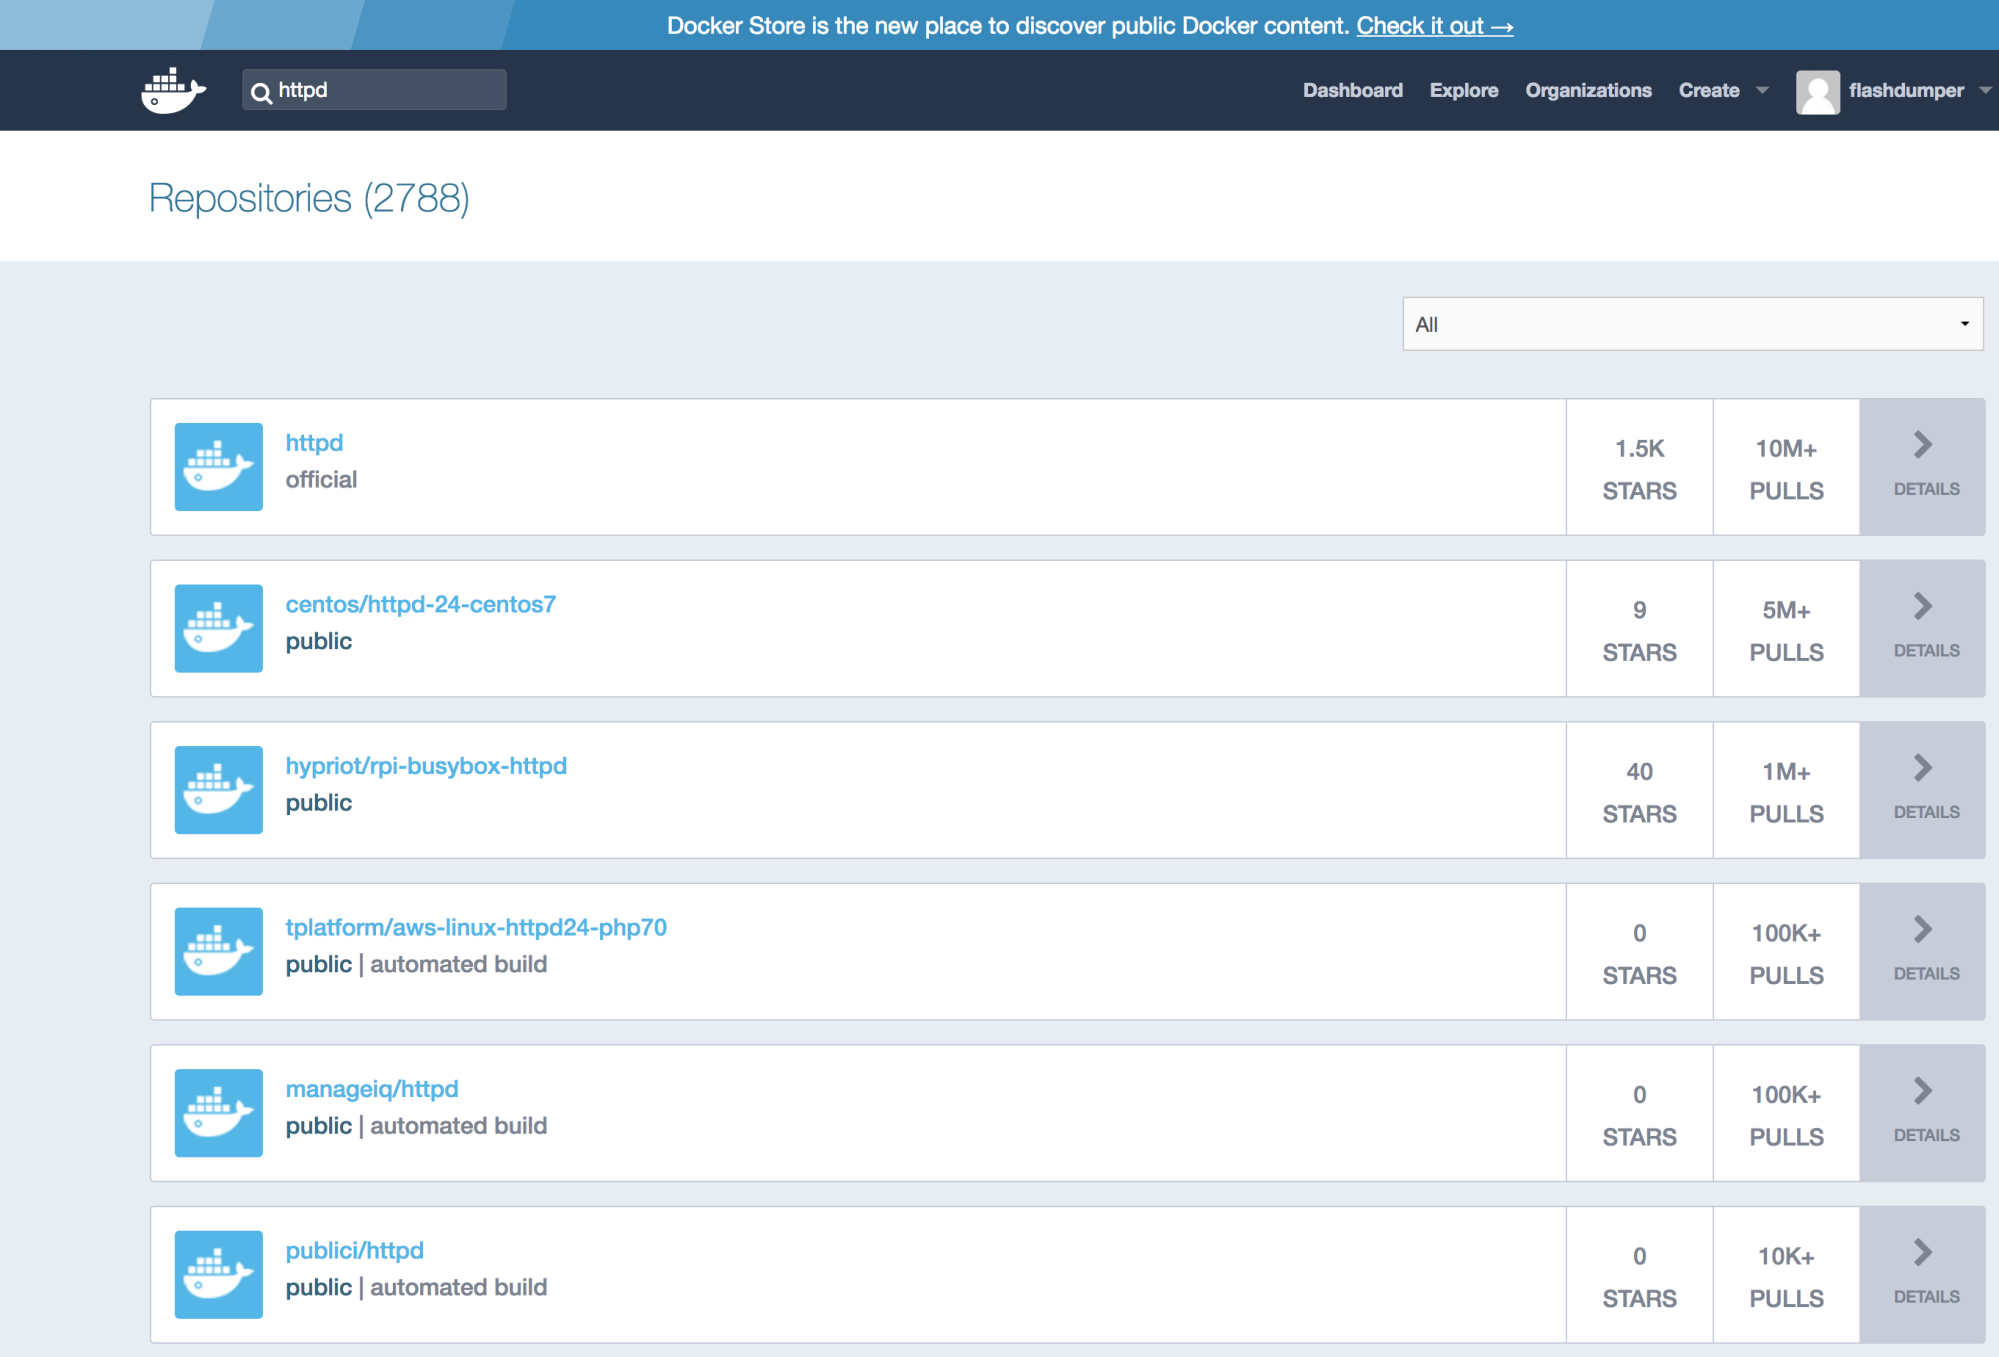
Docker Hub search results

Once the container image is found, we can pull this image from the Docker registry in order to start working with it. To pull a container image to your host, you need to use the docker pull command:

$ docker pull httpd

The output of the preceding command is as follows:
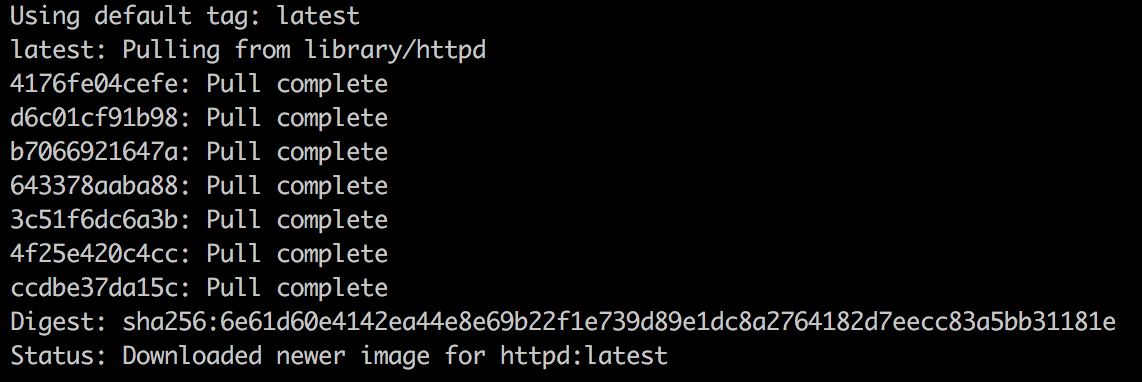
Note that Docker uses concepts from union filesystem layers to build Docker images. This is why you can see seven layers being pulled from Docker Hub. One stacks up onto another, building a final image.

By default, Docker will try to pull the image with the latest tag, but we can also download an older, more specific version of an image we are interested in using different tags. The best way to quickly find available tags is to go to https://hub.docker.com/, search for the specific image, and click on the image details:
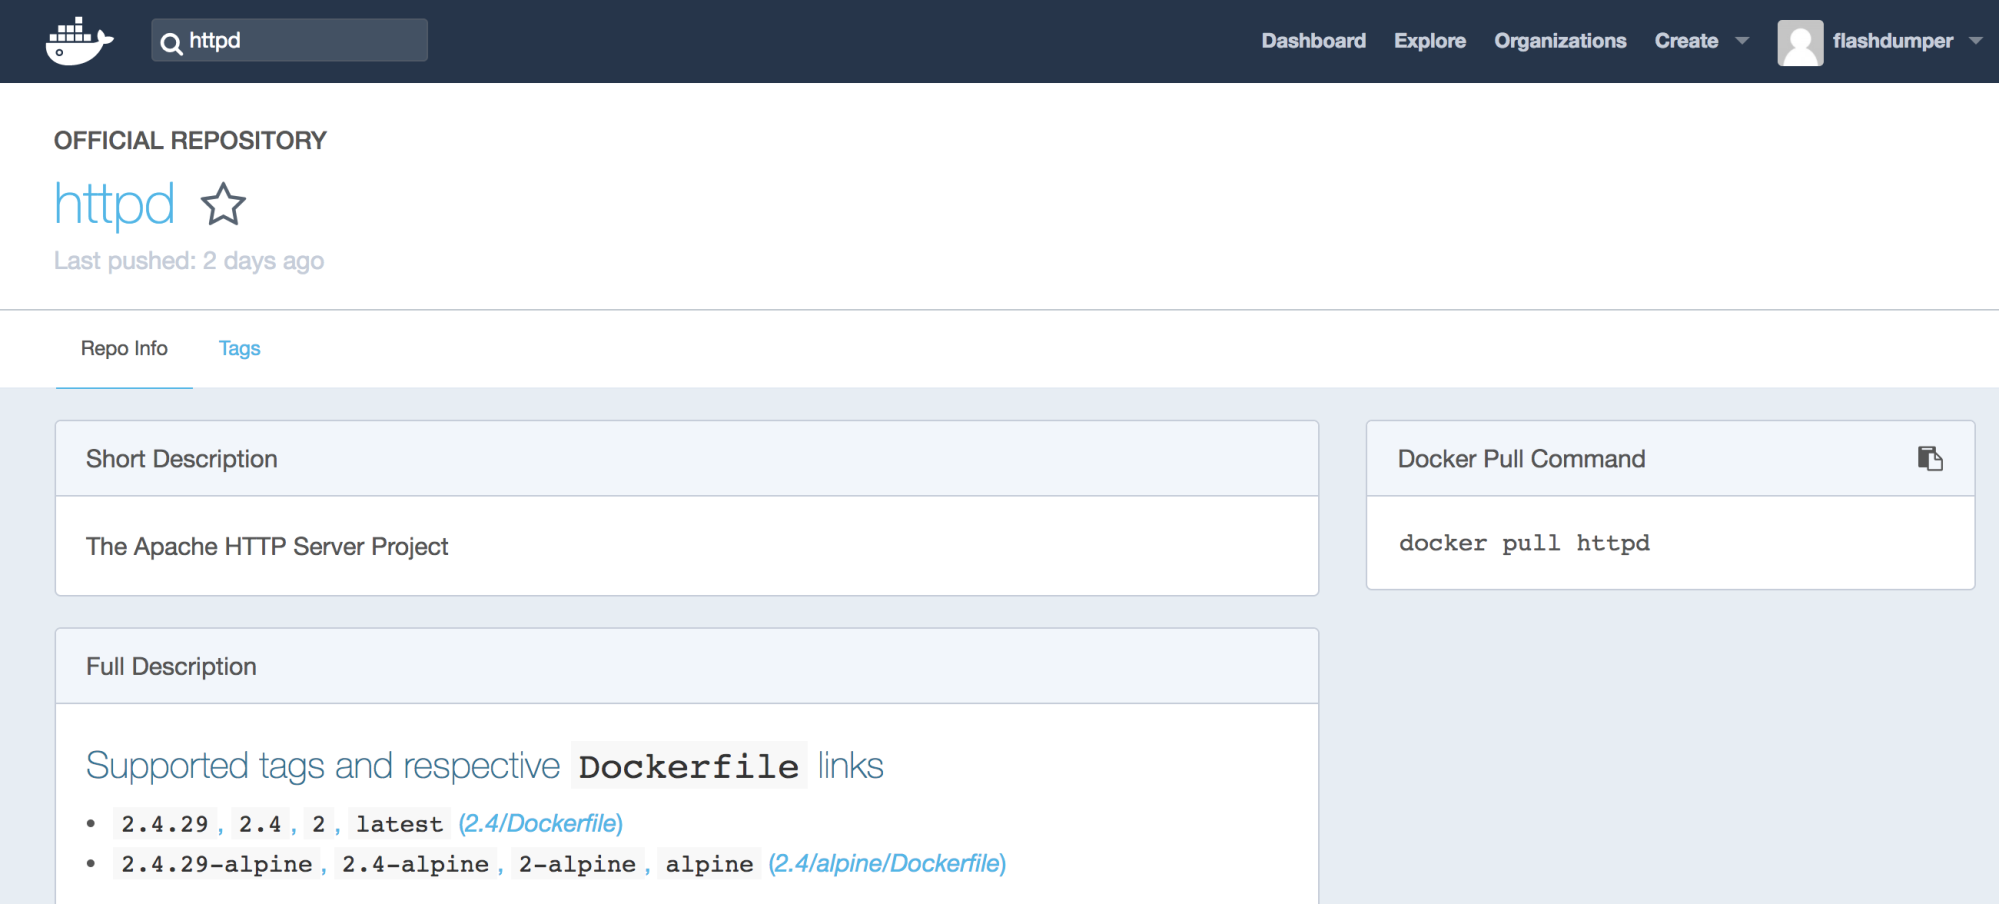
Docker Hub image details

There we are able to see all the image tags available for us to pull from Docker Hub. There are ways to achieve the same goal using the docker search CLI command, which we are going to cover later in this book.

$ docker pull httpd:2.2.29

The output of the preceding code should look something like the following:

You may notice that the download time for the second image was significantly lower than for the first image. It happens because the first image we pulled (docker:latest) has most layers in common with the second image (httpd:2.2.29). So there is no need to download all the layers again. This is very useful and saves a lot of time in large environments.

Working with images

Now we want to check the images available on our local server. To do this, we can use the docker images command:

$ docker images

The output of the preceding command will be as shown in the following screenshot:


If we downloaded a wrong image, we can always delete it from the local server by using the docker rmi command: ReMove Image (RMI). In our case, we have two versions of the same image, so we can specify a tag for the image we want to delete:

$ docker rmi httpd:2.2.29

The output of the preceding command will be as shown in the following screenshot:

At this point, we have only one image left, which is httpd:latest:

$ docker images

The output of the preceding command will be as shown in the following screenshot:


Saving and loading images

The Docker CLI allows us to export and import Docker images and container layers using export/import or save/load Docker commands. The difference between save/load and export/import is that the first one works with images including metadata, but the export/import combination uses only container layers and doesn't include any image metadata information such as name, tags, and so on. In most cases, the save/load combination is more relevant and works properly for images without special needs. The docker save command packs the layers and metadata of all the chains required to build the image. You can then load this saved images chain into another Docker instance and create containers from these images.

The docker export will fetch the whole container, like a snapshot of a regular VM. It saves the OS, of course, but also any change a you made and any data file written during the container life. This one is more like a traditional backup:

$ docker save httpd -o httpd.tar

$ ls -l httpd.tar

To load the image back from the file, we can use the docker load command. Before we do that, though, let's remove the httpd image from the local repository first:

$ docker rmi httpd:latest

The output of the preceding command will be as shown in the following screenshot:

We verify that we do not have any images in the local repository:

 $ docker images
REPOSITORY TAG IMAGE ID CREATED SIZE

Load the image file we previously saved with the docker save command. Like docker export and docker import, this command forms a pair with Docker save and thus is used for loading a saved container archive with all intermediate layers and metadata to the Docker cache:

$ docker load -i httpd.tar

The output of the preceding command will be as shown in the following screenshot:

Check the local docker images with docker image command:

$ docker images

The output of the preceding command will be as shown in the following screenshot:

Uploading images to the Docker registry

Now we know how to search, pull, remove, save, load, and list available images. The last piece we are missing is how to push images back to Docker Hub or a private registry.

To upload an image to Docker Hub, we need to do a few tricks and follow these steps:

  1. Log in to Docker Hub:
$ docker login
Username: #Enter your username here
Password: #Enter your password here
Login Succeeded
  1. Copy the Docker image you want to push to a different path in the Docker repository on your server:
$ docker tag httpd:latest flashdumper/httpd:latest
Note that flashdumper is your Docker Hub username.
  1. Finally, push the copied image back to Docker Hub:
$ docker push flashdumper/httpd:latest

The output of the preceding command will be as shown in the following screenshot:

Now the image is pushed to your Docker Hub and available for anyone to download.

$ docker search flashdumper/*

The output of the preceding command will be as shown in the following screenshot:

You can check the same result using a web browser. If you go to https://hub.docker.com/ you should be able to see this httpd image available under your account:

Docker Hub account images
You have been reading a chapter from
Learn OpenShift
Published in: Jul 2018
Publisher: Packt
ISBN-13: 9781788992329
Register for a free Packt account to unlock a world of extra content!
A free Packt account unlocks extra newsletters, articles, discounted offers, and much more. Start advancing your knowledge today.
Unlock this book and the full library FREE for 7 days
Get unlimited access to 7000+ expert-authored eBooks and videos courses covering every tech area you can think of
Renews at $19.99/month. Cancel anytime
Banner background image