Overview of C# 10.0
You can find the features that will become part of C# 10.0 on the Roslyn GitHub page at https://github.com/dotnet/roslyn/blob/master/docs/Language%20Feature%20Status.md.
Not all these features are available at the time of writing. However, we will look at some of the available features. With that, let's start with top-level programs.
Writing top-level programs
Before C# 9.0, the Hello, World! console application was always the starting point for learning C#. The file that students would update was called Program.cs. In this file, you would have something akin to the following:
using System;
namespace HelloWorld
{
class Program
{
static void Main(string[] args)
{
Console.WriteLine("Hello, World!");
}
}
}
As you can see, first, we import our System library. Then, we have a namespace definition followed by our class definition. Then, in the class definition, we have our Main method, in which we output the phrase "Hello, World!" to the console window.
In version 10.0 of the C# programming language, this can be simplified down to a single line:
System.Console.WriteLine("Hello, World");
Here, we have eradicated 10 lines of code. Running the program will output the following:

Figure 1.2 – The console window showing the output "Hello World!"
If we open the generated DLL in IL DASM, we will see the following:

Figure 1.3 – ILDASM showing the internals of the hello world program
You will see from the decompilation that the compiler adds the Main method at compile time. The next addition to C# 10.0 that we will look at is init-only properties.
Using init-only properties
Init-only properties allow you to use object initializers with immutable fields. For our little demonstration, we will use a Book class that holds the name of a book and its author:
namespace CH01_Books
{
internal class Book
{
public string Title { get; init; }
public string Author { get; init; }
}
}
The properties can be initialized when the book is created. But once created, they can only be read, not updated, making the Book type immutable. Now, let's look at init-only properties. In the Program class, replace its contents with the following:
using System;
using CH01_Books;
var bookName = new Book { Title = "Made up book name",
Author = "Made Up Author" };
Console.WriteLine($"{bookName.Title} is written by
{bookName.Author}. Well worth reading!");
Here, we imported the System and CH01_Books namespaces. Then, we declared a new immutable variable of the Book type. After that, we output the contents of that Book type using an interpolated string. Run the program; you should see the following output:

Figure 1.4 – The output of our init-only properties example
Now that we have been introduced to init-only properties, let's look at records.
Using records
When updating data, you do not want that data to be changed by another thread. So, in multi-threaded applications, you will want to use thread-safe objects when making updates. Records allow complete objects to be immutable and behave as values. The advantage of using records over structs is that they require less memory to be allocated to them. This reduction in memory allocation is accomplished by compiling records to reference types. They are then accessed via references and not as copies. Due to this, other than the original record allocation, no further memory allocation is required.
Let's learn how to use records. Start a new console application.
To demonstrate the use of records, we will use the following Book example:
internal record Book
{
public string Title { get; init; }
public string Author { get; init; }
}
The only change to the Book class is that class has been replaced with record. Everything else remains the same. Now, let's put the record to work:
- Replace the contents of the
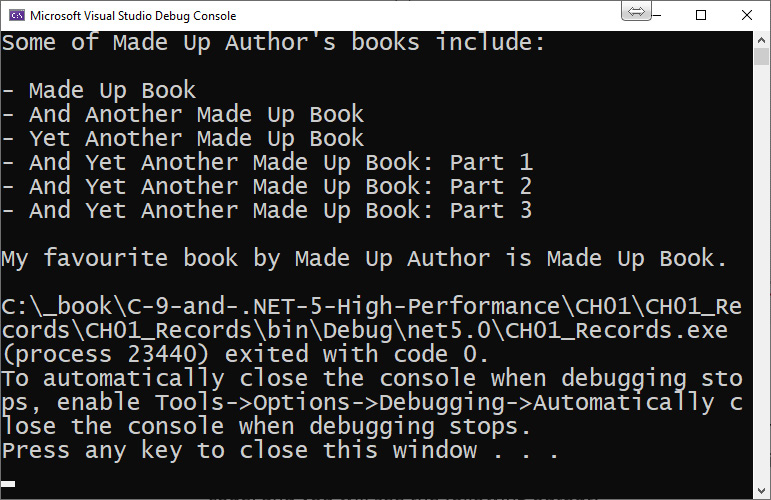
Programclass with the following code:using System; using CH01_Records; var bookOne = new Book { Title = "Made Up Book", Author = "Made Up Author }; var bookTwo = bookOne with { Title = "And Another Made Up Book" }; var bookThree = bookTwo with { Title = "Yet Another Made Up Book" }; var bookFour = bookThree with { Title = "And Yet Another Made Up Book: Part 1", }; var bookFive = bookFour with { Title = "And Yet Another Made Up Book: Part 2" }; var bookSix = bookFive with { Title = "And Yet Another Made Up Book: Part 3" }; Console.WriteLine($"Some of {bookThree.Author}'s books include:\n"); Console.WriteLine($"- {bookOne.Title}"); Console.WriteLine($"- {bookTwo.Title}"); Console.WriteLine($"- {bookThree.Title}"); Console.WriteLine($"- {bookFour.Title}"); Console.WriteLine($"- {bookFive.Title}"); Console.WriteLine($"- {bookSix.Title}"); Console.WriteLine($"\nMy favourite book by {bookOne. Author} is {bookOne.Title}."); - As you can see, we are creating immutable record types. We can create new immutable types from them and change any fields we like using the
withexpression. The original record is not mutated in any way. Run the code; you will see the following output:

Figure 1.5 – Init-only properties showing their immutability
Despite changing the title during the assignment, the original record has not been mutated at all.
- Records can also use inheritance. Let's add a new record that contains the publisher's name:
internal record Publisher { public string PublisherName { get; init; } } - Now, let's have our
Bookinherit thisPublisherrecord:internal record Book : Publisher { public string Title { get; init; } public string Author { get; init; } } Bookwill now includePublisherName. When we initialize a new book, we can now set itsPublisherName:var bookOne = new Book { Title = "Made Up Book", Author = "Made Up Author", PublisherName = "Made Up Publisher Ltd." };- Here, we have created a new
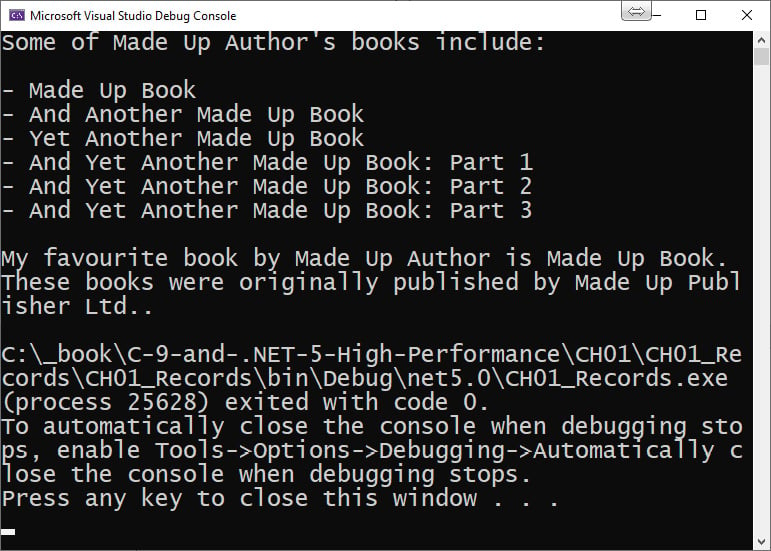
Bookthat containsPublisher.PublisherName. Let's print the publisher's name. Add the following line to the end of theProgramclass:Console.WriteLine($"These books were originally published by {bookSix.PublisherName}."); - Run the code; you should see the following output:

Figure 1.6 – Init-only properties using inheritance
- As you can see, we never set the publisher's name for
bookTwotobookSix. However, the inheritance has followed through from when we set it forbookOne. - Now, let's perform object equality checking. Add the following code to the end of the
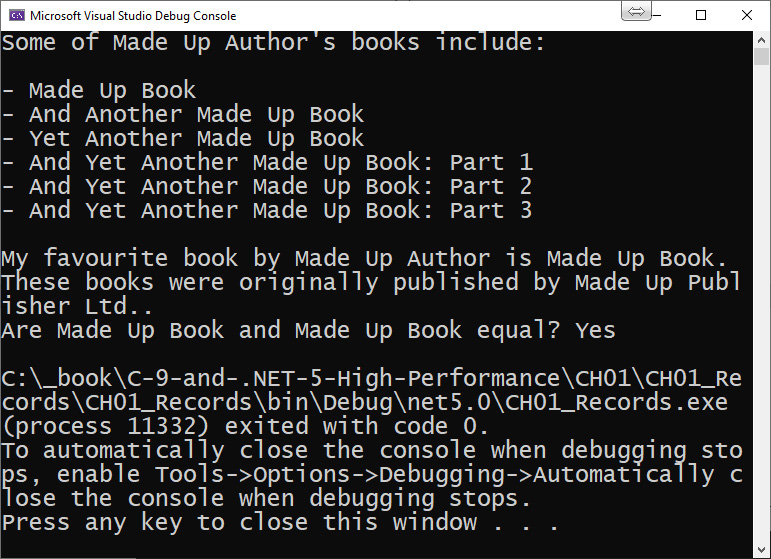
Programclass:var book = bookThree with { Title = "Made Up Book" }; var booksEqual = Object.Equals(book, bookOne) ? "Yes" : "No"; Console.WriteLine($"Are {book.Title} and {bookOne.Title} equal? {booksEqual}"); - Here, we created a new
BookfrombookThreeand set the title toMade Up Book. Then, we performed an equality check and output the result to the console window. Run the code; you will see the following output:

Figure 1.7 – Init-only properties showing the result of an equality check
It is clear to see that the equality check works with both book instances being equal.
- Our final look at records considers positional records. Positional records set data via the constructor and extract data via the deconstructor. The best way to understand this is with code. Add a class called
Productand replace the class with the following:public record Product { readonly string Name; readonly string Description; public Product(string name, string description) => (Name, Description) = (name, description); public void Deconstruct(out string name, out string description) => (name, description) = (Name, Description); } - Here, we have an immutable record. The record has two private and
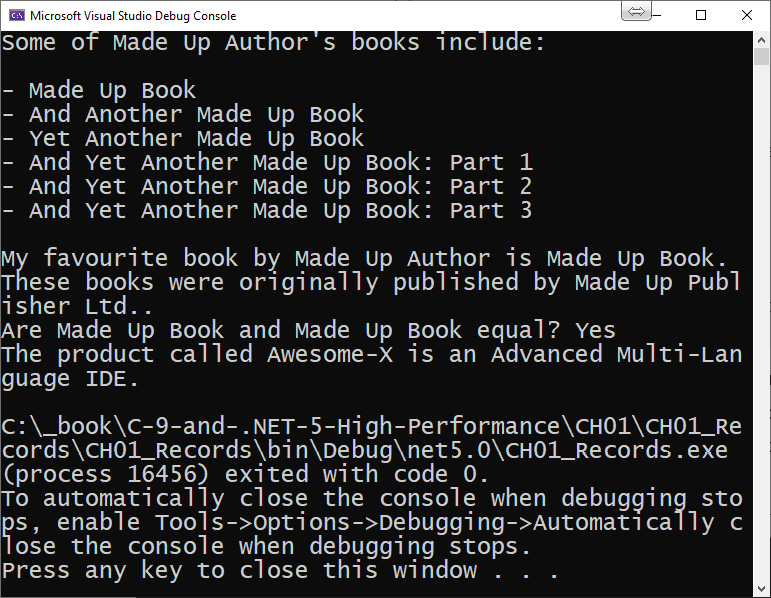
readonlyfields. They are set in the constructor. TheDeconstructmethod is used to return the data. Add the following code to theProgramclass:var ide = new Product("Awesome-X", "Advanced Multi- Language IDE"); var (product, description) = ide; Console.WriteLine($"The product called {product} is an {description}.");
In this code, we created a new product with parameters for the name and description. Then, we declared two fields called product and description. The fields are set by assigning the product. Then, we output the product and description to the console window, as shown here:

Figure 1.8 – Init-only positional records
Now that we have finished looking at records, let's look at the improved pattern matching capabilities of C# 10.0.
Using the new pattern matching features
Now, let's look at what's new for pattern matching in C# 10.0, starting with simple patterns. With simple pattern matching, you no longer need the discard (_) operator to just declare the type. In our example, we will apply discounts to orders:
- Add a new record called
Productto a new file calledProduct.csin a new console application and add the following code:internal record Product { public string Name { get; init; } public string Description { get; init; } public decimal UnitPrice { get; init; } } - Our
Productrecord has three init-only properties forName,Description, andUnitPrice. Now, add theOrderItemrecord that inherits fromProduct:internal record OrderItem : Product { public int QuantityOrdered { get; init; } } - Our
OrderItemrecord inherits theProductrecord and adds theQuantityOrderedinit-only property. In theProgramclass, we will add three variables of theOrderItemtype and initialize them. Here is the firstOrderItem:var orderOne = new OrderItem { Name = "50-80mm Scottish Cobbles", Description = "These rounded stones are frequently used for edging paths and to add interest to gardens", QuantityOrdered = 4, UnitPrice = 199 };
As you can see, the quantity that's being ordered is 4.
- Add
orderTwowith the same values but with anOrderQuantityof7. - Then, add
orderThreewith the same values, but with anOrderQuantityof31. We will demonstrate simple pattern matching in theGetDiscountmethod:static int GetDiscount(object order) => order switch { OrderItem o when o.QuantityOrdered == 0 => throw new ArgumentException("Quantity must be greater than zero."), OrderItem o when o.QuantityOrdered > 20 => 30, OrderItem o when o.QuantityOrdered < 5 => 10, OrderItem => 20, _ => throw new ArgumentException("Not a known OrderItem!", nameof(order)) }; - Our
GetDiscountmethod receives an order.QuantityOrderedis then evaluated. Argument exceptions are thrown if the order quantity is0and if the object type that's been passed in is not of theOrderItemtype. Otherwise, a discount of theinttype is returned for the quantity ordered. Notice that we use the type without using the discard operator on the line for the 20% discount. - Finally, we must add the following lines to the end of the
Programclass:Console.WriteLine($"The discount for Order One is {GetDiscount(orderOne)}%."); Console.WriteLine($"The discount for Order Two is {GetDiscount(orderTwo)}%."); Console.WriteLine($"The discount for Order Three is {GetDiscount(orderThree)}%."); - These lines print the discount received for each of the orders to the console window. Now, let's modify our code so that it uses relational pattern matching. Add the following method to the
Programclass:static int GetDiscountRelational(OrderItem orderItem) => orderItem.QuantityOrdered switch { < 1 => throw new ArgumentException("Quantity must be greater than zero."), > 20 => 30, < 5 => 10, _ => 20 }; - Using relational pattern matching, we have received the same outcome as with simple pattern matching, but with less code. It is also very readable, which makes it easy to maintain. Add the following three lines of code to the end of the
Programclass:Console.WriteLine($"The discount for Order One is {GetDiscountRelational(orderOne)}%."); Console.WriteLine($"The discount for Order Two is {GetDiscountRelational(orderTwo)}%."); Console.WriteLine($"The discount for Order Three is {GetDiscountRelational(orderThree)}%."); - In these three lines, we simply output the discount for each order to the console window. Run the program; you will see the following output:

Figure 1.9 – Simple and relational pattern matching output showing the same results
From the preceding screenshot, you can see that the same outcome has been received for both discount methods.
- The logical
AND,OR, andNOTmethods can be used in logical pattern matching. Let's add the following method:static int GetDiscountLogical(OrderItem orderItem) => orderItem.QuantityOrdered switch { < 1 => throw new ArgumentException("Quantity must be greater than zero."), > 0 and < 5 => 10, > 4 and < 21 => 20, > 20 => 30 }; - In the
GetDiscountLogicalmethod, we employ the logical AND operator to check whether a value falls in that range. Add the following three lines to the end of theProgramclass:Console.WriteLine($"The discount for Order One is {GetDiscountLogical(orderOne)}%."); Console.WriteLine($"The discount for Order Two is {GetDiscountLogical(orderTwo)}%."); Console.WriteLine($"The discount for Order Three is {GetDiscountLogical(orderThree)}%."); - In those three lines of code, we output the discount value for the order to the console window. Run the code; you will see the following output:

Figure 1.10 – Simple, relational, and logical pattern matching showing the same results
The output for the logical pattern matching is the same as for simple and relational pattern matching. Now, let's learn how to use new expressions with targeted types.
Using new expressions with targeted types
You can omit the type of object being instantiated. But to do so, the declared type must be explicit and not use the var keyword. If you attempt to do this with the ternary operator, you will be greeted with an exception:
- Create a new console application and add the
Studentrecord:public record Student { private readonly string _firstName; private readonly string _lastName; public Student(string firstName, string lastName) { _firstName = firstName; _lastName = lastName; } public void Deconstruct(out string firstName, out string lastName) => (firstName, lastName) = (_firstName, _lastName); } - Our
Studentrecord stores the first and last name values, which have been set via the constructor. These values are obtained via theoutparameters of theDeconstructmethod. Add the following code to theProgramclass:Student jenniferAlbright = new ("Jennifer", "Albright"); var studentList = new List<Student> { new ("Jennifer", "Albright"), new ("Kelly", "Charmichael"), new ("Lydia", "Braithwait") }; var (firstName, lastName) = jenniferAlbright; Console.WriteLine($"Student: {lastName}, {firstName}"); (firstName, lastName) = studentList.Last(); Console.WriteLine($"Student: {lastName}, {firstName}"); - First, we instantiate a new
Studentwithout declaring the type in thenewstatement. Then, we instantiate a newListand add new students to the list while omitting theStudenttype. The fields are then defined forfirstNameandlastNameand assigned their values through the assignment of the named student. The student's name is then printed out on the console window. Next, we take those fields and reassign them with the name of the last student on the list. Then, we output the student's name to the console window. Run the program; you will see the following output:

Figure 1.11 – Using targeted types with new expressions
From the preceding screenshot, you can see that we have the correct student names printed. Now, let's look at covariant returns.
Using covariant returns
With covariant returns, base class methods with less specific return types can be overridden with methods that return more specific types. Have a look at the following array declaration:
object[] covariantArray = new string[] { "alpha", "beta",
"gamma", "delta" };
Here, we declared an object array. Then, we assigned a string array to it. This is an example of covariance. The object array is the least specific array type, while the string array is the more specific array type.
In this example, we will instantiate covariant types and pass them into a method that accepts less and more specific types. Add the following class and interface declarations to the Program class:
public interface ICovariant<out T> { }
public class Covariant<T> : ICovariant<T> { }
public class Person { }
public class Teacher : Person { }
public class Student : Person { }
Here, we have a covariant class that implements a covariant interface. We declared a general type of Person that is inherited by the specific Teacher and Student types. Add CovarianceClass, as shown here:
public class CovarianceExample
{
public void CovariantMethod(ICovariant<Person> person)
{
Console.WriteLine($"The type of person passed in is
of type {person.GetType()}.");
}
}
In the CovarianceExample class, we have a CovariantMethod with a parameter that can accept objects of the ICovariant<Person> type. Now, let's put covariance to work by adding the CovarianceAtWork method to the CovarianceExample class:
public void CovarianceAtWork()
{
ICovariant<Person> person = new Covariant<Person>();
ICovariant<Teacher> teacher = new Covariant<Teacher>();
ICovariant<Student> student = new Covariant<Student>();
CovariantMethod(person);
CovariantMethod(teacher);
CovariantMethod(student);
}
In this method, we have the general Person type and the more specific Teacher and Student types. We must pass each into CovariantMethod. This method can take the less specific Person type and the more specific Teacher and Student types.
To run the CovarianceAtWork method, place the following code after the using statement and before the covariantArray example:
CovarianceExample.CovarianceAtWork();
Now, let's look at native compilation.


