Search icon CANCEL
Subscription
0
Cart icon
Your Cart (0 item)
Close icon
You have no products in your basket yet
Save more on your purchases! discount-offer-chevron-icon
Savings automatically calculated. No voucher code required.
Arrow left icon
Explore Products
Best Sellers
New Releases
Books
Videos
Audiobooks
Learning Hub
Newsletter Hub
Free Learning
Arrow right icon
timer SALE ENDS IN
0 Days
:
00 Hours
:
00 Minutes
:
00 Seconds
Arrow up icon
GO TO TOP
Squeaky Clean Topology in Blender

You're reading from   Squeaky Clean Topology in Blender Create accurate deformations and optimized geometry for characters and hard surface models

Arrow left icon
Product type Paperback
Published in Dec 2022
Publisher Packt
ISBN-13 9781803244082
Length 248 pages
Edition 1st Edition
Tools
Concepts
Arrow right icon
Author (1):
Arrow left icon
Michael Steppig Michael Steppig
Author Profile Icon Michael Steppig
Michael Steppig
Arrow right icon
View More author details
Toc

Table of Contents (13) Chapters Close

Preface 1. Part 1 – Getting Started with Modeling and Topology
2. Chapter 1: Navigating and Modeling in Blender FREE CHAPTER 3. Chapter 2: The Fundamentals of Topology 4. Chapter 3: Deforming Topology 5. Chapter 4: Improving Topology Using UV Maps 6. Part 2 – Using Topology to Create Appropriate Models
7. Chapter 5: Topology on a Humanoid Head 8. Chapter 6: Topology on a Humanoid Body 9. Chapter 7: Topology on a Hard Surface 10. Chapter 8: Optimizing Geometry for a Reduced Triangle Count 11. Index 12. Other Books You May Enjoy

Retopology of the front grip

The next part of the blaster we are going to look at is the front grip. Figure 7.30 shows a close-up of the front grip.

Figure 7.30 – The front grip

Figure 7.30 – The front grip

Again, we are going to lay out the lines on our edges and corners first. You can see the guiding edges in Figure 7.31.

Figure 7.31 – Guiding edges

Figure 7.31 – Guiding edges

Next, we are going to start making the faces of the front grip. Most of the faces are going to be easy to place, but we should focus on the radius at the top left of the grip. You can see that there are far more vertices on the radius than the surrounding mesh. To address this, we just need to send the loops around the bottom of the grip. Figure 7.32 shows the finished faces.

Figure 7.32 – Guiding edges joined with faces

Figure 7.32 – Guiding edges joined with faces

After adding new geometry, you may need to smooth the model again. The smoothed faces can be seen in Figure 7.33.
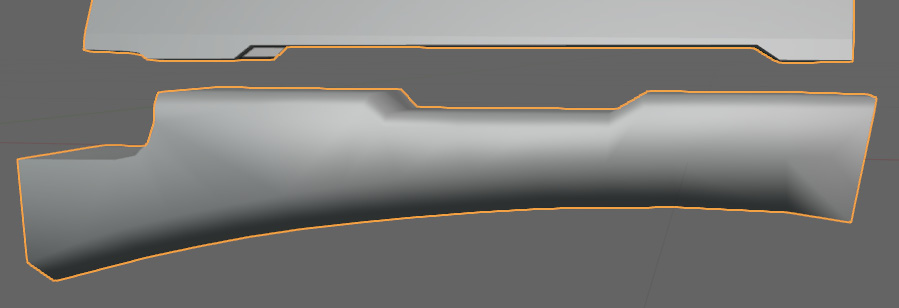
Figure 7.33 – Smooth shading applied
...
lock icon The rest of the chapter is locked
Register for a free Packt account to unlock a world of extra content!
A free Packt account unlocks extra newsletters, articles, discounted offers, and much more. Start advancing your knowledge today.
Unlock this book and the full library FREE for 7 days
Get unlimited access to 7000+ expert-authored eBooks and videos courses covering every tech area you can think of
Renews at $19.99/month. Cancel anytime
Banner background image