Search icon CANCEL
Subscription
0
Cart icon
Your Cart (0 item)
Close icon
You have no products in your basket yet
Arrow left icon
Explore Products
Best Sellers
New Releases
Books
Videos
Audiobooks
Learning Hub
Free Learning
Arrow right icon
Arrow up icon
GO TO TOP
Squeaky Clean Topology in Blender

You're reading from   Squeaky Clean Topology in Blender Create accurate deformations and optimized geometry for characters and hard surface models

Arrow left icon
Product type Paperback
Published in Dec 2022
Publisher Packt
ISBN-13 9781803244082
Length 248 pages
Edition 1st Edition
Tools
Concepts
Arrow right icon
Author (1):
Arrow left icon
Michael Steppig Michael Steppig
Author Profile Icon Michael Steppig
Michael Steppig
Arrow right icon
View More author details
Toc

Table of Contents (13) Chapters Close

Preface 1. Part 1 – Getting Started with Modeling and Topology
2. Chapter 1: Navigating and Modeling in Blender FREE CHAPTER 3. Chapter 2: The Fundamentals of Topology 4. Chapter 3: Deforming Topology 5. Chapter 4: Improving Topology Using UV Maps 6. Part 2 – Using Topology to Create Appropriate Models
7. Chapter 5: Topology on a Humanoid Head 8. Chapter 6: Topology on a Humanoid Body 9. Chapter 7: Topology on a Hard Surface 10. Chapter 8: Optimizing Geometry for a Reduced Triangle Count 11. Index 12. Other Books You May Enjoy

Improving unwraps

Our new tool is located in the Overlays tab of the UV Editing area. You can see the Overlays tab open in Figure 4.45:
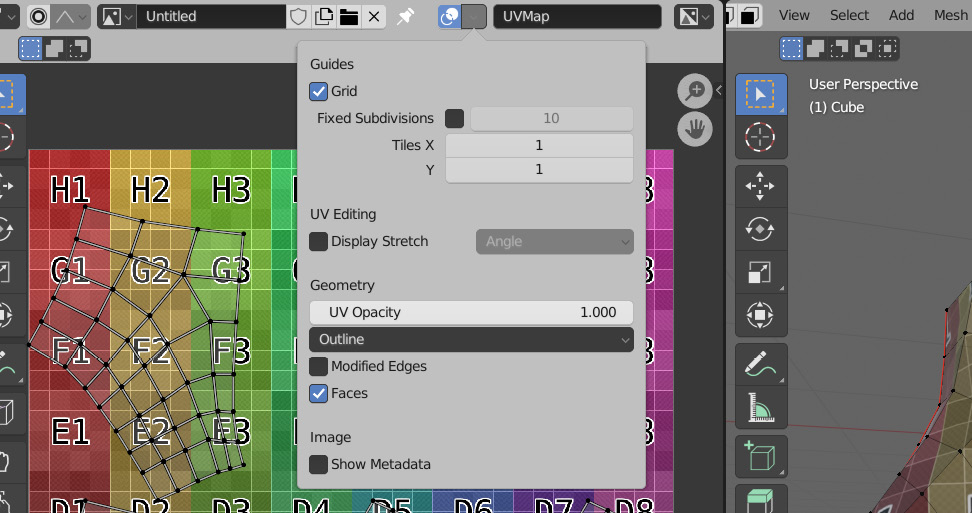
Figure 4.45 – The Overlay tab

Figure 4.45 – The Overlay tab

In this tab, we can scroll down to the Display Stretch checkbox shown in Figure 4.46:
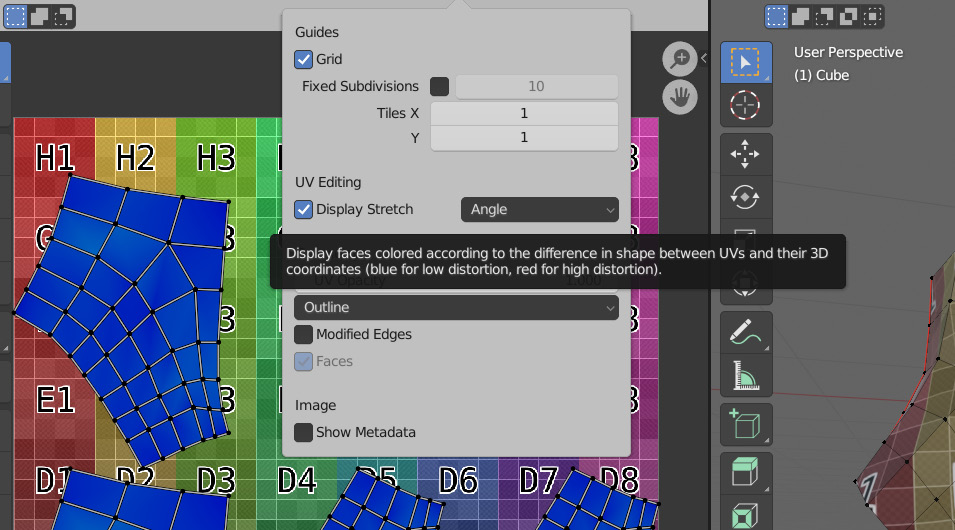
Figure 4.46 – The Display Stretch option

Figure 4.46 – The Display Stretch option

With this setting, we can check two things: the area of the individual faces, and the amount of deformation each of the faces has. By default, it checks for the angle, but this can be changed in the Overlays tab we just used to enable the setting. With this setting set to Angle, we can see how it affects a cube in Figure 4.47.
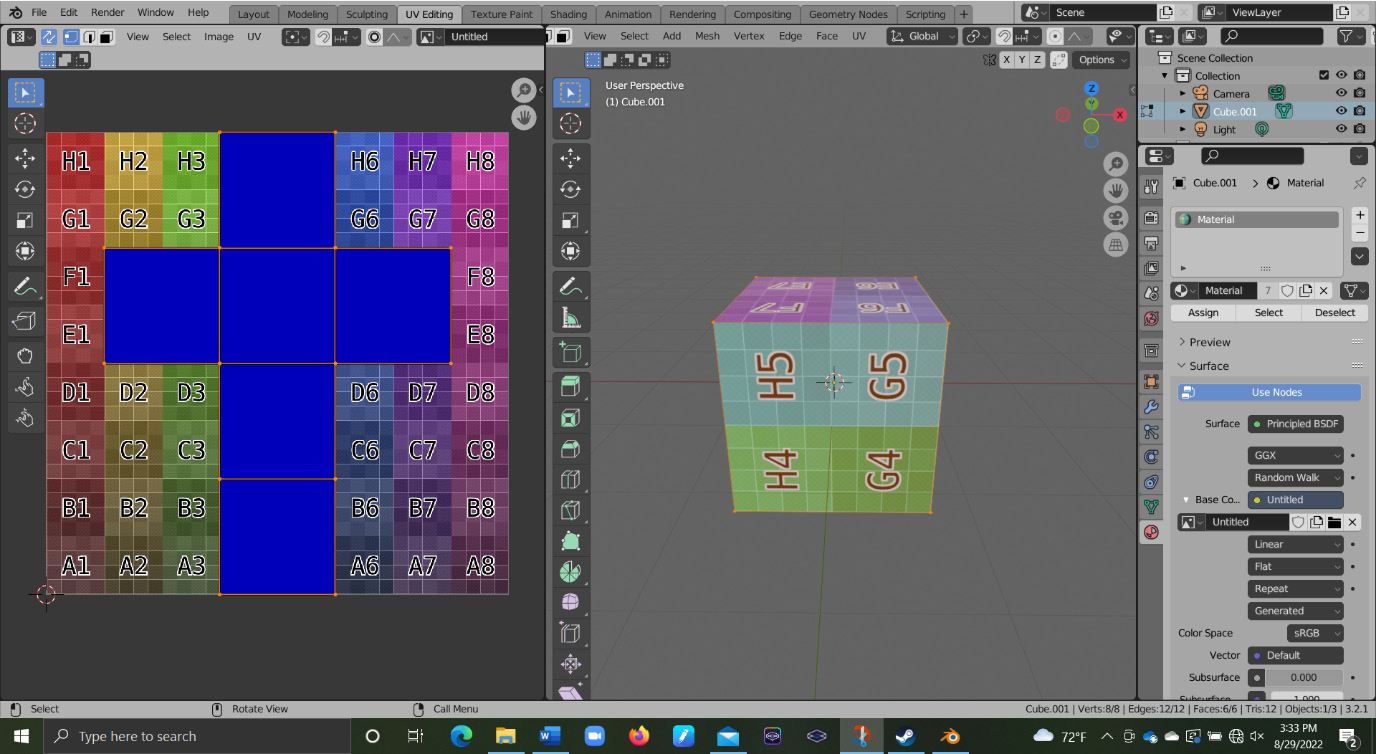
Figure 4.47 – Affected cube model with new settings

Figure 4.47 – Affected cube model with new settings

Notice how all of the faces are blue. This means that there is no warping because all of the faces are being warped from how they are actually shaped on the mesh. Notice how if we move a point on the mesh, or if we move a vertex in the UV editor, the UV map starts to turn green, and then red on the vertices it is affecting. Figure 4.48 shows a vertex in the UV editor being moved.

Figure 4.48 – Moving a vertex in the UV editor

Figure 4.48 – Moving a vertex in the UV editor

This can be corrected by either moving the mesh or the UV map to match the shapes as much as possible. When unwrapping a finished mesh, that usually means tweaking the UV map. This is often a good indication of whether you have enough seams on your UV map, or whether you have them placed well enough. If you unwrap your mesh and there is a dramatic amount of warping, you will likely have to change your unwrap.

The final thing you want to think about when unwrapping your model is something called texel density. Texel density is the size of the face in relation to how much space it takes up on the texture. If we look back at our pants example, with the separate UV islands, we can see this in practice. In Figure 4.49, we can see the two legs next to each other with different texel densities.

Figure 4.49 – Different texel densities

Figure 4.49 – Different texel densities

The leg on the left has a shrunken UV. This reduces the texel density of that leg because it is taking up less space on the texture and, by extension, makes the texture look bigger on the mesh. The leg on the right has an enlarged UV. This increases the texel density and makes the texture look smaller because it takes up more space. This is how you can control what parts of the mesh get more detail than others. Have a higher texel density on the parts you want more detail on, to allow them to take up more space on the texture. This is something we need to control on each of our unwraps, and we need our mesh to have as consistently sized quads as possible to help with this.

Thankfully, if we observe all of our previous topology rules up until this point, our only trouble should be in marking our seams properly, but if you find that you are unable to get the result you want regardless of the seams, it likely means that you violated a rule earlier on.

lock icon The rest of the chapter is locked
Register for a free Packt account to unlock a world of extra content!
A free Packt account unlocks extra newsletters, articles, discounted offers, and much more. Start advancing your knowledge today.
Unlock this book and the full library FREE for 7 days
Get unlimited access to 7000+ expert-authored eBooks and videos courses covering every tech area you can think of
Renews at $19.99/month. Cancel anytime
Banner background image