Search icon CANCEL
Subscription
0
Cart icon
Your Cart (0 item)
Close icon
You have no products in your basket yet
Save more on your purchases! discount-offer-chevron-icon
Savings automatically calculated. No voucher code required.
Arrow left icon
Explore Products
Best Sellers
New Releases
Books
Videos
Audiobooks
Learning Hub
Free Learning
Arrow right icon
Arrow up icon
GO TO TOP
Oracle JET for Developers

You're reading from   Oracle JET for Developers Implement client-side JavaScript efficiently for enterprise Oracle applications

Arrow left icon
Product type Paperback
Published in Dec 2017
Publisher Packt
ISBN-13 9781787284746
Length 282 pages
Edition 1st Edition
Languages
Tools
Arrow right icon
Author (1):
Arrow left icon
Raja Malleswara Rao Malleswara Rao Pattamsetti Raja Malleswara Rao Malleswara Rao Pattamsetti
Author Profile Icon Raja Malleswara Rao Malleswara Rao Pattamsetti
Raja Malleswara Rao Malleswara Rao Pattamsetti
Arrow right icon
View More author details
Toc

Table of Contents (11) Chapters Close

Preface 1. Getting Started with Oracle JET FREE CHAPTER 2. Oracle Alta UI 3. Tool Integration 4. Knockout JS 5. Oracle JET Components – Form Elements, Controls, and Data Collections 6. OJ Components – Layouts, Navigation, and Visualizations 7. Framework 8. Hybrid Mobile Application Development 9. Testing and Debugging 10. Security and Version Migration

Installation and programming

The following are the series of steps involved in Knockout.js installation and usage:

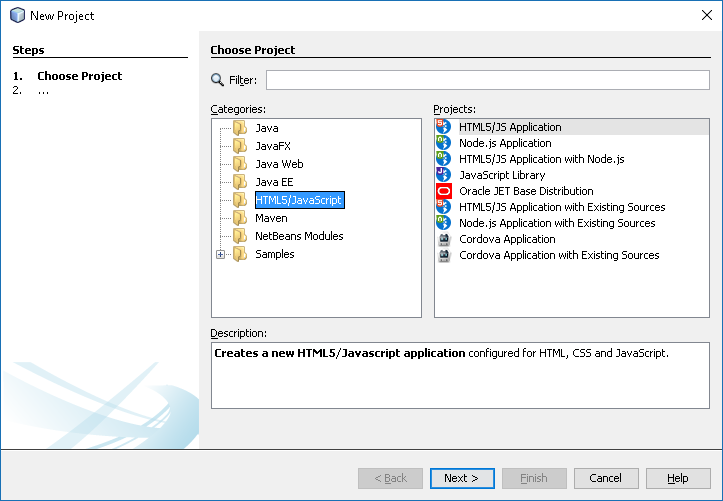
  1. Create a new web application in NetBeans using the options File | New Project. This opens the New Project wizard, as shown in the following screenshot:
  1. Press Next to provide the name and location of the project, as shown in the following screenshot:
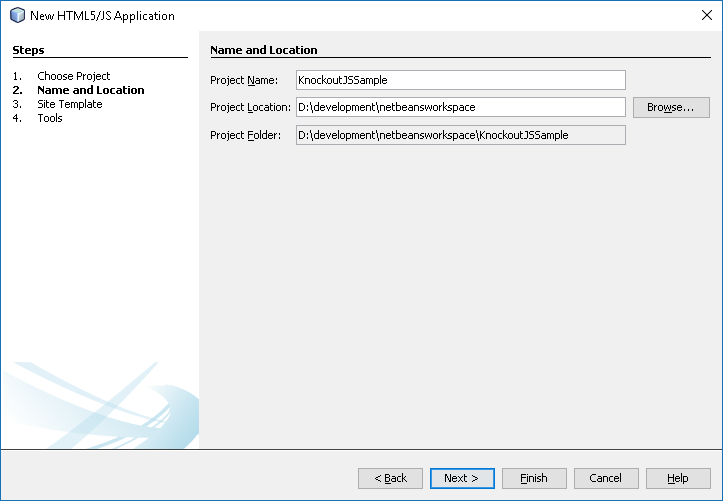
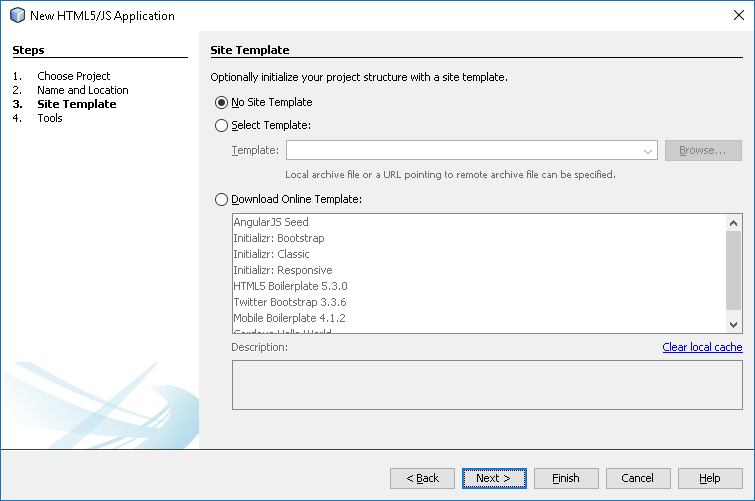
  1. Enter the Project Name and select the Next option to select the site template; choose No Site Template, as shown in the following screenshot:
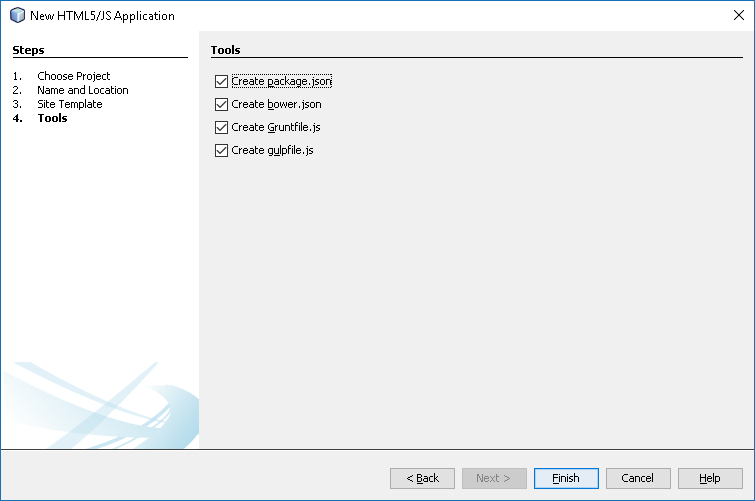
  1. Click the Next button to select the build package tools including package.json, bower.json, Gruntfile.js, and gulpfile.js, as shown in the following screenshot:
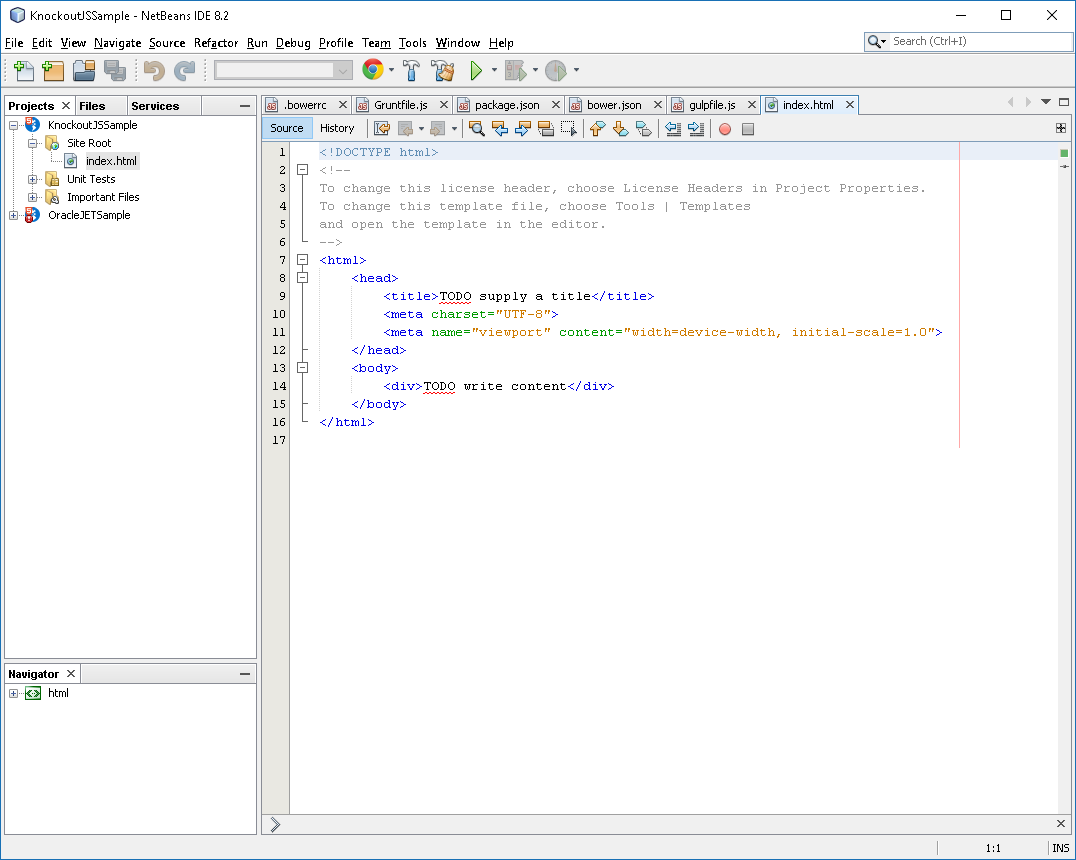
  1. Click on Finish to create the project and show the index.html page, as shown in the following screenshot:
  1. Right-click on the Site Root folder and choose New Folder to create a directory for...
lock icon The rest of the chapter is locked
Register for a free Packt account to unlock a world of extra content!
A free Packt account unlocks extra newsletters, articles, discounted offers, and much more. Start advancing your knowledge today.
Unlock this book and the full library FREE for 7 days
Get unlimited access to 7000+ expert-authored eBooks and videos courses covering every tech area you can think of
Renews at $19.99/month. Cancel anytime
Banner background image