Creating an On-Premises Data Gateway
The Microsoft on-premises data gateway (or simply gateway) is a Windows service that runs in on-premises environments or as an infrastructure-as-a-service (IaaS) resource running in the cloud. The sole purpose of the gateway is to facilitate secure (encrypted) and efficient data transfer between on-premises and IaaS data sources and Microsoft Azure services, such as Power BI, Power Apps, Power Automate, Azure Analysis Services, and Azure Logic Apps, via an outbound connection to Azure Service Bus. It is important to note that if all data sources used in Power BI reports are in the cloud (and so not on-premises) and accessible by the Power BI service, then the Microsoft on-premises data gateway is not required, as the Power BI service will use native cloud gateways to access native cloud data sources; this could be something such as Azure SQL Database or Azure SQL Managed Instances.
Once installed, a gateway can be used to schedule data refreshes of imported Power BI datasets, to support Power BI reports and dashboards built with DirectQuery, plus live connections to Analysis Services databases. The gateway can also be used by Power Apps, Azure Logic Apps, Power Automate, Azure Analysis Services, and Dataflows.
A single on-premises data gateway can support the refresh and query activity for multiple data sources, and permission to use the gateway can be shared with multiple users. Currently, the gateway supports all common data sources via scheduled imports, including Open Database Connectivity (ODBC) connections, and many of the most common sources via Live Connection and DirectQuery.
Getting ready
The hardware resources required by the gateway vary based on the type of connection (import versus live connection, for example), the usage of the reports and dashboards in the Power BI service, and the proportion of data volume handled by the gateway versus the on-premises source systems. It is recommended to start with 8-core CPUs, 8 GB of RAM server, and a 64-bit version of Windows 2012 R2 or later for the operating system. A solid-state drive is also recommended with at least 4 GB of disk space. This machine cannot be a domain controller, and to maintain the availability of Power BI content, the gateway server should always be on and connected to the internet.
Another top consideration for the gateway is the location of the gateway server in relation to the Power BI tenant and the data sources to be supported by the gateway. For example, if a SQL Server database is the primary gateway source and runs on a server in the Western United States, and the Power BI tenant for the organization is in the West US Azure region, then the gateway should be installed on a server or potentially an Azure virtual machine (VM) in the West US Azure region, or a location in the Western United States.
Based on an analysis of current and projected workloads, the gateway resources can be scaled up or down, and optionally, additional gateways can be installed on separate servers to distribute the overall Power BI refresh and query deployment workload.
For example, one gateway server can be dedicated to scheduled refresh/import workloads, thus isolating this activity from a separate gateway server responsible for DirectQuery and Live Connection queries.
The gateway does not require inbound ports to be opened and defaults to HTTPS, but it can be forced to use TCP. For the default communication mode, it is recommended to whitelist the IP addresses in your data region in your firewall. This list is updated weekly and is available via the Microsoft Azure Datacenter IP list (https://bit.ly/40APL97).
To prepare for this recipe, perform the following steps:
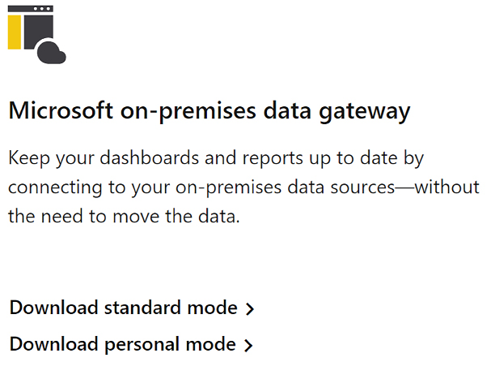
- Download the latest Microsoft on-premises data gateway from https://powerbi.microsoft.com/downloads/.

Figure 1.20: Download the Microsoft on-premises data gateway
- Select the Download standard mode link.
You are now ready to install the gateway.
How to create the gateway
The gateway has two modes, Standard mode and Personal mode. Personal mode is intended for personal use and, thus, cannot be shared among users within an enterprise. We will focus on Standard mode, as the installation and configuration are essentially the same for Personal mode:
- Once the gateway is downloaded, choose Open file to run
GatewayInstall.exe. - Choose the file directory for the installation, accept the terms of use and privacy agreement, and then click the Install button. If prompted on whether you want to allow this app to make changes to your device, click the Yes button.
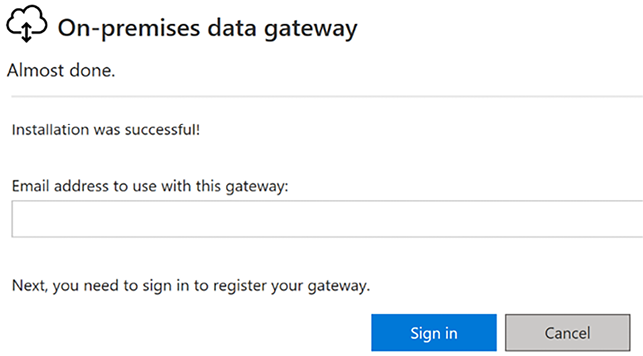
- Sign in to the Power BI service to register the gateway:

Figure 1.21: Registering the gateway
- On the next screen after signing in, choose Register a new gateway on this computer, and then click the Next button.
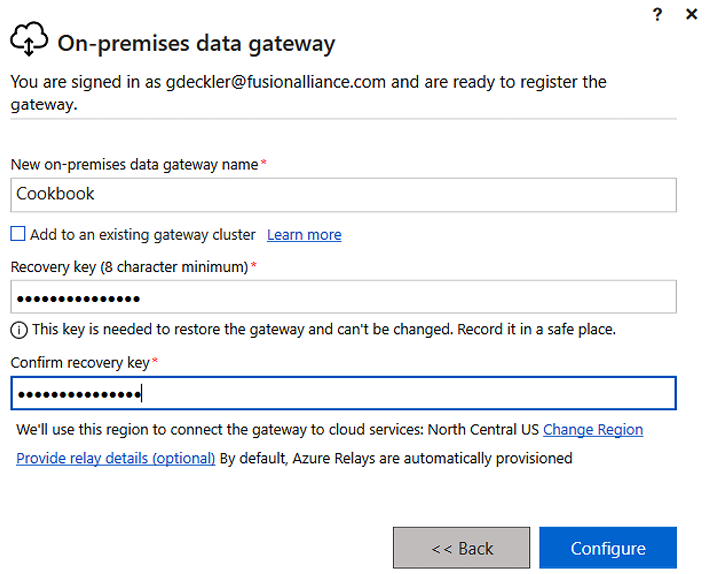
- Enter a user-friendly name for the gateway and a recovery key, and then click the Configure button.

Figure 1.22: Final configuration information for the gateway
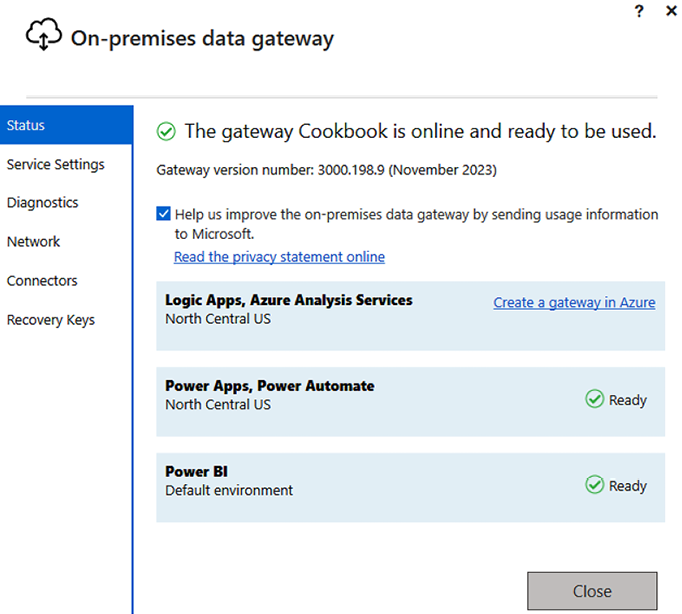
With the gateway installed and registered, data sources, gateway admins, and authorized data source users can be added to the Power BI service. A Manage Gateways option will be available under the gear icon in the Power BI service. Managing gateways is covered in a later chapter of this book.

Figure 1.23: Successfully installed gateway
How it works
As new versions of the gateway become available, a notification is made available in the Status tab of the on-premises data gateway UI, as per Figure 1.23. The Power BI gateway team recommends that updates should be installed as they become available.
The Standard mode on-premises data gateway, rather than the Personal mode gateway, is required for the Import and DirectQuery datasets created in this book and the use of other Azure services in the Microsoft business application platform.
The Power BI service uses read-only connections to on-premises sources, but the other services (for example, Power Apps) can use the gateway to write, update, and delete these sources.
The recovery key is used to generate both a symmetric and an asymmetric key, which encrypts data source credentials and stores them in the cloud. The credentials area is only decrypted by the gateway machine in response to a refresh or query request. The recovery key will be needed in the following scenarios:
- Migrating a gateway and its configured data sources to a different machine
- Restoring a gateway to run the service under a different domain account or restoring a gateway from a machine that has crashed
- Taking over ownership of an existing gateway from an existing gateway administrator
- Adding a gateway to an existing cluster
It is important that the recovery key is stored in a secure location accessible to the BI/IT organization. Additionally, more than one user should be assigned as a gateway administrator in the Power BI service to provide redundancy.
There’s more…
The final configuration screen for the Microsoft on-premises data gateway shown in Figure 1.22 provides several advanced options, including the following:
- Add to an existing gateway cluster
- Change region
- Provide relay details
Gateway clusters remove single points of failure for on-premises data access. Since only a single standard gateway can be installed on a computer, each additional gateway cluster member must be installed on a different computer. If the primary gateway is not available, data refresh requests are routed to other gateway cluster members. When using gateway clusters, it is important that all gateway cluster members run the same gateway version and that offline gateway members are removed or disabled—offline gateway members will negatively impact performance. You must know and enter the Recovery Key for the previously installed gateway when joining a cluster.
By default, the gateway is installed in the same Azure region as your Power BI tenant in the Power BI service. In almost all cases, this setting should not be changed. However, with multi-geo support in Power BI Premium, it may be necessary to install gateways in different Azure regions. The Change Region option provides this flexibility.
Azure relays are automatically provisioned for installed gateways at the time of installation. However, the Provide relay details option allows you to provide your own relay details, if you wish to associate the relay with your Azure subscription and manage the sender and listener keys for the relay. This is a very advanced option, and you should fully understand Azure relays and what you are trying to accomplish before attempting this configuration. It is important to note that only WCF relays with NetTcp are supported for this feature.
See also
- Details of configuring and managing data sources through the on-premises gateway are covered in Chapter 11, Deploying and Distributing Power BI Content
- Set the Azure relay for an on-premises data gateway: http://bit.ly/3rMJMvP


