How do I get started?
Now that you are aware of all the exciting features of DynamoDB, I am sure you are itching to try out your hands on it. So let's try to create a table using the Amazon DynamoDB management console. The pre-requisite to do this exercise is having a valid Amazon account and a valid credit card for billing purposes. Once the account is active and you have signed up for the DynamoDB service, you can get started directly. If you are new to AWS, more information is available at http://docs.aws.amazon.com/gettingstarted/latest/awsgsg-intro/gsg-aws-intro.html.
Amazon's infrastructure is spread across almost 10 regions worldwide and DynamoDB is available in almost all regions. You can check out more details about it at https://aws.amazon.com/about-aws/globalinfrastructure/regional-product-services/.
Creating a DynamoDB table using the AWS management console
Perform the following steps to create a DynamoDB table using the AWS management console:
- Go to the Amazon DynamoDB management console at https://console.aws.amazon.com/dynamodb, and you will get the following screenshot:
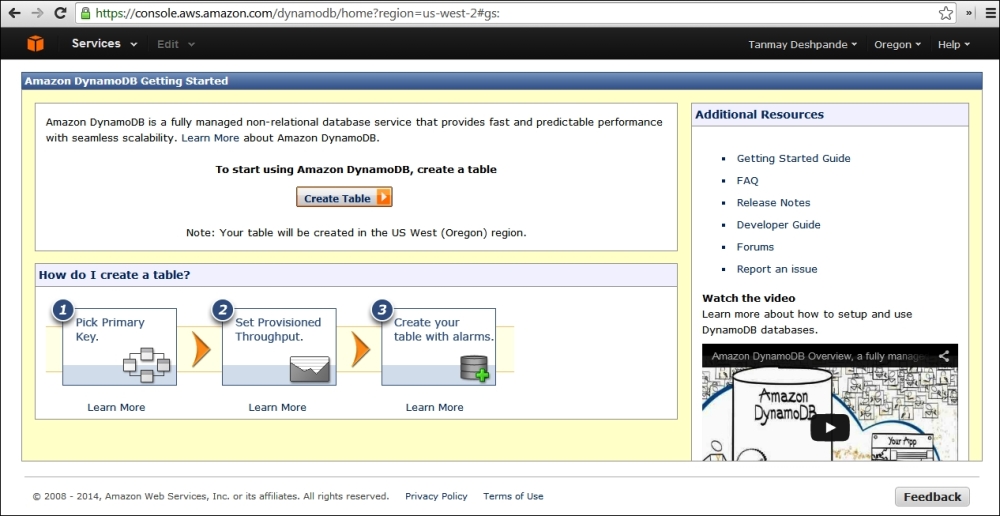
- Click on the Create Table button and you will see a pop-up window asking for various text inputs. Here, we are creating a table called
Employeehavingemp_idas the hash key andemailas the range key, as shown in the following screenshot: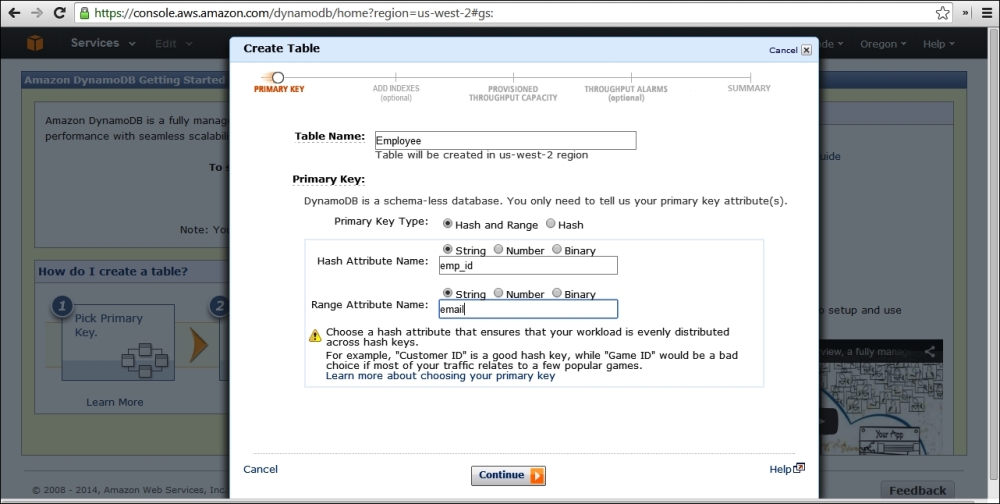
- Once you click on the Continue button, you will see the next window asking to create indexes, as shown in the next screenshot. These are optional parameters; so, if you do not wish to create any secondary indexes, you can skip this and click on Continue. We are going to talk about the indexes in Chapter 2, Data Models.
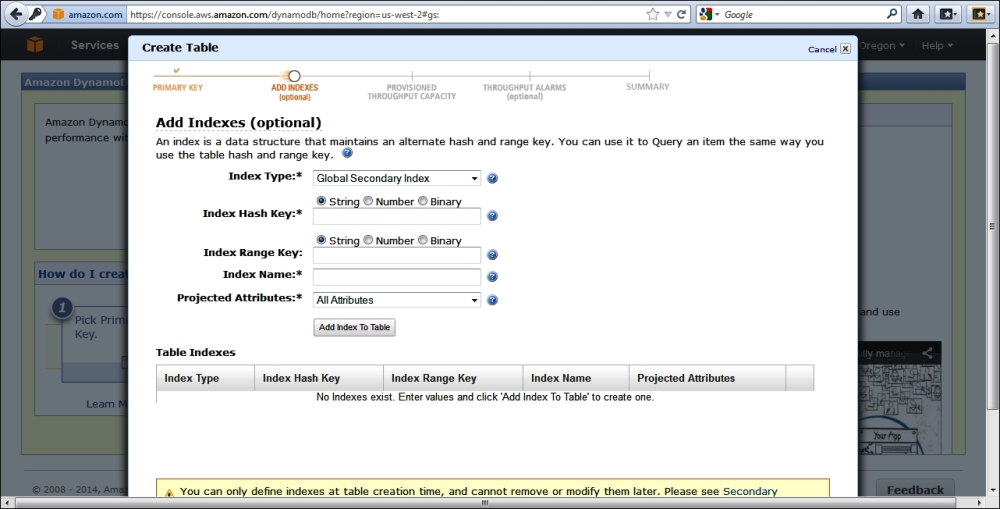
- Once you click on the Continue button again, the next page will appear asking for provision throughput capacity units. We have already talked about the read and write capacity; so, depending upon your application requirements, you can give the read and write capacity units in the appropriate text box, as shown in the following screenshot:

- The next page will ask whether you want to set any throughput alarm notifications for this particular table. You can provide an e-mail ID on which you wish to get the alarms, as shown in the following screenshot. If not, you can simply skip it.
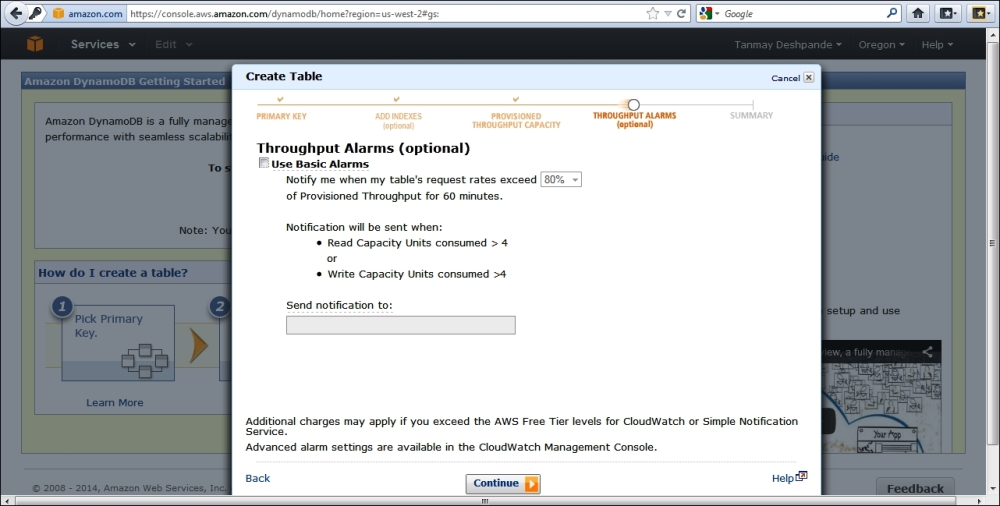
- Once you set the required alarms, the next page would be a summary page confirming the details you have provided. If you see all the given details are correct, you can click on the Create button, as shown in the following screenshot:

- Once the Create button is clicked, Amazon starts provisioning the hardware and other logistics in the background and takes a couple of minutes to create the table. In the meantime, you can see the table creations status as CREATING on the screen, as shown in the following screenshot:
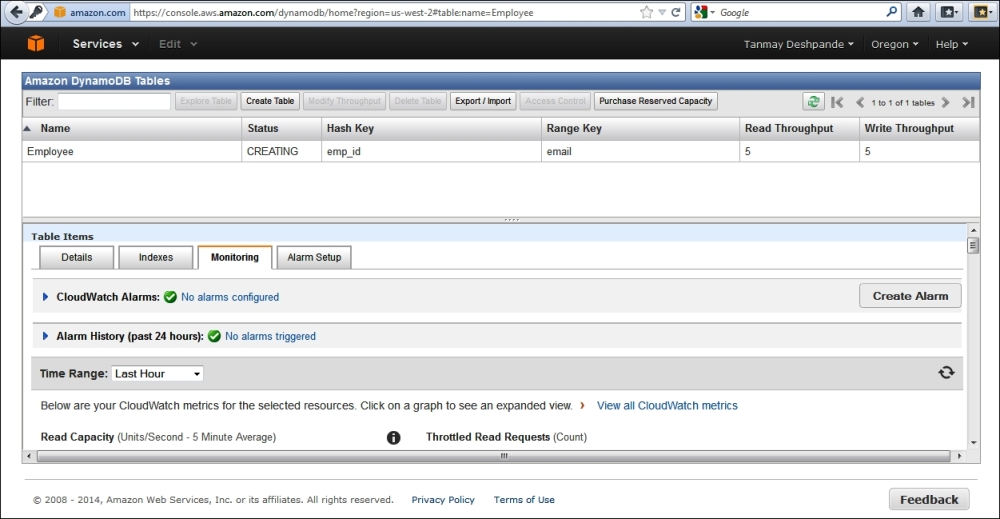
- Once the table is created, you can see the status changed to ACTIVE on the screen, as shown in the following screenshot:
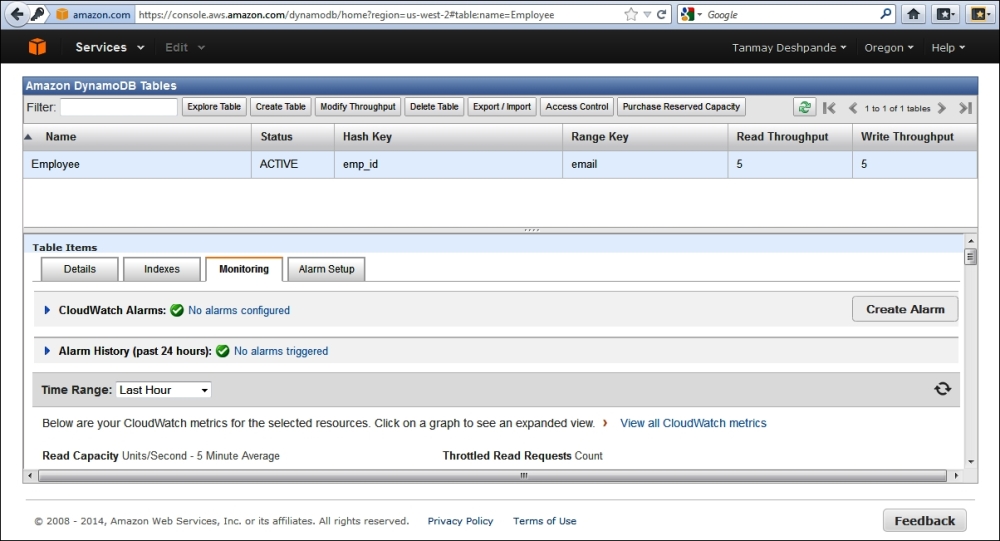
- Now that the table
Employeeis created and active, let's try to put an item in it. Once you double-click on the Explore Table button, you will see the following screen: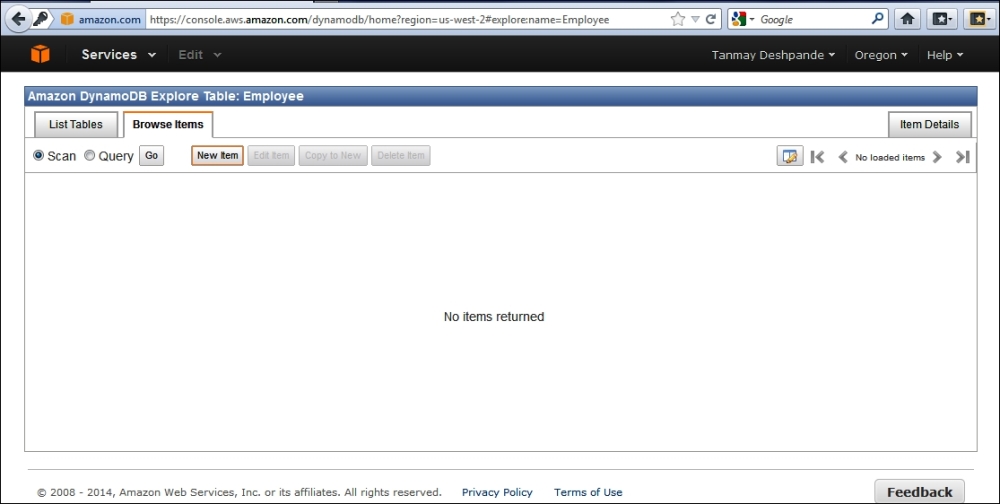
- You can click on the New Item button to add a new record to the table, which will open up a pop up asking for various attributes that we wish to add in this record. Earlier, we had added
emp_idandemailas hash and range key, respectively. These are mandatory attributes we have to provide with some optional attributes if you want to, as shown in the following screenshot: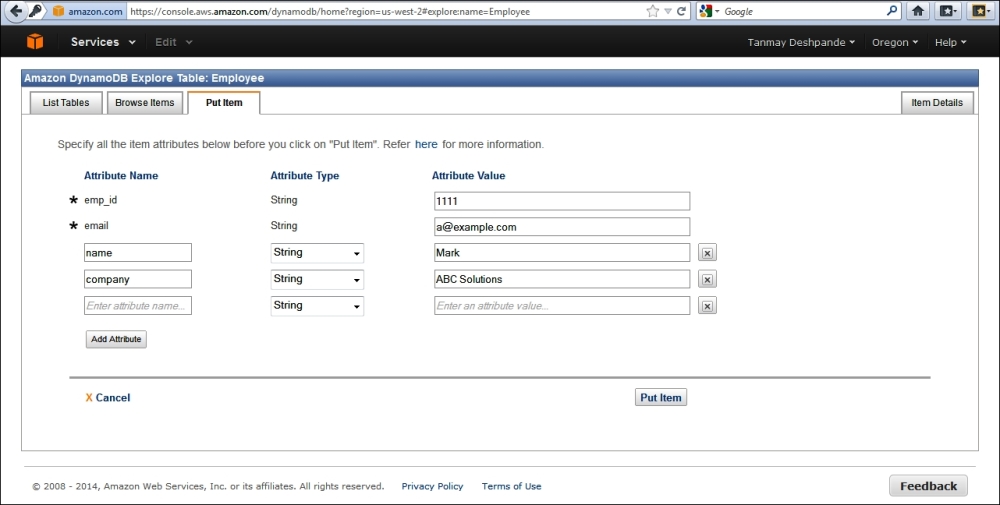
Here, I have added two extra attributes,
nameandcompany, with some relevant values. Once done, you can click on the Put Item button to actually add the item to the table. - You can go to the Browse Items tab to see whether the item has been added. You can select Scan to list down all items in the
Employeetable, which is shown in the following screenshot:
In Chapter 2, Data Models, we will be looking for various examples in Java, .Net, and PHP to play around with tables, items, and attributes.
DynamoDB Local
DynamoDB is a lightweight client-side database that mimics the actual DynamoDB database. It enables users to develop and test their code in house, without consuming actual DynamoDB resources. DynamoDB Local supports all DynamoDB APIs, with which you can run your code like running on an actual DynamoDB.
To use DynamoDB Local, you need to run a Java service on the desired port and direct your calls from code to this service. Once you try to test your code, you can simply redirect it to an actual DynamoDB.
So, using this, you can code your application without having full Internet connectivity all the time, and once you are ready to deploy your application, simply make a single line change to point your code to an actual DynamoDB and that's it.
Installing and running DynamoDB Local is quite easy and quick; you just have to perform the following steps and you can get started with it:
- Download the DynamoDB Local executable JAR, which can be run on Windows, Mac, or Linux. You can download this JAR file from http://dynamodb-local.s3-website-us-west-2.amazonaws.com/dynamodb_local_latest.
- This JAR file is compiled on version 7 of JRE, so it might not be suitable to run on the older JRE version.
- The given ZIP file contains two important things: a
DynamoDBLocal_libfolder that contains various third-party JAR files that are being used, andDynamoDBLocal.jarwhich contains the actual entry point. - Once you unzip the file, simply run the following command to get started with the local instance:
java -Djava.library.path=. -jar DynamoDBLocal.jar - Once you press Enter, the DynamoDB Local instance gets started, as shown in the following screenshot:

By default, the DynamoDB Local service runs on port 8000.
- In case you are using port 8000 for some other service, you can simply choose your own port number by running the following command:
java -Djava.library.path=. -jar DynamoDBLocal.jar --port <YourPortNumber>
Now, let's see how to use DynamoDB Local in the Java API. The complete implementation remains the same; the only thing that we need to do is set the endpoint in the client configuration as http://localhost:8000.
Using DynamoDB for development in Java is quite easy; you just need to set the previous URL as the endpoint while creating DynamoDB Client, as shown in the following code:
// Instantiate AWS Client with proper credentials
AmazonDynamoDBClient dynamoDBClient = new AmazonDynamoDBClient(
  new ClasspathPropertiesFileCredentialsProvider());
Region usWest2 = Region.getRegion(Regions.US_WEST_2);
  dynamoDBClient.setRegion(usWest2);
// Set DynamoDB Local Endpoint
  dynamoDBClient.setEndpoint("http://localhost:8000");
Once you are comfortable with your development and you are ready to use the actual DynamoDB, simply remove the highlighted line from the previous code snippet and you are done. Everything will work as expected.
DynamoDB Local is useful but before using it, we should make a note of following things:
- DynamoDB Local ignores the credentials you have provided.
- The values provided in the access key and regions are used to create only the local database file. The DB file gets created in the same folder from where you are running your DynamoDB Local.
- DynamoDB Local ignores the settings provided for provision throughput. So, even if you specify the same at table creation, it will simply ignore it. It does not prepare you to handle provision throughput exceeded exceptions, so you need to be cautious about handling it in production.
- Last but not least, DynamoDB Local is meant to be used for development and unit testing purposes only and should not be used for production purposes, as it does not have durability or availability SLAs.


