Lab – setting up the testing lab
The lab environment will be an integral part of your journey into ethical hacking. Here, we will install test machines, test out code and exploits, and see how to detect them in the chapters to come.
Setting up VirtualBox
The first step to setting up the lab environment is to install virtualization software, allowing us to run multiple systems on one machine without having to purchase a lot of hardware and software. We will use VirtualBox as our virtual machine manager; however, if you prefer to use VMware or Hyper-V, they should work just as effectively with some adjustments:
- Go to https://www.virtualbox.org/. At the time of writing, VirtualBox was at version 7.0.10.
- Select the downloads link or find the downloads page and download the platform package appropriate for your operating system. In addition to the core package, you will need the extension package, which provides additional functionality.
- Install VirtualBox, accepting all the defaults, followed by the extension pack. Once complete, launch VirtualBox and you should be greeted with a screen similar to the one in the following figure:
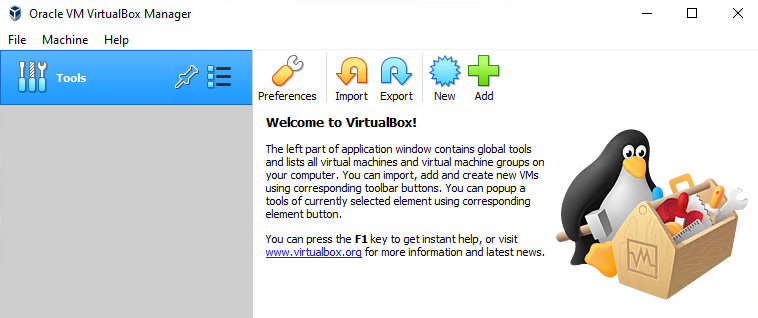
Figure 1.3 – VirtualBox setup complete
This will complete the installation of VirtualBox. Next, we will set up our virtual attack machine using Kali Linux.
Setting up Kali Linux
Kali Linux is an offensive virtual machine that contains several attack tools. This machine will be used as the attack machine in the lab. You will need to take the following steps:
- Go to https://www.kali.org/ and select Downloads. Find the VirtualBox VM and download it. The file downloaded will be something like kali-linux-<number>-virtualbox-amd64.ova. The file is large and will take some time to download.
- Once the download is complete, open VirtualBox and select Import, and navigate to the downloaded file. Use the defaults and begin the imports, and it will do the following:
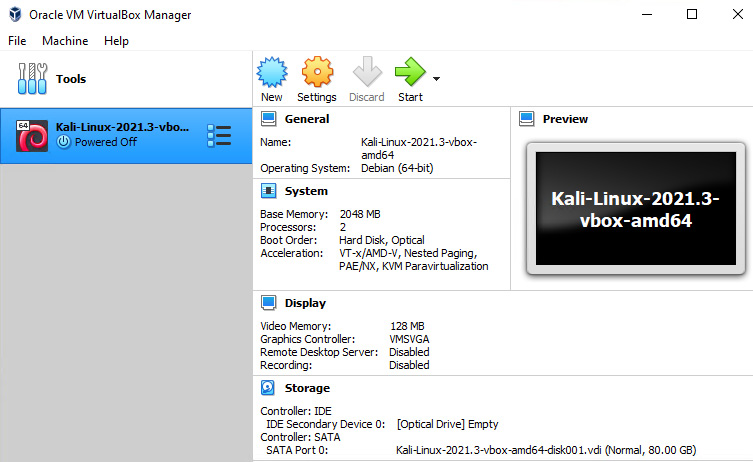
Figure 1.4 – VirtualBox showing Kali installed
By default, Kali will be in NAT mode. To perform the required operations, the network needs to be enabled.
- Click Settings in VirtualBox Manager, select Network, and from the Attached to: drop-down menu, select Bridged Adapter and select OK:

Figure 1.5 – VirtualBox adapter settings
- Next, the actual adapter address needs to be configured. Boot your Kali Linux instance and log in. The default credentials are kali/kali.
- To set the network configuration to be used, click the Kali icon in the upper-left corner and select Settings | Advanced Network Configuration. From here, select your connection, probably Wired connection 1, and click the small cog icon at the bottom that says Edit the Selected Connection. A new window will be presented. Click the tab that says IPv4 Settings and change the method from DHCP to Manual.
- Next, you will need to add an address. Select the Add button and enter the following elements:
- Address: 192.168.255.10
- Netmask: 24
- Gateway: 192.168.255.1
Now that our attack machine is set up, we can set up our victim machines. A company called Rapid7 provides two vulnerable machines for testing free of charge. The machines are Windows and Linux. We will use the following instructions to download and install them automatically.
Setting up vulnerable hosts
In this section, we will set up virtual machines that will contain known vulnerabilities. These machines are the ones you will be attacking in future labs as we learn about attacks, attackers’ methods, and how to defend against them:
- Download and install vagrant on your machine. Vagrant is an open source tool used to automate the installation of virtual machines. Vagrant can be downloaded from https://www.vagrantup.com/downloads.
Once vagrant is installed, run the following command:
vagrant plugin install vagrant-reload
This will install the vagrant-reload plugin and support the reloading of the virtual machines should there be an error during installation.
- Once complete, you are ready to download and install the test virtual machines:
- If your host machine is Linux, please run the following commands:
mkdir metasploitable3-workspace
cd metasploitable3-workspace
curl -O https://raw.githubusercontent.com/rapid7/metasploitable3/master/Vagrantfile && vagrant up
- If your host machine is Windows, please run the following commands:
mkdir metasploitable3-workspace
cd metasploitable3-workspace
Invoke-WebRequest -Uri "https://raw.githubusercontent.com/rapid7/metasploitable3/master/Vagrantfile" -OutFile "Vagrantfile"
- If your host machine is Linux, please run the following commands:
- These commands will download a Vagrant file, which you need to open with a text editor and add the following line:
config.vm.provision :reload
It should resemble the following when completed:
Vagrant.configure("2") do |config| config.vm.provision :reload config.vm.synced_folder - Run the next command to start the process:
vagrant up
Once this has been completed, you will have two more virtual machines installed and your VirtualBox main screen should look similar to that shown in Figure 1.6. However, even though the machines are set up, we still need to configure them to participate in our lab.
Configuring the vulnerable Windows host
Configuring the Windows system requires changes in two separate areas. The first one is the virtual machine settings in VirtualBox. The second is the network configuration inside the virtual machine. These steps are outlined as follows:
- After the Windows machine is installed, open the settings, and modify the network settings to Bridged Adapter, just as was done with the Kali installation. It will look something like this:
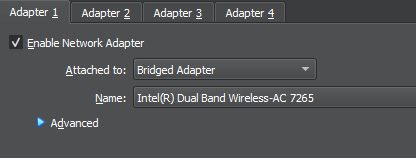
Figure 1.6 – Setting Network Adapter Settings
- Boot the machine and log in with the vagrant account and the vagrant password.
- Navigate to the control panel and then to Network and Sharing Center | Change adapter settings.
- Find the network adaptor, right-click on it, and select Properties.
- Navigate to Internet Protocol Version 4(TCP/IPv4) | Properties.
- Select the radio button labeled Use the following IP address and enter the following values:
- IP address: 192.168.255.2
- Subnet mask: 255.255.255.0
- Default gateway: 192.168.255.1
- Leave the other section alone. Select OK and then close out any open windows.
This will complete the lab setup of the Windows vulnerable host.
Setting up the vulnerable Linux host
Just like the Windows system, the Linux machine requires changes in two separate areas. The first one is the virtual machine settings in VirtualBox. The second is the network configuration inside the virtual machine. These steps are outlined here:
- After the Linux machine is installed, open the settings, and modify the network settings to Bridged Adaptor, just as was done with the Kali installation.
- Boot the machine and log in with the vagrant account and the vagrant password.
- This machine only has command-line access and from the command-line console, we need to change the network settings. To do this, perform the following commands:
cd /etc/network
sudo vi interfaces
- Press the i key, for insert. You should see -- INSERT -- at the bottom of the screen.
- Use the arrow keys to move down and change the section to look like the following:
# The primary network interface
auto eth0
iface eth0 inet static
address 192.168.255.3
netmask 255.255.255.0
gateway 192.168.255.1
dns-nameservers 192.168.255.1, 192.168.255.2
This will complete the lab setup for the vulnerable Linux host.
Final checks
Once all the machines are set up, the lab will be complete and ready for testing. The VirtualBox interface should look like the following, showing all three machines set up:
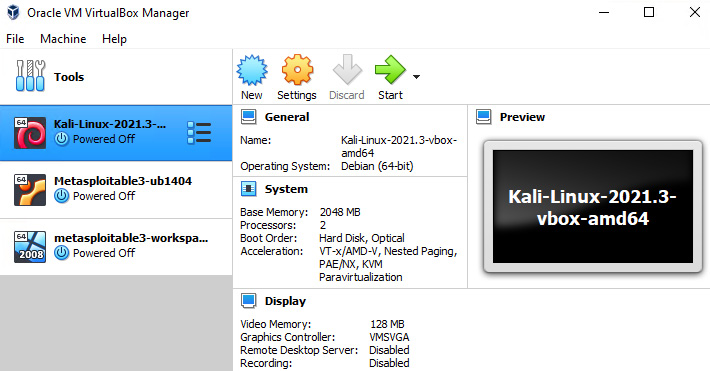
Figure 1.7 – VirtualBox main screen
The following diagram outlines what the virtual network looks like when all the configuration and setup is complete:
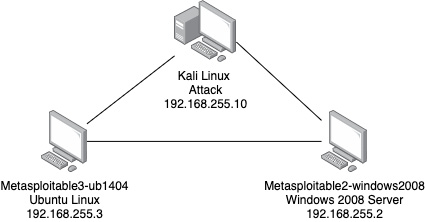
Figure 1.8 – Virtual lab network
With the configurations in place, an isolated virtual lab has been created inside your network. The virtual lab will allow the testing and execution of the lab exercises without damaging or intruding on your host machine or network.


