Push me, pull you
Generally, you want to push your changes and pull down changes from other developers. Also, generally, you will not be working on the same files, and certainly not in main. We'll discuss how to avoid this in Chapter 4, Merging Branches. For now, we'll just be very careful.
Open Visual Studio in the directory GitHub/VisualStudio/ProGitForProgrammers. Add a line to Program.cs as shown here:
namespace ProGitForProgrammers
{
class Program
{
static void Main(string[] args)
{
Console.WriteLine("Hello World!");
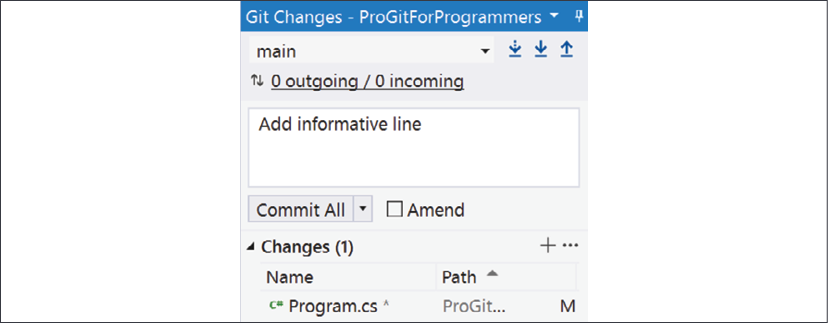
Having made your change, you want to check it in. Since we are in the VisualStudio directory, we'll do the work right within Visual Studio. Click the Git menu and choose Commit or Stash. A Git window will open as a tab next to Solution Explorer. Enter a commit message and press Commit All:

Figure 2.14: Git window in Visual Studio
Note that if you drop down the Commit All menu, you have a number of shortcuts for adding, committing, and pushing your changes.
As you can see, and will see often in this book, you can do almost anything in Visual Studio that you can do at the command line.
Pushing to the server
You have now committed your changes to your local repository. The GitHub repository, however, doesn't know about your changes. (You can prove this to yourself by returning to GitHub and drilling down to Program.cs.)
The other programmers' repositories (for example, CommandLine and GitHubDesktop) are equally oblivious. To disseminate this change, you first push your changes up to the server (GitHub) and then pull them down to the other repositories.
From within Visual Studio's Git window, press Staged. This will stage your changes for committing. Next, click Commit. This will put your changes into your local repository (be sure to give the commit a meaningful message).
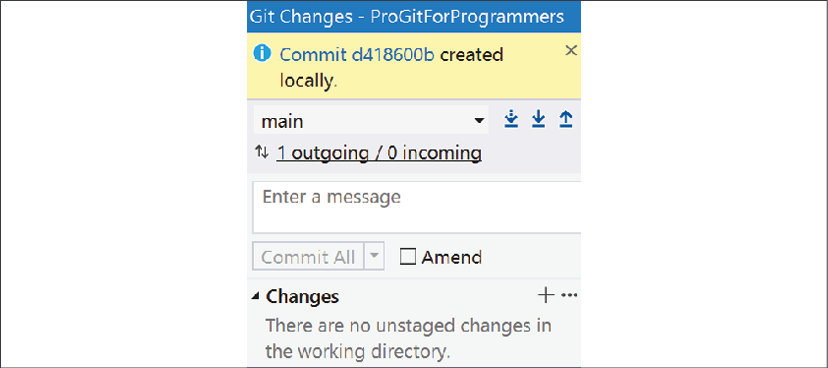
Examine the Git window; there is a lot of information:

Figure 2.15: The Git window in Visual Studio
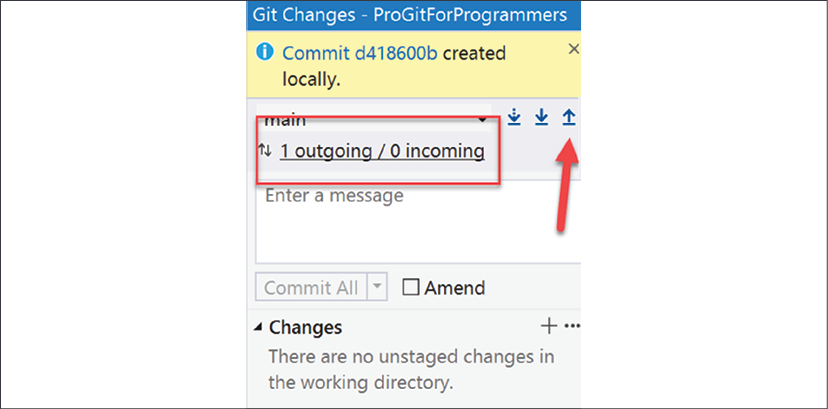
You are told that the commit was created locally (and locally is the important part!). Below that is the status of your commit. You have one to push up to the server (outgoing) and none to bring down (incoming):

Figure 2.16: Uploading a commit from Visual Studio
Now, find the up-pointing arrow in the upper-right corner. Hover over it and you'll see that it says Push. Click that button to push your changes to the server. When it is done, it will give you a success message. Ignore the offer to create a pull request for now.
Look to the left of your Git menu and see the local history of your commits:

Figure 2.17: The history of commits
Each dot signals a commit, and next to each dot is your commit message (and now you can see why meaningful commit messages are both hard to write and worth the effort). There is also an indicator that main is pointing to your last commit.
If you check GitHub (remember to refresh the page) you will now see the line in Program.cs. Make sure you understand why: this is because after we committed the change, we pushed it to the remote repository.
Downloading the changes at the command line
We created the changes in the VisualStudio directory. CommandLine and GitHubDesktop know nothing of the changes, even though they are now on GitHub.
For these directories to know about the changes, you need to pull the changes down.
Change directories to CommandLine. Examine the contents of Program.cs; the new line is not there. Open your terminal and enter pull. This will pull any changes from the server to your local repository.
The result should look like this:

Figure 2.18: Pulling from the remote repository
Git is telling you that it formatted and compressed your files and passed them down to your repository. Toward the bottom it says that it used Fast-forward. We'll discuss this in Chapter 4, Merging, Pull Requests, and Handling Merge Conflicts.
Take a look at Program.cs now in your command directory; the new addition should now be there.
Want to do something cool? Open the Program.cs file before updating. After the update you will see the second WriteLine pop into view. What is actually happening is that the code that was in your directory is replaced by the new code on the pull.
Downloading the changes using GitHub Desktop
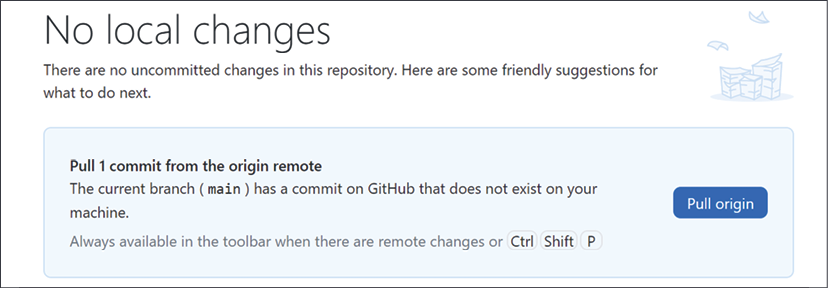
Change directories to GitHubDesktop and open the GitHub Desktop program. It will give you a lot of information about the status of your repository (No Local Changes) and it will automatically check and inform you that there is one commit to update your local repository with:

Figure 2.19: The view from the remote repository
Go ahead and click Pull origin. It does the pull, and the button disappears. Check your code; the change should now be in your Program.cs (and is recorded in your local repository).
All three local repositories and the server repository are now in sync.


