Connecting the ESP8266 to a cloud server
In this recipe, we will connect the ESP8266 to the Internet and send data to a cloud server. The cloud server we will be sending data to is dweet.io. The data we send to dweet.io will be used later in this book, so ensure that you execute this section successfully.
Getting ready
As in the previous recipe, we won't need any extra components here. All we need to do is ensure that the ESP8266 is connected to the computer.
How to do it…
To accomplish this, follow these steps:
- We will connect the ESP8266 to a local Wi-Fi network that has an active Internet connection.
- Once the connection is successful, we will send a
GETrequest to the cloud server and then display the reply that the server sends back to the ESP8266 board:// Libraries #include <ESP8266WiFi.h>
- Enter the
SSIDandpassword:// SSID const char* ssid = "your-ssid"; const char* password = "your-password";
- Store the hostname of the cloud server:
// Host
const char* host = "dweet.io";
- Configure the SSID and password of the Wi-Fi network and connect the ESP8266 to the Wi-Fi network:
void setup() { // Serial Serial.begin(115200); delay(10); // We start by connecting to a WiFi network Serial.println(); Serial.println(); Serial.print("Connecting to "); Serial.println(ssid); WiFi.begin(ssid, password); while (WiFi.status() != WL_CONNECTED) { delay(500); Serial.print("."); } Serial.println(""); Serial.println("WiFi connected"); Serial.println("IP address: "); Serial.println(WiFi.localIP()); } - Delay for five seconds and then print the name of the host we are connecting to on the serial monitor:
void loop() { delay(5000); Serial.print("connecting to "); Serial.println(host); - Connect to the host server:
// Use WiFiClient class to create TCP connections WiFiClient client; const int httpPort = 80; if (!client.connect(host, httpPort)) { Serial.println("connection failed"); return; } - Formulate the URI for the
GETrequest we will send to the host server:// We now create a URI for the request String url = "/dweet/for/my-thing-name?value=test";
- Send the
GETrequest to the server and check whether the request has been received or if it has timed out:// Send request Serial.print("Requesting URL: "); Serial.println(url); client.print(String("GET ") + url + " HTTP/1.1\r\n" + "Host: " + host + "\r\n" + "Connection: close\r\n\r\n"); unsigned long timeout = millis(); while (client.available() == 0) { if (millis() - timeout > 5000) { Serial.println(">>> Client Timeout !"); client.stop(); return; } } - Read incoming data from the host server line by line and display the data on the serial monitor.
- Close the connection after all the data has been received from the server:
// Read all the lines from the answer while(client.available()){ String line = client.readStringUntil('\r'); Serial.print(line); } // Close connecting Serial.println(); Serial.println("closing connection"); } - Copy the sketch to your Arduino IDE and change the SSID in the code from
your-ssidto the name of your Wi-Fi network and the password fromyour-passwordto the password of your Wi-Fi network. - Upload the sketch to your ESP8266 board.
- Open the serial monitor so that you can view the incoming data.
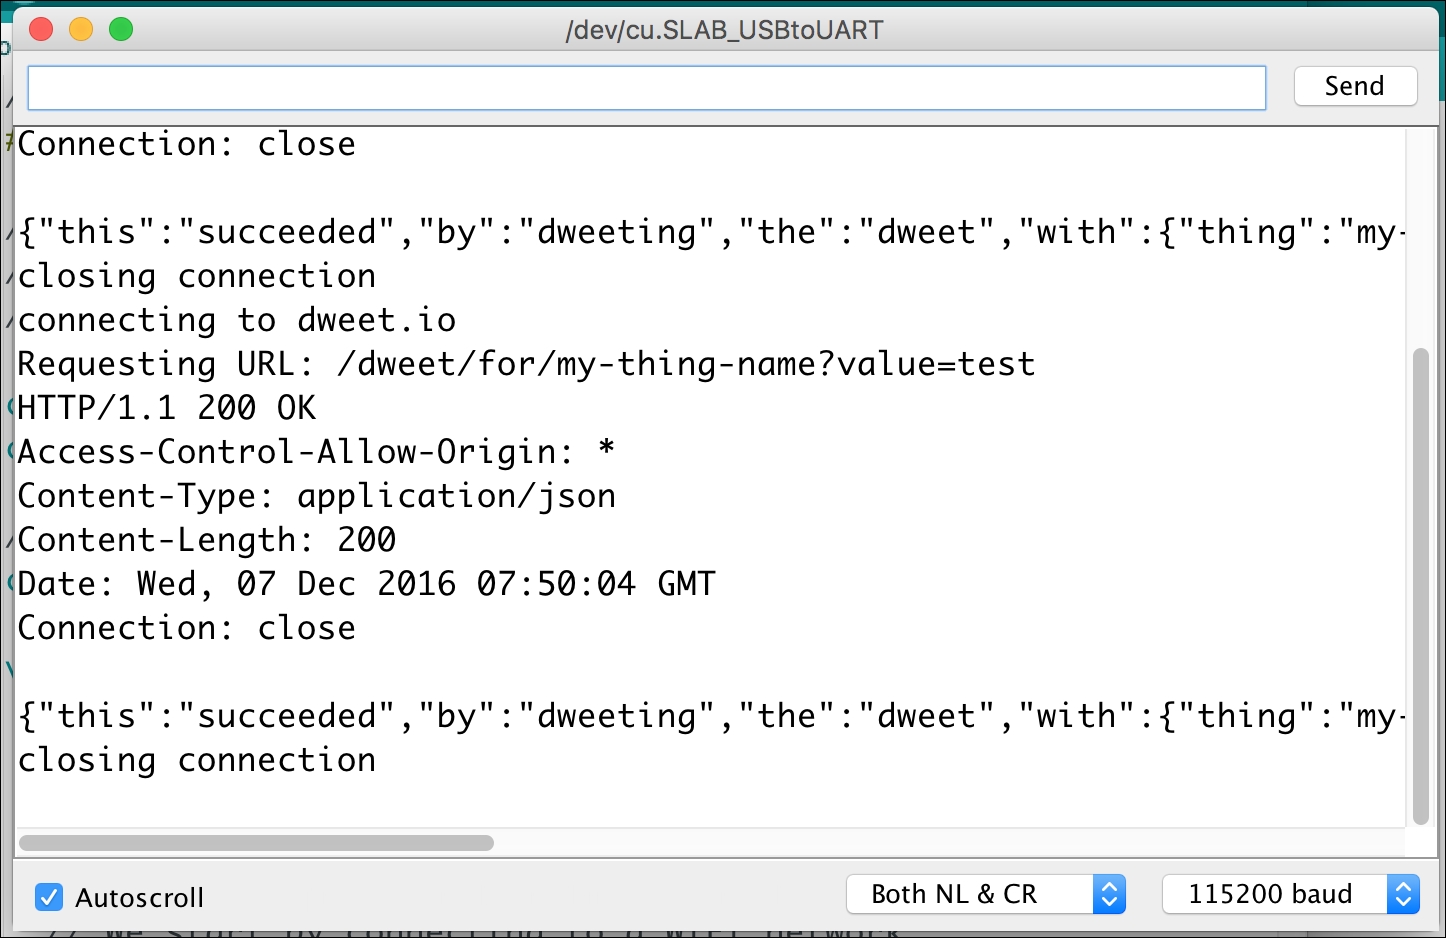
The serial monitor should display data, as shown in the following screenshot:

As you can see from the serial monitor, when you send the GET request to dweet.io you receive a reply from the server. The reply is enclosed in curly brackets {}.
How it works…
The program connects to the Wi-Fi network using the provided password and SSID. It then proceeds to connect to the provided cloud/host server using the client.connect() function, and sends the provided URI to the host server using the client.print() function.
Once the data has been successfully sent, the sketch waits for a reply from the server. It does this with the client.available() function, which checks whether there is incoming data from the server. If there is data available, the sketch reads it and displays it on the serial monitor. The process is repeated until the ESP8266 is turned off.
There's more…
Since you have understood how to connect the ESP8266 to a cloud server, see if you can change the sketch so that it connects to the www.google.com host server and searches for the word Arduino. The results from the server should be displayed on the serial monitor.
Tip
Hint: You can check out the following link to see the format for Google GET requests:
See also
You can now continue to the next recipe and look at some of the common issues that you may face when using your ESP8266 and how you can solve them.


