Search icon CANCEL
Arrow left icon
Explore Products
Best Sellers
New Releases
Books
Videos
Audiobooks
Learning Hub
Conferences
Free Learning
Arrow right icon
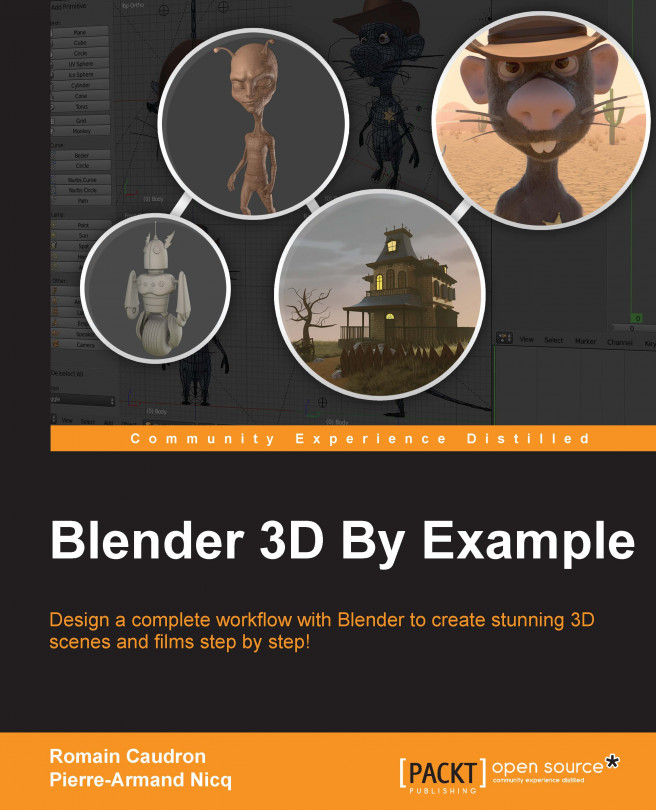
Blender 3D By Example

Blender 3D By Example: Design a complete workflow with Blender to create stunning 3D scenes and films step-by-step!

Arrow left icon
Profile Icon Caudron Profile Icon Pierre-Armand Nicq
Arrow right icon
$27.98 $39.99
Full star icon Full star icon Full star icon Half star icon Empty star icon 3.9 (19 Ratings)
eBook Sep 2015 334 pages 1st Edition
eBook
$27.98 $39.99
Paperback
$48.99
Subscription
Free Trial
Renews at $19.99p/m
eBook
$27.98 $39.99
Paperback
$48.99
Subscription
Free Trial
Renews at $19.99p/m

What do you get with eBook?

Product feature icon Instant access to your Digital eBook purchase
Product feature icon Download this book in EPUB and PDF formats
Product feature icon Access this title in our online reader with advanced features
Product feature icon DRM FREE - Read whenever, wherever and however you want
Table of content icon View table of contents Preview book icon Preview Book

Blender 3D By Example

Chapter 1. Straight into Blender!

Welcome to the first chapter, in which you will start getting familiar with Blender.

Here, navigation within the interface will be presented. Its approach is atypical in comparison to other 3D software, such as Autodesk Maya® or Autodesk 3DS Max®, but once you get used to this, it will be extremely effective.

If you have had the opportunity to use Blender before, it is important to note that the interface went through changes during the evolution of the software (especially since version 2.5).

We will give you an idea of the possibilities that this wonderful free and open source software gives by presenting different workflows. You will learn some vocabulary and key concepts of 3D creation so that you will not to get lost during your learning.

Finally, you will have a brief introduction to the projects that we will carry out throughout this book.

Let's dive into the third dimension! The following topics will be covered in this chapter:

  • Learning some theory and vocabulary
  • Navigating the 3D viewport
  • How to set up preferences
  • Using keyboard shortcuts to save time

An overview of the 3D workflow

Before learning how to navigate the Blender interface, we will give you a short introduction to the 3D workflow.

The anatomy of a 3D scene

To start learning about Blender, you need to understand some basic concepts. Don't worry, there is no need to have special knowledge in mathematics or programming to create beautiful 3D objects; it only requires curiosity. Some artistic notions are a plus.

All 3D elements, which you will handle, will evolve in to a scene. There is a three-dimensional space with a coordinate system composed of three axes. In Blender, the x axis shows the width, y axis shows the depth, and the z axis shows the height. Some softwares use a different approach and reverses the y and z axes. These axes are color-coded, we advise you to remember them: the x axis in red, the y axis in green and the z axis in blue.

A scene may have the scale you want and you can adjust it according to your needs. This looks like a film set for a movie. A scene can be populated by one or more cameras, lights, models, rigs, and many other elements. You will have the control of their placement and their setup.

The anatomy of a 3D scene

A 3D scene looks like a film set.

A mesh is made of vertices, edges, and faces. The vertices are some points in the scene space that are placed at the end of the edges. They could be thought of as 3D points in space and the edges connect them. Connected together, the edges and the vertices form a face, also called a polygon. It is a geometric plane, which has several sides as its name suggests.

In 3D software, a polygon is constituted of at least three sides. It is often essential to favor four-sided polygons during modeling for a better result. You will have an opportunity to see this in more detail later.

Your actors and environments will be made of polygonal objects, or more commonly called as meshes. If you have played old 3D games, you've probably noticed the very angular outline of the characters; it was, in fact, due to a low count of polygons.

We must clarify that the orientation of the faces is important for your polygon object to be illuminated. Each face has a normal. This is a perpendicular vector that indicates the direction of the polygon. In order for the surface to be seen, it is necessary that the normals point to the outside of the model. Except in special cases where the interior of a polygonal object is empty and invisible. You will be able to create your actors and environment as if you were handling virtual clay to give them the desired shape.

The anatomy of a 3D scene

Anatomy of a 3D Mesh

To make your characters presentable, you will have to create their textures, which are 2D images that will be mapped to the 3D object. UV coordinates will be necessary in order to project the texture onto the mesh. Imagine an origami paper cube that you are going to unfold. This is roughly the same. These details are contained in a square space with the representation of the mesh laid flat. You can paint the texture of your model in your favorite software, even in Blender.

The anatomy of a 3D scene

This is the representation of the UV mapping process. The texture on the left is projected to the 3D model on the right.

After this, you can give the illusion of life to your virtual actors by animating them. For this, you will need to place animation keys spaced on the timeline. If you change the state of the object between two keyframes, you will get the illusion of movement—animation. To move the characters, there is a very interesting process that uses a bone system, mimicking the mechanism of a real skeleton. Your polygon object will be then attached to the skeleton with a weight assigned to the vertices on each bone, so if you animate the bones, the mesh components will follow them.

Once your characters, props, or environment are ready, you will be able to choose a focal length and an adequate framework for your camera.

In order to light your scene, the choice of the render engine will be important for the kind of lamps to use, but usually there are three types of lamps as used in cinema productions. You will have to place them carefully. There are directional lights, which behave like the sun and produce hard shadows. There are omnidirectional lights, which will allow you to simulate diffuse light, illuminating everything around it and casting soft shadows. There are also spots that will simulate a conical shape. As in the film industry or other imaging creation fields, good lighting is a must-have in order to sell the final picture. Lighting is an expressive and narrative element that can magnify your models, or make them irrelevant.

Once everything is in place, you are going to make a render. You will have a choice between a still image and an animated sequence. All the given parameters with the lights and materials will be calculated by the render engine. Some render engines offer an approach based on physics with rays that are launched from the camera. Cycles is a good example of this kind of engine and succeed in producing very realistic renders. Others will have a much simpler approach, but none less technically based on visible elements from the camera.

All of this is an overview of what you will be able to achieve while reading this book and following along with Blender.

What can you do with Blender?

In addition to being completely free and open source, Blender is a powerful tool that is stable and with an integral workflow that will allow you to understand your learning of 3D creation with ease. Software updates are very frequent; they fix bugs and, more importantly, add new features.

You will not feel alone as Blender has an active and passionate community around it. There are many sites providing tutorials, and an official documentation detailing the features of Blender.

You will be able to carry out everything you need in Blender, including things that are unusual for a 3D package such as concept art creation, sculpting, or digital postproduction, which we have not yet discussed, including compositing and video editing. This is particularly interesting in order to push the aesthetics of your future images and movies to another level.

It is also possible to make video games. Also, note that the Blender game engine is still largely unknown and underestimated. Although this aspect of the software is not as developed as other specialized game engines, it is possible to make good quality games without switching to another software.

You will realize that the possibilities are enormous, and you will be able to adjust your workflow to suit your needs and desires.

Software of this type could scare you by its unusual handling and its complexity, but you'll realize that once you have learned its basics, it is really intuitive in many ways.

Getting used to the navigation in Blender

Now that you have been introduced to the 3D workflow, you will learn how to navigate the Blender interface, starting with the 3D viewport.

An introduction to the navigation of the 3D Viewport

It is time to learn how to navigate in the Blender viewport. The viewport represents the 3D space, in which you will spend most of your time. As we previously said, it is defined by three axes (x, y, and z). Its main goal is to display the 3D scene from a certain point of view while you're working on it.

An introduction to the navigation of the 3D Viewport

The Blender 3D Viewport

When you are navigating through this, it will be as if you were a movie director but with special powers that allow you to film from any point of view.

The navigation is defined by three main actions: pan, orbit, and zoom. The pan action means that you will move horizontally or vertically according to your current point of view. If we connect that to our cameraman metaphor, it's like if you were moving laterally to the left, or to the right, or moving up or down with a camera crane.

By default, in Blender the shortcut to pan around is to press the Shift button and the Middle Mouse Button (MMB), and drag the mouse.

The orbit action means that you will rotate around the point that you are focusing on. For instance, imagine that you are filming a romantic scene of two actors and that you rotate around them in a circular manner. In this case, the couple will be the main focus. In a 3D scene, your main focus would be a 3D character, a light, or any other 3D object.

To orbit around in the Blender viewport, the default shortcut is to press the MMB and then drag the mouse.

The last action that we mentioned is zoom. The zoom action is straightforward. It is the action of moving our point of view closer to an element or further away from an element.

In Blender, you can zoom in by scrolling your mouse wheel up and zoom out by scrolling your mouse wheel down.

To gain time and precision, Blender proposes some predefined points of view. For instance, you can quickly go in a top view by pressing the numpad 7, you can also go in a front view by pressing the numpad 1, you can go in a side view by pressing the numpad 3, and last but not least, the numpad 0 allows you to go in Camera view, which represents the final render point of the view of your scene.

You can also press the numpad 5 in order to activate or deactivate the orthographic mode. The orthographic mode removes perspective. It is very useful if you want to be precise. It feels as if you were manipulating a blueprint of the 3D scene.

An introduction to the navigation of the 3D Viewport

The difference between Perspective (left) and Orthographic (right)

If you are lost, you can always look at the top left corner of the viewport in order to see in which view you are, and whether the orthographic mode is on or off.

Try to learn by heart all these shortcuts; you will use them a lot. With repetition, this will become a habit.

What are editors?

In Blender, the interface is divided into subpanels that we call editors; even the menu bar where you save your file is an editor. Each editor gives you access to tools categorized by their functionality. You have already used an editor, the 3D view. Now it's time to learn more about the editor's anatomy.

What are editors?

In this picture, you can see how Blender is divided into editors

The anatomy of an editor

There are 17 different editors in Blender and they all have the same base. An editor is composed of a Header, which is a menu that groups different options related to the editor. The first button of the header is to switch between other editors. For instance, you can replace the 3D view by the UV/Image Editor by clicking on it. You can easily change its place by right-clicking on it in an empty space and by choosing the Flip to Top/Bottom option.

The header can be hidden by selecting its top edge and by pulling it down. If you want to bring it back, press the little plus sign at the far right.

The anatomy of an editor

The header of the 3D viewport. The first button is for switching between editors, and also, we can choose between different options in the menu

In some editors, you can get access to hidden panels that give you other options. For instance, in the 3D view you can press the T key or the N key to toggle them on or off. As in the header, if a sub panel of an editor is hidden, you can click on the little plus sign to display it again.

Split, Join, and Detach

Blender offers you the possibility of creating editors where you want. To do this, you need to right-click on the border of an editor and select Split Area in order to choose where to separate them.

Split, Join, and Detach

Right-click on the border of an editor to split it into two editors

The current editor will then be split in two editors. Now you can switch to any other editor that you desire by clicking on the first button of the header bar. If you want to merge two editors into one, you can right-click on the border that separates them and select the Join Area button. You will then have to click on the editor that you want to erase by pointing the arrow on it.

Split, Join, and Detach

Use the Join Area option to join two editors together

You then have to choose which editor you want to remove by pointing and clicking on it.

Split, Join, and Detach

We are going to see another method of splitting editors that is nice. You can drag the top right corner of an editor and another editor will magically appear! If you want to join back two editors together, you will have to drag the top right corner in the direction of the editor that you want to remove. The last manipulation can be tricky at first, but with a little bit of practice, you will be able to do it closed eyes!

Split, Join, and Detach

The top right corner of an editor

If you have multiple monitors, it could be a great idea to detach some editors in a separated window. With this, you could gain space and won't be overwhelmed by a condensed interface. In order to do this, you will need to press the Shift key and drag the top right corner of the editor with the Left Mouse Button (LMB).

Some useful layout presets

Blender offers you many predefined layouts that depend on the context of your creation. For instance, you can select the Animation preset in order to have all the major animation tools, or you can use the UV Editing preset in order to prepare your texturing. To switch between the presets, go to the top of the interface (in the Info editor, near the Help menu) and click on the drop-down menu. If you want, you can add new presets by clicking on the plus sign or delete presets by clicking on the X button. If you want to rename a preset, simply enter a new name in the corresponding text field. The following screenshot shows the Layout presets drop-down menu:

Some useful layout presets

The layout presets drop-down menu

Setting up your preferences

When we start learning new software, it's good to know how to set up your preferences. Blender has a large number of options, but we will show you just the basic ones in order to change the default navigation style or to add new tools that we call add-ons in Blender.

An introduction to the Preferences window

The preferences window can be opened by navigating to the File menu and selecting the User Preferences option. If you want, you can use the Ctrl + Alt + U shortcut or the Cmd key and comma key on a Mac system.

There are seven tabs in this window as shown here:

An introduction to the Preferences window

The different tabs that compose the Preferences window

A nice thing that Blender offers is the ability to change its default theme. For this, you can go to the Themes tab and choose between different presets or even change the aspect of each interface elements.

Another useful setting to change is the number of undo that is 32 steps, by default. To change this number, go to the Editing tab and under the Undo label, slide the Steps to the desired value.

Customizing the default navigation style

We will now show you how to use a different style of navigation in the viewport. In many other 3D programs, such as Autodesk Maya®, you can use the Alt key in order to navigate in the 3D view. In order to activate this in Blender, navigate to the Input tab, and under the Mouse section, check the Emulate 3 Button Mouse option. Now if you want to use this navigation style in the viewport, you can press Alt and LMB to orbit around, Ctrl + Alt and the LMB to zoom, and Alt + Shift and the LMB to pan. Remember these shortcuts as they will be very useful when we enter the sculpting mode while using a pen tablet. The Emulate 3 Button Mouse checkbox is shown as follows:

Customizing the default navigation style

The Emulate 3 Button Mouse will be very useful when sculpting using a pen tablet

Another useful setting is the Emulate Numpad. It allows you to use the numeric keys that are above the QWERTY keys in addition to the numpad keys. This is very useful for changing the views if you have a laptop without a numpad, or if you want to improve your workflow speed.

Customizing the default navigation style

The Emulate Numpad allows you to use the numeric keys above the QWERTY keys in order to switch views or toggle the perspective on or off

Improving Blender with add-ons

If you want even more tools, you can install what is called as add-ons on your copy of Blender. Add-ons, also called Plugins or Scripts, are Python files with the .py extension. By default, Blender comes with many disabled add-ons ordered by category. We will now activate two very useful add-ons that will improve our speed while modeling. First, go to the Add-ons tab, and click on the Mesh button in the category list at the left. Here, you will see all the default mesh add-ons available. Click on the check-boxes at the left of the Mesh: F2 and Mesh: LoopTools subpanels in order to activate these add-ons. If you know the name of the add-on you want to activate, you can try to find it by typing its name in the search bar. There are many websites where you can download free add-ons, starting from the official Blender website. If you want to install a script, you can click on the Install from File button and you will be asked to select the corresponding Python file.

Note

The official Blender Add-ons Catalog

You can find it at http://wiki.blender.org/index.php/Extensions:2.6/Py/Scripts.

The following screenshot shows the steps for activating the add-ons:

Improving Blender with add-ons

Steps for Add-ons activation

Note

Where are the add-ons on the hard-disk?

All the scripts are placed in the add-ons folder that is located wherever you have installed Blender on your hard disk. This folder will usually be at Your Installation Path\Blender Foundation\Blender\2.VersionNumber\scripts\addons.

If you find it easier, you can drop the Python files here instead of at the standard installation.

Don't forget to click on the Save User Settings button in order to save all your changes!

A brief introduction to the projects

You will now be introduced to the fun projects that we will do together during each of the later chapters. You will need practice to improve your skills.

The Robot Toy

In this project, you will follow step by step the modeling of a little Robot Toy, starting from a simple cube primitive. This old school mechanic robot will make you re-live your childhood. The goal of this chapter is to teach you the modeling process in Blender. You will gain a good overview of the main modeling tools, such as extrude or loop cut. On the other hand, you will discover what a good workflow is by creating your model according to a reference.

The Alien Character

This project will be exciting! We think you will have enough experience to start learning how to create your own alien character using the sculpting tools of Blender. During the project, you will encounter a new modeling process by creating a base mesh for sculpting. After this, you will understand how to retopologize and keep the details of that sculpt. It will be divided into two parts: the sculpting and the retopology process.

The Haunted House

The Haunted House is a nice but scary little house in the middle of the Pennsylvania...Booooohhhhhhhoooohhh! The legend says that it is haunted by thousands of spectrums. In this project, divided into three parts, you will start by modeling the house and its environment while discovering new modeling techniques, such as the array modifier. After completing the modeling, you will learn how to use the powerful Blender texturing and UV tools in order to add colors to your meshes. Finally, you will use the Cycles nodal editor in order to create materials with the textures previously made. After reading the corresponding chapters, you will have a good understanding of how a full 3D scene is constructed and how to organize yourself for such a big task.

The Rat Cowboy

The Rat Cowboy and the story of the holes in the cheese will be your first animated sequence. It will be a nice starting point to learn more about rigging and animation. The Rat will face a piece of cheese pinched under a rat trap, and he will unsheathe his gun to shoot the cheese. The Gruyère cheese is born. In order to produce a polished final shot, you will learn some compositing tricks and how to render the sequence with Cycles.

Summary

In this chapter, you have learned the steps behind 3D creations. You know what a mesh is and what it is composed of. Then you have been introduced to navigation in Blender by manipulating the 3D viewport and going through the user preference menu. In the later sections, you configured some preferences and extended Blender by activating some add-ons.

You are now ready to start the 3D modeling of our Robot Toy project.

Left arrow icon Right arrow icon

Description

Blender is a powerful tool, stable, with an integral workflow that will allow you to understand your learning of 3D creation with serenity. Today, it is considered to be one of the most complete 3D packages on the market and it is free and open source! It is very efficient for many types of productions, such as 3D animated or live action films, architecture, research, or even game creation with its integrated game engine and its use of the Python language. Moreover, Blender has an active community that contributes to expanding its functionalities. Today, it is used in many professional products and by many companies. Through this book, you will create many types of concert projects using a step-by-step approach. You will start by getting to know the modeling tools available in Blender as you create a 3D robot toy. Then, you will discover more advanced techniques such as sculpting and re-topology by creating a funny alien character. After that, you will create a full haunted house scene. For the last project, you will create a short film featuring a rat cowboy shooting cheese in a rat trap! This will be a more complex project in which you learn how to rig, animate, compose advanced material, composite, and edit a full sequence. Each project in this book will give you more practice and increase your knowledge of the Blender tools. By the end of this book, you will master a workflow that you will be able to apply to your own creations.

What you will learn

  • Understand the basics of 3D and how to navigate your way around the Blender interface
  • Create a 3D robot toy model from start to finish using the basic modeling tools of Blender
  • Make a full alien character using the skin mesh modifier and the sculpting tools with an artistic approach
  • Use retopology techniques to create a clean 3D version of the previously sculpted alien
  • Model a full haunted house and its environment using more advanced modeling tools and techniques such as the Array Modifier, Instance duplication, or Curves
  • Discover the power of the texture paint tool in order to add color to the haunted house
  • Get to know the Cycles render engine by creating different materials for the house and the environment

Product Details

Country selected
Publication date, Length, Edition, Language, ISBN-13
Publication date : Sep 25, 2015
Length: 334 pages
Edition : 1st
Language : English
ISBN-13 : 9781785280245
Vendor :
Blender Foundation
Tools :

What do you get with eBook?

Product feature icon Instant access to your Digital eBook purchase
Product feature icon Download this book in EPUB and PDF formats
Product feature icon Access this title in our online reader with advanced features
Product feature icon DRM FREE - Read whenever, wherever and however you want

Product Details

Publication date : Sep 25, 2015
Length: 334 pages
Edition : 1st
Language : English
ISBN-13 : 9781785280245
Vendor :
Blender Foundation
Tools :

Packt Subscriptions

See our plans and pricing
Modal Close icon
$19.99 billed monthly
Feature tick icon Unlimited access to Packt's library of 7,000+ practical books and videos
Feature tick icon Constantly refreshed with 50+ new titles a month
Feature tick icon Exclusive Early access to books as they're written
Feature tick icon Solve problems while you work with advanced search and reference features
Feature tick icon Offline reading on the mobile app
Feature tick icon Simple pricing, no contract
$199.99 billed annually
Feature tick icon Unlimited access to Packt's library of 7,000+ practical books and videos
Feature tick icon Constantly refreshed with 50+ new titles a month
Feature tick icon Exclusive Early access to books as they're written
Feature tick icon Solve problems while you work with advanced search and reference features
Feature tick icon Offline reading on the mobile app
Feature tick icon Choose a DRM-free eBook or Video every month to keep
Feature tick icon PLUS own as many other DRM-free eBooks or Videos as you like for just $5 each
Feature tick icon Exclusive print discounts
$279.99 billed in 18 months
Feature tick icon Unlimited access to Packt's library of 7,000+ practical books and videos
Feature tick icon Constantly refreshed with 50+ new titles a month
Feature tick icon Exclusive Early access to books as they're written
Feature tick icon Solve problems while you work with advanced search and reference features
Feature tick icon Offline reading on the mobile app
Feature tick icon Choose a DRM-free eBook or Video every month to keep
Feature tick icon PLUS own as many other DRM-free eBooks or Videos as you like for just $5 each
Feature tick icon Exclusive print discounts

Frequently bought together


Stars icon
Total $ 158.97
Blender 3D By Example
$48.99
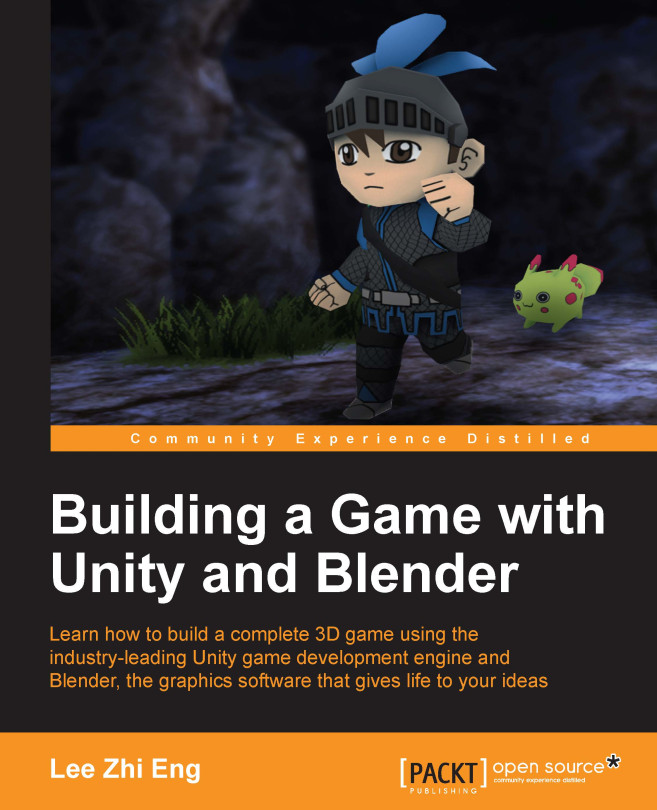
Building a Game with Unity and Blender
$48.99
Blender 3D Cookbook
$60.99
Total $ 158.97 Stars icon

Table of Contents

11 Chapters
1. Straight into Blender! Chevron down icon Chevron up icon
2. Robot Toy – Modeling of an Object Chevron down icon Chevron up icon
3. Alien Character – Base Mesh Creation and Sculpting Chevron down icon Chevron up icon
4. Alien Character – Creating a Proper Topology and Transferring the Sculpt Details Chevron down icon Chevron up icon
5. Haunted House – Modeling of the Scene Chevron down icon Chevron up icon
6. Haunted House – Putting Colors on It Chevron down icon Chevron up icon
7. Haunted House – Adding Materials and Lights in Cycles Chevron down icon Chevron up icon
8. Rat Cowboy – Learning To Rig a Character for Animation Chevron down icon Chevron up icon
9. Rat Cowboy – Animate a Full Sequence Chevron down icon Chevron up icon
10. Rat Cowboy – Rendering, Compositing, and Editing Chevron down icon Chevron up icon
Index Chevron down icon Chevron up icon

Customer reviews

Top Reviews
Rating distribution
Full star icon Full star icon Full star icon Half star icon Empty star icon 3.9
(19 Ratings)
5 star 47.4%
4 star 15.8%
3 star 21.1%
2 star 10.5%
1 star 5.3%
Filter icon Filter
Top Reviews

Filter reviews by


pierre parenteau Apr 23, 2017
Full star icon Full star icon Full star icon Full star icon Full star icon 5
tres bon
Amazon Verified review Amazon
martin lawrence Nov 08, 2015
Full star icon Full star icon Full star icon Full star icon Full star icon 5
I've bought this as I'm skilled with the basics and this has helped me broaden my skills to cover new areas within the program
Amazon Verified review Amazon
Theresa M Mason Feb 17, 2016
Full star icon Full star icon Full star icon Full star icon Full star icon 5
Gift for my husband for Christmas and he loves it!!!
Amazon Verified review Amazon
Carles Nov 12, 2015
Full star icon Full star icon Full star icon Full star icon Full star icon 5
This book covers everything you can do with Blender the best way, using plenty of examples and going through them very precisely not giving anything for already known.The book is long (almost took me 3 weeks to read on my spare time) but never gets boring.It starts with a brief introduction to the workflow and then continues with the part anyone sure enjoys the most: several examples which cover different tools and design paths.After being already confident with the tool, this beefy part allow you to deliver all your creativity implementing the different case scenarios and having lots of fun while you learn at the same time.The only drawback for tight budgets is that it could be a little pricey but imho the book it's worth its value.
Amazon Verified review Amazon
Perry Nally Nov 06, 2015
Full star icon Full star icon Full star icon Full star icon Full star icon 5
This book is amazing! I've read a few other Blender books and they all incorporate similar features. But this book goes a step further and teaches you animation, modeling, rigging, texturing, sculpting, lighting, particles, fur, grass, trees, rocks, character design, compositing, shape keys for your rig, and all the rest of the tools blender offers in such a way that it also adds principles of good techniques. For instance, you'll learn traditional principles of animation, how to write a script for your fully animated scene, what story boarding is and how to create them, and using the video sequence editor to complete the full animation of your sequences. There is an amazing amount of great information within these pages. You will learn very useful and current techniques on how to create a 3D animated sequence from scratch. I wish I had this book a few years ago.I am a mobile game developer (and a bunch of other things), and I often need 3D objects for my games. This book has given me the knowledge that I was looking for to create assets for my games. Sure it doesn't go into things like exporting for games, but it does discuss things like creating a re-topology of a high resolution model and correct UV mapping. Tons of other things too that help me inadvertently. I still needed things like creating an animated short and still images, so this is perfect.This really is your one stop shop for using blender if you are new to the blender world, and even a good reference book if you are familiar with blender already. Sure there will be more advanced feature that you'll need to learn that this book does not have, but the fact that this book even goes into subsurface scattering (SSS) in advanced textures and how to create grass and fur, tells you that this is not just a simple beginner's book, you'll learn it all including adjusting the cycles renderer to make great films. I'm so glad I read this book, and so will you.
Amazon Verified review Amazon
Get free access to Packt library with over 7500+ books and video courses for 7 days!
Start Free Trial

FAQs

How do I buy and download an eBook? Chevron down icon Chevron up icon

Where there is an eBook version of a title available, you can buy it from the book details for that title. Add either the standalone eBook or the eBook and print book bundle to your shopping cart. Your eBook will show in your cart as a product on its own. After completing checkout and payment in the normal way, you will receive your receipt on the screen containing a link to a personalised PDF download file. This link will remain active for 30 days. You can download backup copies of the file by logging in to your account at any time.

If you already have Adobe reader installed, then clicking on the link will download and open the PDF file directly. If you don't, then save the PDF file on your machine and download the Reader to view it.

Please Note: Packt eBooks are non-returnable and non-refundable.

Packt eBook and Licensing When you buy an eBook from Packt Publishing, completing your purchase means you accept the terms of our licence agreement. Please read the full text of the agreement. In it we have tried to balance the need for the ebook to be usable for you the reader with our needs to protect the rights of us as Publishers and of our authors. In summary, the agreement says:

  • You may make copies of your eBook for your own use onto any machine
  • You may not pass copies of the eBook on to anyone else
How can I make a purchase on your website? Chevron down icon Chevron up icon

If you want to purchase a video course, eBook or Bundle (Print+eBook) please follow below steps:

  1. Register on our website using your email address and the password.
  2. Search for the title by name or ISBN using the search option.
  3. Select the title you want to purchase.
  4. Choose the format you wish to purchase the title in; if you order the Print Book, you get a free eBook copy of the same title. 
  5. Proceed with the checkout process (payment to be made using Credit Card, Debit Cart, or PayPal)
Where can I access support around an eBook? Chevron down icon Chevron up icon
  • If you experience a problem with using or installing Adobe Reader, the contact Adobe directly.
  • To view the errata for the book, see www.packtpub.com/support and view the pages for the title you have.
  • To view your account details or to download a new copy of the book go to www.packtpub.com/account
  • To contact us directly if a problem is not resolved, use www.packtpub.com/contact-us
What eBook formats do Packt support? Chevron down icon Chevron up icon

Our eBooks are currently available in a variety of formats such as PDF and ePubs. In the future, this may well change with trends and development in technology, but please note that our PDFs are not Adobe eBook Reader format, which has greater restrictions on security.

You will need to use Adobe Reader v9 or later in order to read Packt's PDF eBooks.

What are the benefits of eBooks? Chevron down icon Chevron up icon
  • You can get the information you need immediately
  • You can easily take them with you on a laptop
  • You can download them an unlimited number of times
  • You can print them out
  • They are copy-paste enabled
  • They are searchable
  • There is no password protection
  • They are lower price than print
  • They save resources and space
What is an eBook? Chevron down icon Chevron up icon

Packt eBooks are a complete electronic version of the print edition, available in PDF and ePub formats. Every piece of content down to the page numbering is the same. Because we save the costs of printing and shipping the book to you, we are able to offer eBooks at a lower cost than print editions.

When you have purchased an eBook, simply login to your account and click on the link in Your Download Area. We recommend you saving the file to your hard drive before opening it.

For optimal viewing of our eBooks, we recommend you download and install the free Adobe Reader version 9.