Search icon CANCEL
Subscription
0
Cart icon
Your Cart (0 item)
Close icon
You have no products in your basket yet
Save more on your purchases! discount-offer-chevron-icon
Savings automatically calculated. No voucher code required.
Arrow left icon
Explore Products
Best Sellers
New Releases
Books
Videos
Audiobooks
Learning Hub
Newsletter Hub
Free Learning
Arrow right icon
timer SALE ENDS IN
0 Days
:
00 Hours
:
00 Minutes
:
00 Seconds
Arrow up icon
GO TO TOP
3D Game Design with Unreal Engine 4 and Blender

You're reading from   3D Game Design with Unreal Engine 4 and Blender Combine the powerful UE4 with Blender to create visually appealing and comprehensive game environments

Arrow left icon
Product type Paperback
Published in Jun 2016
Publisher Packt
ISBN-13 9781785881466
Length 252 pages
Edition 1st Edition
Tools
Arrow right icon
Author (1):
Arrow left icon
Jessica Plowman Jessica Plowman
Author Profile Icon Jessica Plowman
Jessica Plowman
Arrow right icon
View More author details
Toc

Table of Contents (11) Chapters Close

Preface 1. Unreal, My Friend, I'd Like You to Meet Blender FREE CHAPTER 2. Starting Our First Project 3. It's Time to Customize! 4. Getting the Assets to the Level 5. Taking This Level Up a Notch 6. Monster Assets – The Level Totally Needs One of These 7. Let's Dress to Impress! 8. Lights, Camera, Animation! 9. Bang Bang – Let's Make It Explode Index

Using multiple shapes within Blender


To begin building our object, we need to break our design down into its individual pieces and decide on a primitive shape to start building each part. The bottom section looks like a cylinder. The lid looks like the top portion of a sphere split in two. The gears and pistons that make up the locking mechanism definitely look like cylinders and the legs could start that way too.

Tip

Don't forget to set up your file with the appropriate settings like we did in Chapter 3, It's Time to Customize!

Now, let's start with a cylinder:
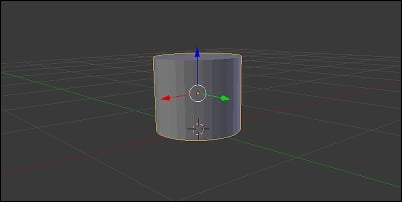
Starting with a cylinder

Let's start the build with the bottom of the object:

  1. Delete the starting objects from the scene, if you have them. Go to the Add menu located at the bottom of the 3D viewport, go to Mesh, and select Cylinder from the options. In the bottom of the Tools pane, you can see the options for our newly created Cylinder. Set the Sides to 24 (using just enough sides to stay round), set the Radius to 60, and the Depth to...

lock icon The rest of the chapter is locked
Register for a free Packt account to unlock a world of extra content!
A free Packt account unlocks extra newsletters, articles, discounted offers, and much more. Start advancing your knowledge today.
Unlock this book and the full library FREE for 7 days
Get unlimited access to 7000+ expert-authored eBooks and videos courses covering every tech area you can think of
Renews at $19.99/month. Cancel anytime
Banner background image