Sharing a cloud flow
Now that you’ve got an understanding of what additional features a shared flow provides, let’s work on sharing a flow with some team members.
In this example, we’re going to take the Expense Reports flow we created in Chapter 3, Working with Email, and update it to be a shared flow:
- Log in to the Power Automate web portal (https://flow.microsoft.com) and select My flows.
- Select the Expense Reports flow you created in Chapter 3, Working with Email, and then click the share icon. You can also click the ellipsis and select Share from the context menu:

Figure 7.1: Sharing a flow
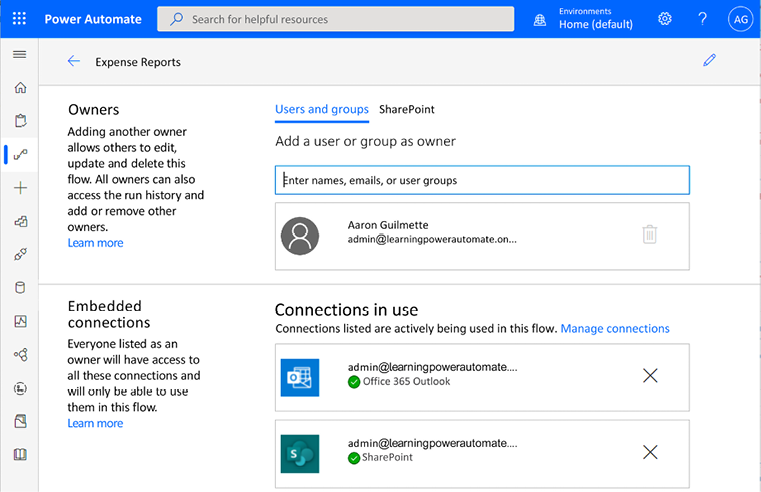
- In the Owners section, under Users and groups, begin entering the name or address of a user or group to whom you will grant access and click to select it:

Figure 7.2: Adding co-owners to a flow
- When adding new members, you’ll be prompted to click OK to acknowledge what access to the connectors...


