Scaffolding a Vue.js application
In this section, we will create a Vue.js application and connect it to the Firebase project that we created in the previous step. Make sure you have Node.js installed on your system.
You must also install Vue.js. Check out the instructions page from the official Vue documentation at https://vuejs.org/v2/guide/installation.html. Alternatively, simply run the npm install command:
$ npm install -g vue-cli
Now, everything is ready to start scaffolding our application. Go to the folder where you want your application to reside and type the following line of code:
vue init webpack please-introduce-yourself
It will ask you several questions. Just choose the default answer and hit Enter for each of them. After the initialization, you are ready to install and run your application:
cd please-introduce-yourself
npm install
npm run dev
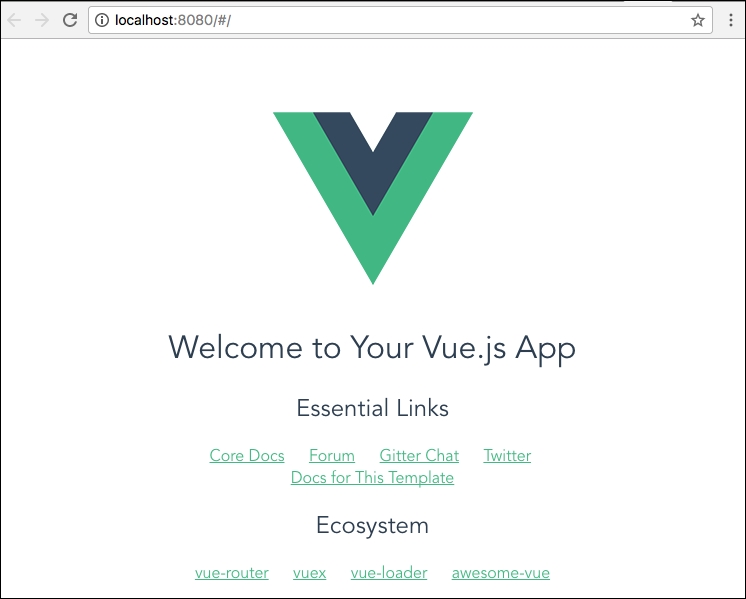
If everything is fine, the following page will automatically open in your default browser:

Default Vue.js application after installing and running
If not, check the Vue.js official installation page again.
Connecting the Vue.js application to the Firebase project
To be able to connect your application to the Firebase project, you must install Firebase and VueFire. Run the npm install command while being in the root directory of your new application:
cd please-introduce-yourself
npm install firebase vuefire --save
Now, you can use Firebase's powerful features inside your application. Let's check if it worked! We just have to do the following:
- Import Firebase
- Create a
configobject containing the Firebase app ID, project domain, database domain, and some other stuff needed to connect it to our project - Write the code that will use the Firebase API and the created
configfile to connect to the Firebase project. - Use it
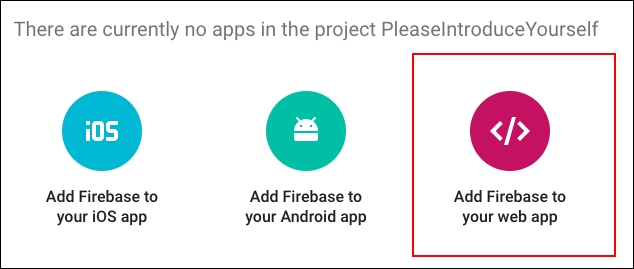
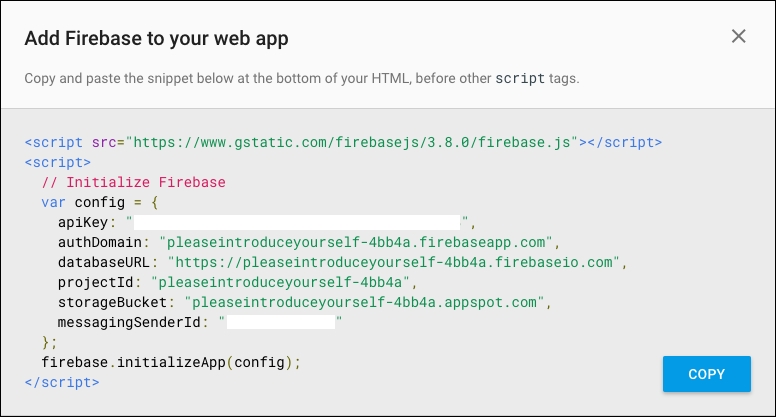
Where do we get the necessary information for the configuration of our Firebase instance? Go to the Firebase console, click on the cog to the right of the Overview tab, and select Project Settings. Now, click on the Add Firebase to your web app button:

Click on the Add Firebase to your web app button
A popup with all the information we need will open:

All the information needed for the config object is here
OK, now, just leave this popup open, go to your Vue application, and open the main.js file that resides in the src directory of your application. Here, we need to tell our Vue application that it will use VueFire. In this way, we will be able to use all the features provided by Firebase inside our application. Add the following lines to the import section of the main.js file:
//main.js
import VueFire from 'vuefire'
Vue.use(VueFire)
Great! Now, open the App.vue file. Here, we will import Firebase and initialize our Firebase application inside the Vue application. Add the following lines of code inside the <script> tags:
//App.vue
<script>
  import Firebase from 'firebase'

  let config = {
    apiKey: 'YOUR_API_KEY',
    authDomain: 'YOUR_AUTH_DOMAIN',
    databaseURL: 'YOUR_DATABASE_URL',
    projectId: 'YOUR_PROJECT_ID',
    storageBucket: 'YOUR_STORAGE_BUCKET',
    messagingSenderId: 'YOUR_MESSAGING_SENDER_ID'
  }

  let app = Firebase.initializeApp(config)
</script>
Copy what's needed for the config object information from the popup that we opened in the previous step.
Now, we will obtain the reference to our messages database object. It is pretty simple using the Firebase API:
//App.vue
<script>
  <...>
  let db = app.database()
  let messagesRef = db.ref('messages')
</script>
We're almost done. Now, we just have to export the messages object in the Vue data object so that we are able to use it inside the template section. So, inside the export section, add an entry with the firebase key and point messages to messagesRef:
export default {
  firebase: {
    messages: messagesRef
  },
}
Now, inside the <template> tag, we will use a v-for directive to iterate through the messages array and print all the information about each message. Remember that each message is composed of title, text, and timestamp. So, add the following <div> to the template:
//App.vue
<div v-for="message in messages">
  <h4>{{ message.title }}</h4>
  <p>{{ message.text }}</p>
  <p>{{ message.timestamp }}</p>
</div>
In the end, your App.vue component will look like this:
//App.vue
<template>
  <div id="app">
    <div v-for="message in messages">
      <h4>{{ message.title }}</h4>
      <p>{{ message.text }}</p>
      <p>{{ message.timestamp }}</p>
    </div>
  </div>
</template>

<script>
  import Firebase from 'firebase'

  let config = {
    apiKey: 'YOUR_API_KEY',
    authDomain: 'YOUR_AUTH_DOMAIN',
    databaseURL: 'YOUR_DATABASE_URL',
    projectId: 'YOUR_PROJECT_ID',
    storageBucket: 'YOUR_STORAGE_BUCKET',
    messagingSenderId: 'YOUR_MESSAGING_SENDER_ID'
  }

  let app = Firebase.initializeApp(config)
  let db = app.database()
  let messagesRef = db.ref('messages')
  export default {
    name: 'app',
    firebase: {
      messages: messagesRef
    }
  }
</script>
If you had chosen the default linter settings on the app initialization, the code that you will copy from Firebase and paste into your application will not pass linter. That's because the default linter settings of Vue-cli initialization would require the use of single quotes and no use of semicolon at the end of the line. By the way, Evan You is particularly proud of this no semicolon rule. So, bring him this pleasure; remove all the semicolons from the copied code and replace the double quotes with single quotes.
Aren't you curious to check out the page? If you are not running your application already, switch inside the application folder and run it:
cd please-introduce-yourself
npm run dev
I am pretty sure that you are seeing the following screenshot:

The Vue.js web application displaying the information from the Firebase database
Congratulations! You have successfully completed the first part of our tutorial, connecting the Vue.js application to the Firebase real-time database.


