Installing Salesforce CPQ
Having covered the need to implement Salesforce CPQ, as well as the advantages it offers, it is now time to install it.
Before the full implementation is deployed in the production environment, all the required configurations can be done in a test environment. The advantage of using a test environment is that deploying these configurations into production following thorough testing and approval by the business will leave little room for error. All use cases in this book will be demonstrated in a developer org using Salesforce Lightning. Let's get started.
Tip
You can skip the installation if you just need to practice CPQ configurations. Salesforce provides a pre-installed CPQ developer org for 90 days. You can get a free training org here: https://developer.salesforce.com/promotions/orgs/cpqtrails.
Before installing Salesforce CPQ, you will need to create a developer org. The developer org comes with sample data for all the Salesforce standard objects. To create a developer org, sign up here: https://developer.salesforce.com/signup. You can then verify your account via email and set up a password.
Important Note
Salesforce CPQ is a managed package and it needs to be separately installed on any Salesforce org.
Once you have created a developer org, you are ready to install Salesforce CPQ. The following steps can be followed to install CPQ in any Salesforce org:
- Log in to the Salesforce org where the CPQ package needs to be installed.
- If email deliverability is not enabled, you will not receive any email notifications. These could include notifications for the package installation status, for example, completed or failed. Before installing, make sure the email deliverability option is enabled for all users. Navigate to Setup Email Administration Deliverability Access level All email Save.
- To install Salesforce CPQ, go to https://install.steelbrick.com.
- The latest version of the CPQ package is found under the Package Installation Links tab. The current Salesforce CPQ is Spring '22 at the time of writing this book.
- In the Package Installation Links tab, under INSTALLATION LINKS, there are two options: Production and Sandbox.
- Click on the Production link to install in the production instance and click on the Sandbox link to install in the sandbox instance.
- To install the CPQ package in the developer org, click on the Production link under INSTALLATION LINKS. This will prompt the Salesforce login screen.
- Log in to the Salesforce org by providing your credentials.
- After logging in, you will be taken to the Installation screen (Upgrade Salesforce CPQ). Click on Install for All Users and then click Install.
- From here, click Approve Third-Party Access and then click Continue.
- The installation will begin, and it will take few minutes to complete. If the installation of the app takes longer, a notification will be sent to the registered email, once the installation is complete. You can close the Upgrade Salesforce CPQ installation window or leave it as is.
- Verify the installed package by logging in to your developer org or the org where you have installed the CPQ package. Navigate to Set up Installed packages Salesforce CPQ.
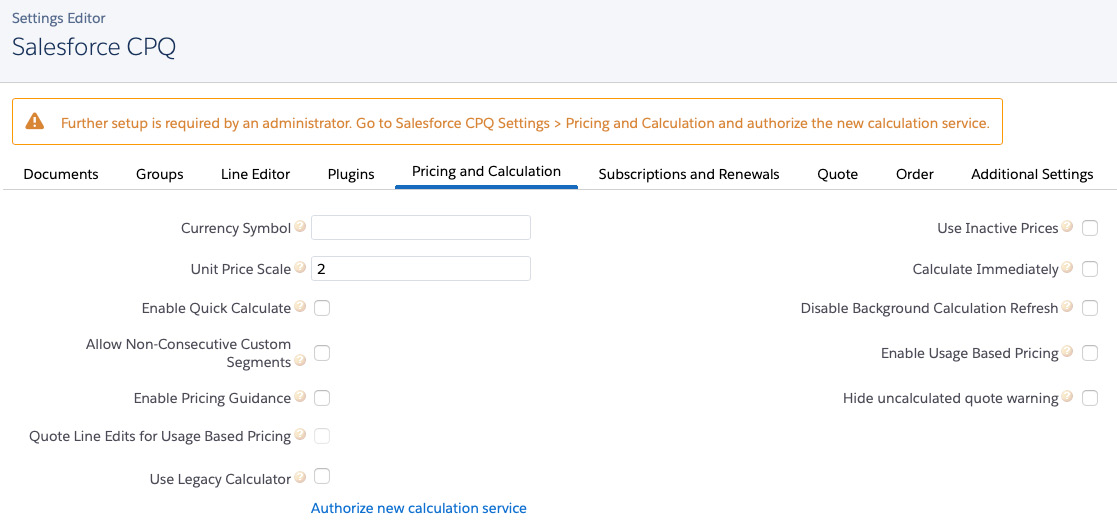
- After the package is verified, a new calculation service needs to be authorized in the CPQ package settings before configuring the CPQ automation. To do this, navigate to the Set up Installed packages Salesforce CPQ Configure Pricing and Calculation tab, and then click Authorize New Calculation Service. An Authorize new calculation service message will be displayed until the configuration is selected and completed, as shown here:

Figure 1.5 – CPQ package pricing authorization
Now that the package installation is complete, you are ready to configure CPQ as per your business requirements.


