Quick start — Creating your first tables
phpMyAdmin is all about managing MySQL tables, so this section guides you in creating a database to hold your new project, then creating two tables.
The theme for the sample tables is a grocery store, with departments and items. Of course an information system for a real grocery store would contain many more tables describing employees, suppliers, and sales but two tables will suffice for our purpose.
We suppose here that your MySQL username is sarah and that this account is allowed to create databases with the prefix sarah_.
Step 1—Creating a database
A MySQL database is a container for tables. The new database will be named sarah_grocery, assuming that the system administrator enforces the policy that all databases must have the username as a prefix. The rest of the database name consists of the project name, which here is grocery.
Currently you might be seeing one existing database, information_schema. This is not a real database but contains metadata about the whole data structure.
Log in to MySQL via phpMyadmin's login panel, with the username sarah.
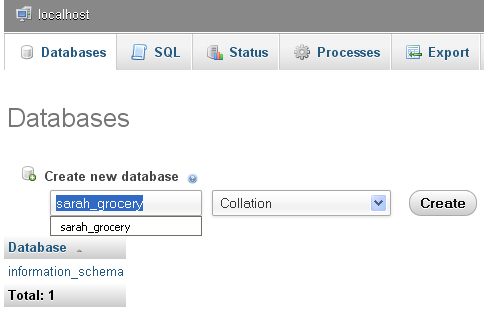
Click on the Databases menu tab.
Change the database name from sarah_.... to sarah_grocery.
Click on the Create button.
Step 2—Opening the database
You must now tell phpMyAdmin to use sarah_grocery as the current database. This way, all actions will take place in the context of this database. The easiest way to open it is by clicking on the database name from the navigation panel (which is located on the left-hand side if you are using a left-to-right language like English).
Step 3—Creating the first table
Now that you have a database to play with, it's time to create a table that will hold the description of the grocery's departments. To be able to create inter-table relations in a later task without the need for installing further phpMyAdmin elements, all the tables in this exercise will use the InnoDB storage engine—see http://www.innodb.com and http://dev.mysql.com/doc/refman/5.5/en/innodb-storage-engine.html.
InnoDB is a good choice for the storage engine, as it offers solid performance, transactions, referential integrity, and crash recovery.
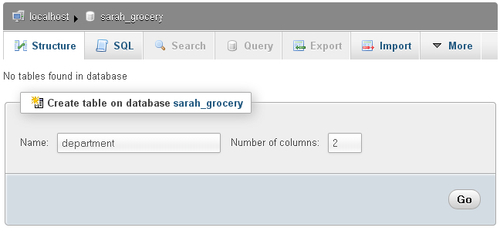
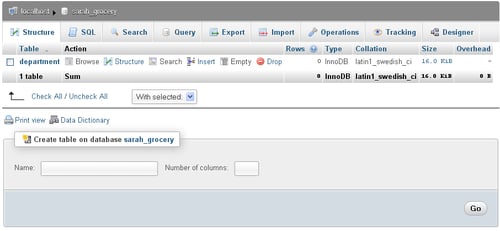
When opening a database, you are by default in its Structure page where you can see existing tables and views belonging to this database. You now use the Create table initial dialog to specify the table name and initial number of columns:
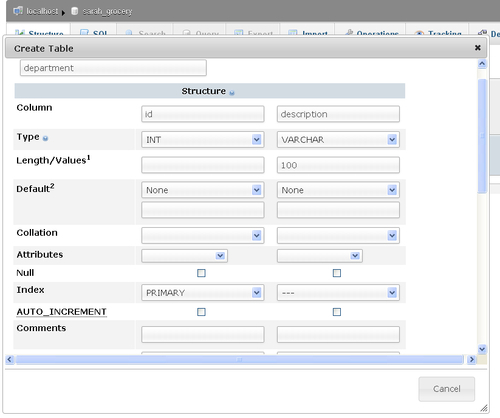
Clicking on Go brings up the columns panel where you'll create two columns, id (an integer column) and description (a variable-size character column having a maximum length of 100). The id column is marked as being the primary key.
Scrolling to the bottom of this panel and clicking Save creates the table. You now see a different Structure panel, which shows the existing table, department, on which you can apply actions, and the Create table dialog to create further tables.
Step 4—Creating the second table
You will now use your table creation skills to create the item table, containing the following columns:
id (an integer and primary key)
dept_id (an integer)
description (VARCHAR 100)
weight (an integer)
You will notice that both tables have a column id as the primary key; however, there is no risk of confusion because SQL requires using the table name in queries, such as the following:
SELECT id FROM item
Step 5—Populating the tables
You need some sample data to play with these tables. There is more than one way of inserting data into a table:
An application that programmatically inserts data
An
INSERTquery typed in phpMyAdmin's query boxAn import operation via phpMyAdmin's Import menu
An insertion via phpMyAdmin's Insert menu
In the current step you'll use the Insert menu, which can be reached from the database Structure page. Let's begin by inserting new departments; on the line for the department table, click on Insert, which brings the insertion panel. Then enter this sample data:
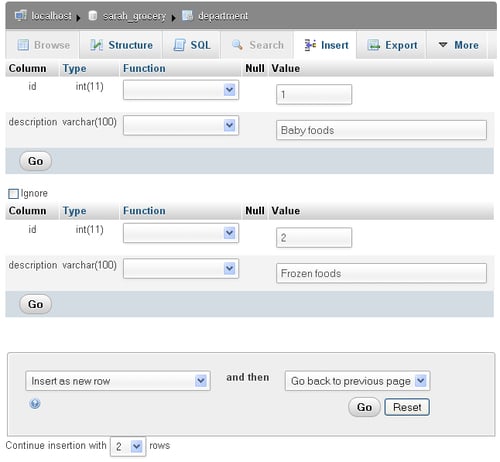
Clicking on Go generates the following query, sends it to the MySQL server and displays it on-screen—this is handy, both to reassure you about the action done and possibly to teach you SQL.
INSERT INTO `sarah_grocery`.`department` (`id` ,`description`
)
VALUES (
'1', 'Baby foods'
), (
'2', 'Frozen foods'
);
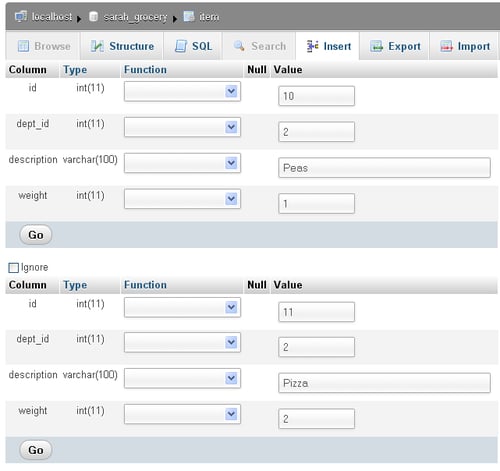
You need to also populate the item table. Here you create two items in the frozen foods department:
