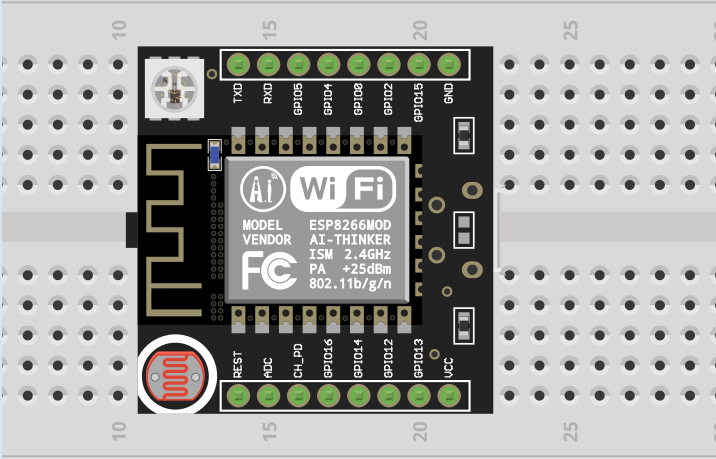
To begin this, let's evaluate the basic input and output of the Witty ESP8266 module.
The definition of pins is Light Dependent Resistor (LDR) on Witty and is attached to A0 (the analog input), the push button is connected to GPIO 4, and the LEDs are connected to GPIO 12, GPIO 13, and GPIO 15:

Delete everything that is in your Arduino IDE and replace it with the following code:
#define LDR     A0
#define BUTTON  4
#define RED     15
#define GREEN   12
#define BLUE    13
The setup section will run only once after the module is reset or powered. The serial UART is started with 115200 bps, so the messages can be seen in the Serial Monitor window, where you also need to set the same speed in the lower-right corner of the window; otherwise, weird characters will be seen.
All pins are defined as INPUT or OUTPUT depending on their usage. The button and LDR are configured as input pins and all LED connected pins are set as output:
void setup()
{
Serial.begin(115200);

pinMode(LDR, INPUT);
pinMode(BUTTON, INPUT);
pinMode(RED, OUTPUT);
pinMode(GREEN, OUTPUT);
pinMode(BLUE, OUTPUT);
}
The loop() function is continuously running after the setup() and, in it:
- The analogRead function reads the value of the ambient light provided as 0-1 V by the LDR.
- The digitalRead function reads the value of GPIO 4, that can be either 0 V when the button is pressed or VCC 3.3 V if the button is not pressed.
- Show the data to the Serial Monitor with the Serial.print function. Serial.println just adds a new line.
- Write a random value between 0 and 1023 to GPIO 15 and GPIO 12 that will control the red and green LED color intensity. This is Pulse Width Modulation (PWM).
- Turn on the blue LED connected to GPIO 13.
- Wait 1000 ms (one second).
- Turn off the blue LED and continue from step 1:
void loop()
{
Serial.print("LDR: ");
Serial.println(analogRead(LDR));
Serial.print("BUTTON: ");
Serial.println(digitalRead(BUTTON));

analogWrite(RED,   random(0,1023));
analogWrite(GREEN, random(0,1023));
digitalWrite(BLUE, HIGH);
delay(1000);
digitalWrite(BLUE, LOW);
}
In order to compile and flush the binary into the ESP8266 chip you need to press the Upload button.


