Details of the designer window/workspace
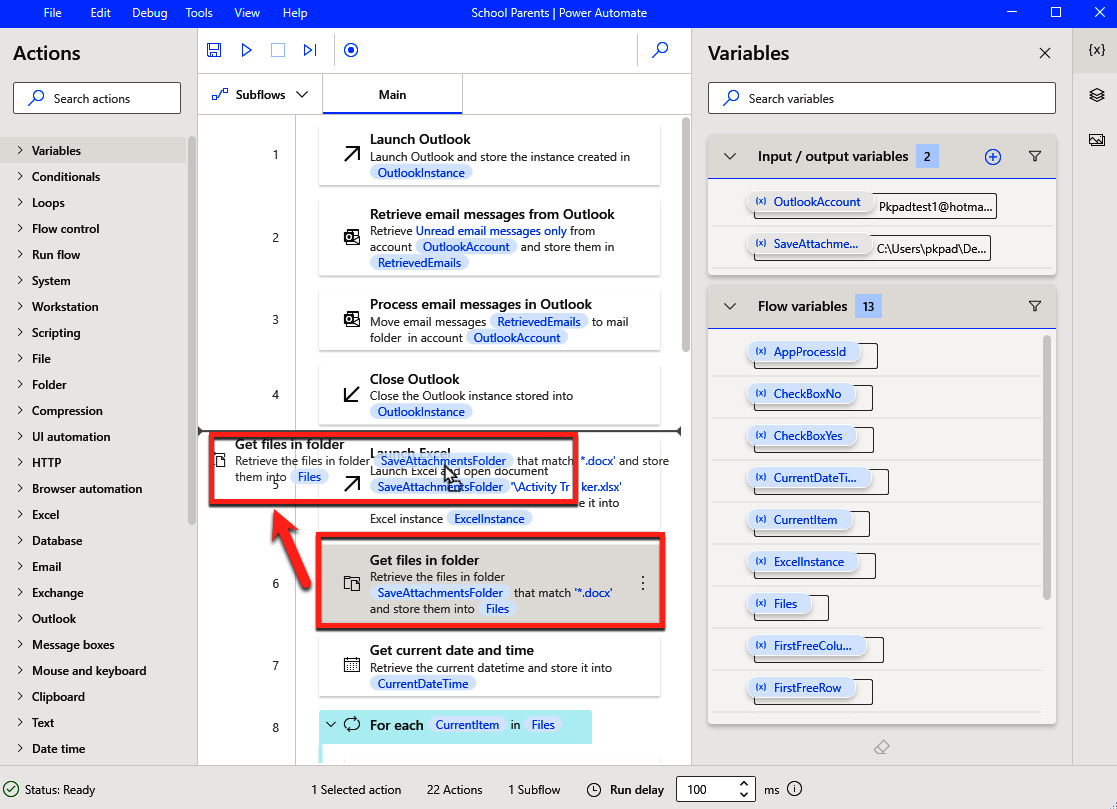
A UI flow and its content are created by dragging actions from the Actions pane into the workspace. The workspace, by the end, contains a list of actions that run in sequence from top to bottom. This sequence can easily be changed; we just have to click and drag the action to another place up or down. In the following screenshot, we will use the example from the first chapter, where we saw the automation of different Office applications:

Figure 3.1 – Dragging an action into the workspace
The bold horizontal line in the workspace shows us after which action the new position will be. In the preceding example, we are dragging Get files in folder up and placing it after Close Outlook.
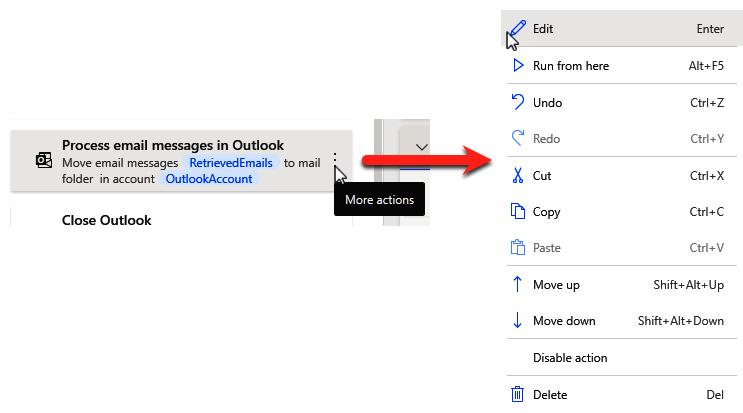
Once the actions have been set in the right order, we can use the kebab menu (the three vertical dots) to access additional options. The same happens when you use the left mouse button.

Figure 3.2 ...


