Setting up Cocos2d-x
Now that you have all the Cocos2d-x pre-requisites for building your first game for the Android platform, you are going to download the Cocos2d-x 3.4 framework and set it up with the help of the following steps:
- You can download the source code from http://www.cocos2d-x.org/download. Be aware that this page also has the link for downloading the Cocos2d-x branch 2, which is not covered in this book, and the manufacturer has officially announced that the new features will only be available in branch 3.
- After downloading the compressed Cocos2d-x source code, uncompress it to your desired location.
- In order to configure Cocos2d-x, open your system terminal and point to the path where you have uncompressed it, and type
setup.py. It will require you to specifyANDROID_NDK_PATH, here you will specify the root directory of the NDK that you have previously uncompressed in the previous sections. Secondly, it will require you to specifyANDROID_SDK_ROOT, here you will specify the directory path from where you have chosen to install the Android SDK during the installation process. Then, it will require you to setANT_ROOT,where you will specify the root directory of your ant installation. Finally, close the terminal, and open a new one so that the changes can take effect.
Creating your first project
Now, Cocos2d-x is set up, and it is ready for creating your first project. You can do so by typing the following command:
cocos new MyGame -p com.your_company.mygame -l cpp -d NEW_PROJECTS_DIR
This script has created an Android template code for your game that will run in all the Android devices containing the Android API 9 or higher, that is Android 2.3 (Gingerbread) and later.
Take in to consideration that the package name should contain exactly two dots, as the example shows, if it has less or more, then the project creation script will not work. The –l cpp parameter means that the new project is going to use C++ as the programming language, which is the only one that is covered in this book.
Cocos2d-x 3.x, as opposed to branch 2.x, allows you to create your project outside of the framework directory structure. Therefore, you can create your project at any location, and not just inside the projects directory, as it was in the previous versions.
It will take a while, since it will copy all the framework files to your new project's path. After it finishes, plug your Android device to your computer, then you can easily run the template HelloWorld code by typing the following command within your new project's path:
cocos run -p android
Alternatively, you could run the following command regardless of your current path on the terminal:
cocos run -p android /path/to/project
Note
For building and running Cocos2d-x 3.4 for Windows, you will need Microsoft Visual Studio 2012 or 2013.
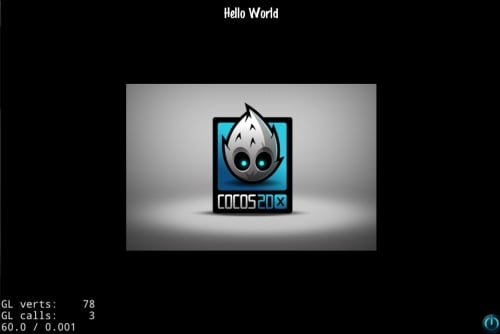
Now, you should be able to see the Cocos2d-x logo and a text that says Hello World, as we can see in the following image:

Setting up the Eclipse IDE
Cocos2d-x branch 3 has improved the Android building process significantly.
Back in branch 2, it was necessary to manually configure many environment variables within IDE, import many core projects, and handle dependencies. Even after completing all the steps, the Cygwin Windows UNIX port integration with Eclipse was never polished to work flawlessly, so minor hacks were required.
Building Cocos2d-x 3.4 within Eclipse is as simple as importing the project and clicking on the Run button. In order to achieve this, within the ADT, navigate to File | Import | General | Existing Projects into Workspace, select the path, where Cocos2d-x has created the new project from the previous sections. Then click on Finish.
Tip
Cocos2d-x Android template project is created using the API Level 10 as target platform. If you don't have this version installed on your system, you should change it by right-clicking on the project from the package explorer, click on Properties, and select your preferred installed Android API version from the Project Build Target box.
Now, right-click on the project name in the package explorer, click on run as, and finally, click on Android Application. The following pop up will be displayed, and it will require you to specify the Android device on which you want to launch the Cocos2d-x game:

After picking your Android device, you will see the HelloWorld game scene as it was shown when we ran the Run command in the previous section.


