Adding decals with UV maps
Next, let's add a few decals. Most large vehicles tend to have words, symbols, or logos on them. We can do this easily using UV maps.
Note
UV mapping tells Blender how to apply a two-dimensional image to three-dimensional objects.
Later in the book, we'll use UV mapping to unwrap and texture an entire model, and we'll look at the different settings and options. In this case, however, we're just using it selectively to apply a few decals to the model.
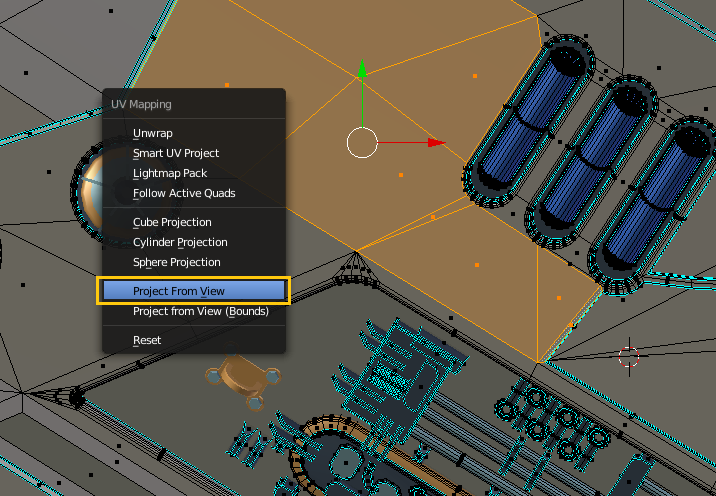
We can pick an area of the ship where we'd like to have writing or a decal. The easiest way to unwrap areas for decal use is to line up the faces so that they're roughly flat in the 3D viewport (you can also use Shift + 7 to precisely align the view to your faces). Then, you can press U to bring up the Unwrap menu; select Project from View:

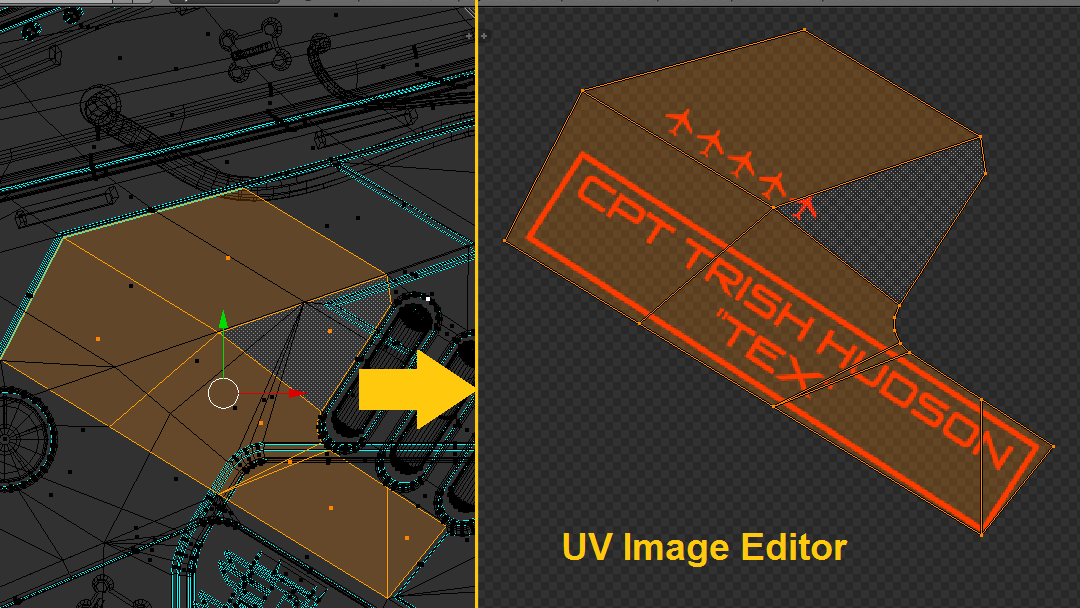
In the UV/Image Editor, you can now align those faces with an image of your choice:

You can assign multiple parts of the model to the same area of an image. If a decal is repeated...


