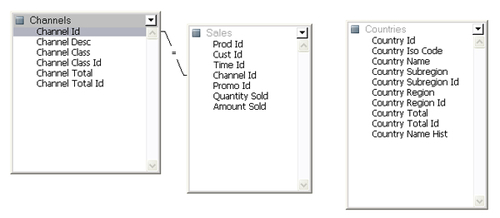
Adding tables to the data model
Tables are dragged and rearranged in the query section by highlighting the table name in the Elements window and dragging-and-dropping the table into the main window of the Query section. Continuing with the Sales model example from the previous chapter, tables are added one-by-one to the main window of the query as demonstrated in the following screenshot. Once a table is in the query window, it can be resized and rearranged as necessary.

After the necessary tables are added and rearranged, the tables can be appropriately joined to one another to produce the results of interest.
Note
The default configuration for the Web Client is to include the Auto join tables option in the query. If a number of unexpected joins appear when adding tables, access the DataModel menu, and select the Data Model Options menu item. On the General tab, uncheck the Auto join tables checkbox. Removing this option will prevent the Web Client product from attempting to determine joins...


