Search icon CANCEL
Subscription
0
Cart icon
Your Cart (0 item)
Close icon
You have no products in your basket yet
Save more on your purchases! discount-offer-chevron-icon
Savings automatically calculated. No voucher code required.
Arrow left icon
Explore Products
Best Sellers
New Releases
Books
Videos
Audiobooks
Learning Hub
Newsletter Hub
Free Learning
Arrow right icon
timer SALE ENDS IN
0 Days
:
00 Hours
:
00 Minutes
:
00 Seconds
Arrow up icon
GO TO TOP
Mastering Unity Scripting

You're reading from   Mastering Unity Scripting Learn advanced C# tips and techniques to make professional-grade games with Unity

Arrow left icon
Product type Paperback
Published in Jan 2015
Publisher
ISBN-13 9781784390655
Length 380 pages
Edition 1st Edition
Languages
Tools
Arrow right icon
Author (1):
Arrow left icon
Alan Thorn Alan Thorn
Author Profile Icon Alan Thorn
Alan Thorn
Arrow right icon
View More author details
Toc

Table of Contents (12) Chapters Close

Preface 1. Unity C# Refresher FREE CHAPTER 2. Debugging 3. Singletons, Statics, GameObjects, and the World 4. Event-driven Programming 5. Cameras, Rendering, and Scenes 6. Working with Mono 7. Artificial Intelligence 8. Customizing the Unity Editor 9. Working with Textures, Models, and 2D 10. Source Control and Other Tips Index

Starting an NPC agent


Now, let's create an AI agent for the level, something that can interact with the player. First, the agent needs a physical mesh representation in the scene. For this, I used the Constructor mesh, which is part of the Unity Character Controllers package imported earlier. Drag-and-drop this from the Project panel into the scene and then remove any animator component that might be created, as shown in the following screenshot. The animations will be important, but a custom-made animator controller will be created later.
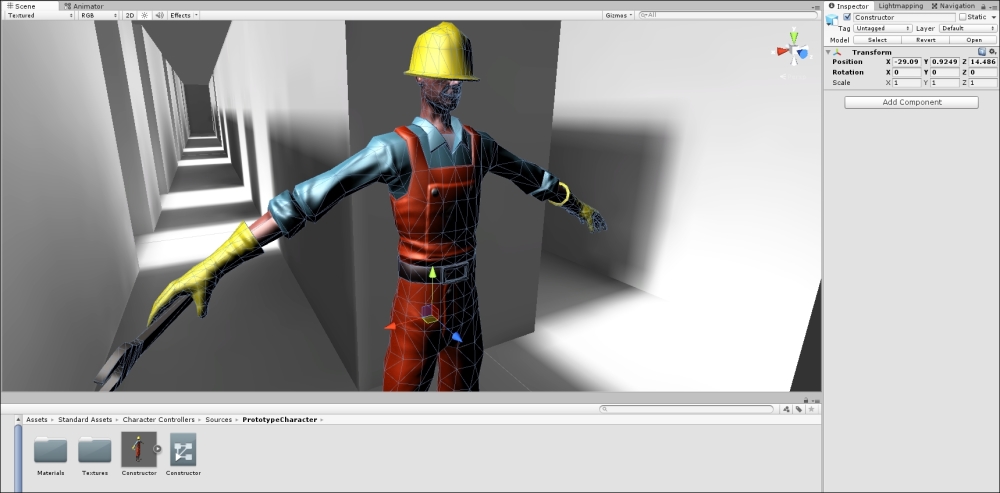
Adding a constructor mesh for the enemy character

Tip

Remember that we're not using the third-person controller prefab; it's just the constructor mesh alone.

Next, add a NavMeshAgent component to the object by navigating to Component | Navigation | Nav Mesh Agent. This allows the object to work with the navigation mesh, and it is able to find and travel paths when instructed. Set both the Radius and Height values of the component to match the dimensions of...

lock icon The rest of the chapter is locked
Register for a free Packt account to unlock a world of extra content!
A free Packt account unlocks extra newsletters, articles, discounted offers, and much more. Start advancing your knowledge today.
Unlock this book and the full library FREE for 7 days
Get unlimited access to 7000+ expert-authored eBooks and videos courses covering every tech area you can think of
Renews at $19.99/month. Cancel anytime
Banner background image