Installing Blender
In this chapter, you’ll start by installing Blender. Then you’ll learn about the different areas of Blender’s interface. You’ll learn what each section of the interface is for, and to wrap it up, you’ll learn how it can be customized to fit your needs.
OK, let’s get started. Time to download Blender and set it all up:
- In a web browser, go to www.blender.org, the home of the Blender Foundation.
- Click the Download tab to see the latest release. You can download the latest release and everything in this book should work just fine.
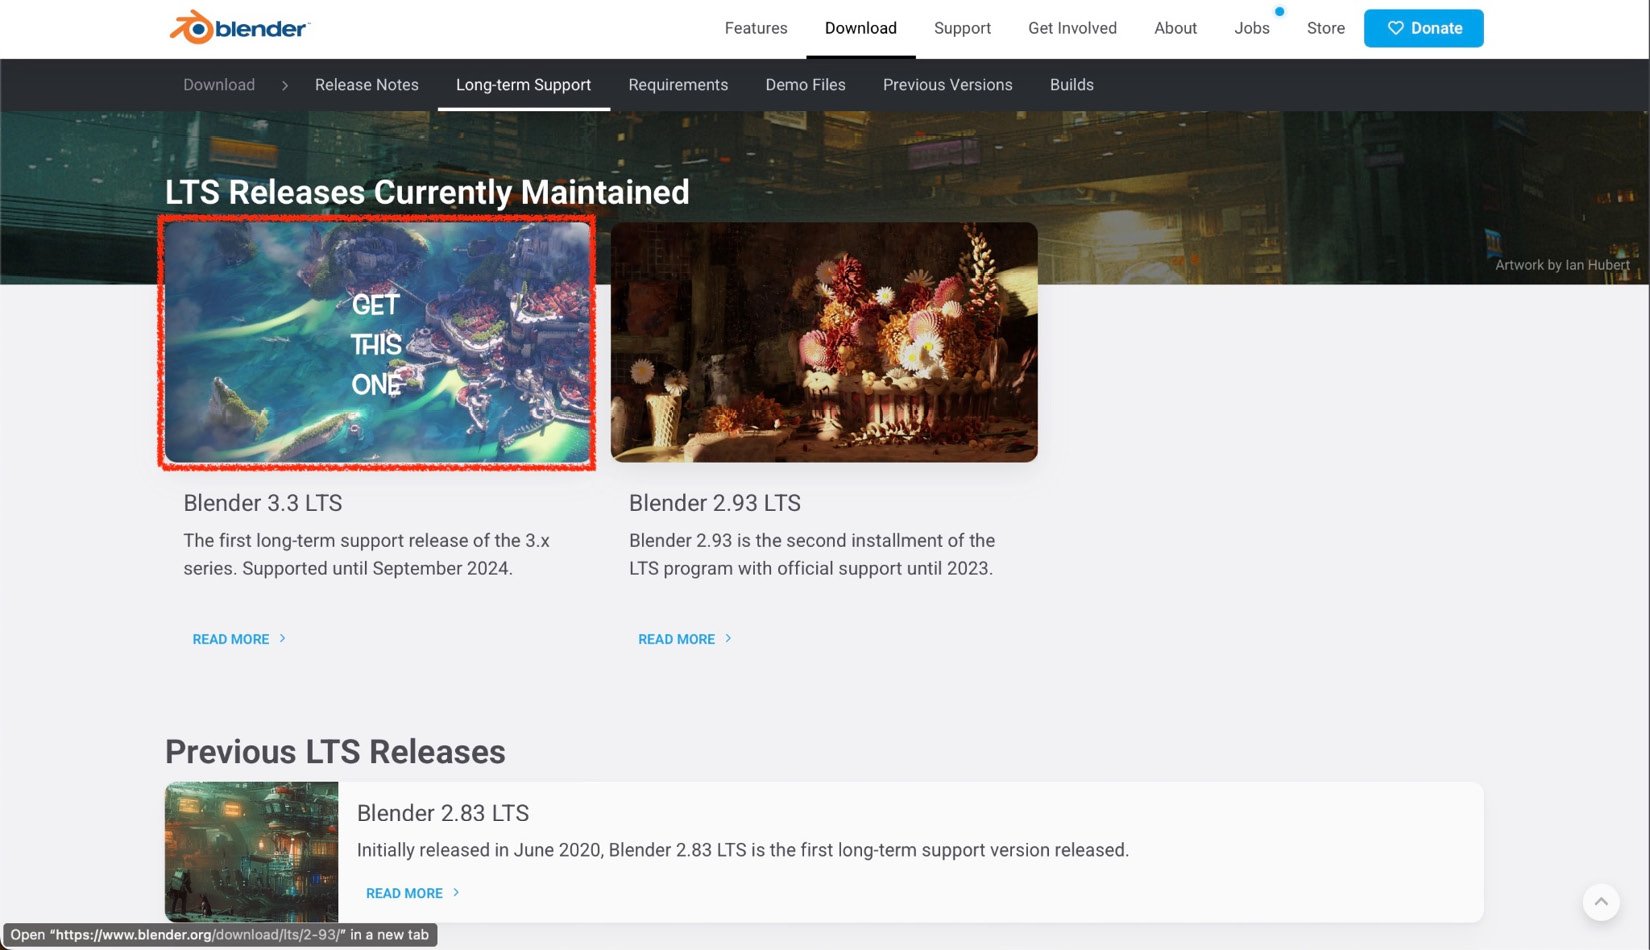
- But if you want to work in the exact same Blender version as I am working in, click the Long-term Support tab at the top, between Release Notes and Requirements.
Long-term support (LTS) versions of Blender will be supported for a few years, so they’re very stable. Also, they still get bug fixes so they should be pretty bug-free.
- Scroll down to LTS Releases Currently Maintained to see a list of the currently supported LTS versions of Blender. I’m using Blender 3.3 LTS, so click that one (it’s a big aerial picture of a castle/city). You’ll end up on a new page.
- Scroll down to Versions and in the Download section, pick your operating system:

Figure 1.1 – The download page
Now, wait for Blender to download (this is the hardest part of the process). Once the download is complete, you’ll have an installer of some kind in your Downloads folder.
It’ll be slightly different depending on your operating system, but the installer should guide you through the installation process.
And that’s it! You’re done, great job. You’ve successfully installed Blender. In the next section, you’ll learn about the different parts of Blender’s user interface.


