Making a simple Arduino clock
As the first project of this chapter, we are going to build a simple clock that gets the time from a cloud server, using Arduino. The time itself will actually be displayed on an OLED screen, also controlled by the Arduino board.
Getting ready
For this project, you will need an OLED screen to display the time that can be controlled via Arduino. I recommend using the 128x64 OLED screen from Adafruit (https://www.adafruit.com/products/938).
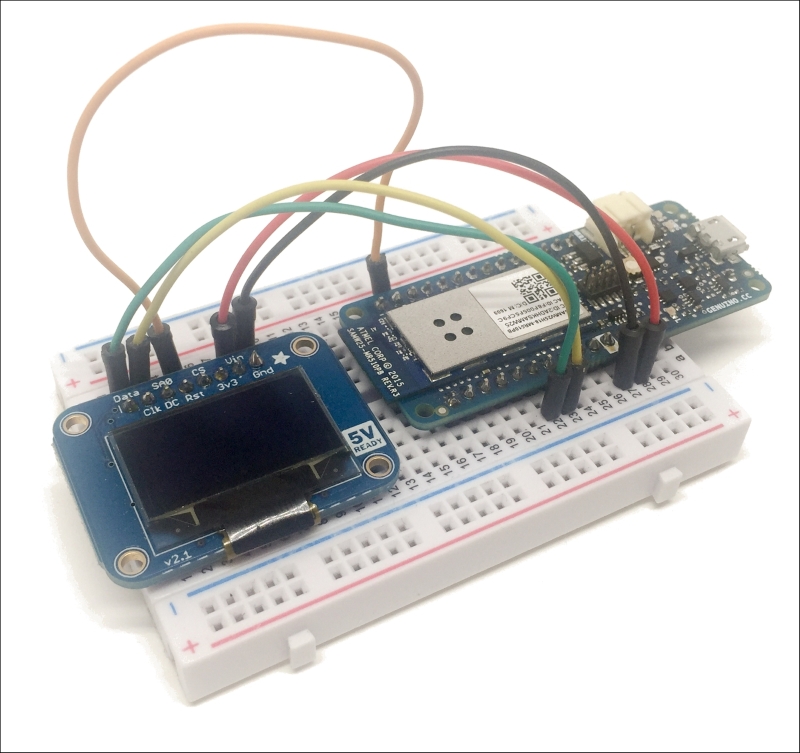
We can now assemble the project, which basically consists of simply connecting the Arduino board to the OLED screen. First, place both boards on a breadboard. Then, connect the VIN pin of the OLED board to the VCC of the Arduino board, and GND to GND. After that, connect the data and clock pins: data goes to the SDA of the Arduino board, and CLK goes to the SCL of the Arduino board. Finally, connect the RST pin of the OLED screen to pin 4 of the Arduino board.
This is the final result:

On the software side, you will need to download...


