Scheduling and canceling work
When orchestrating multithreaded processing in an application, it is important to understand how to schedule and cancel work on managed threads.
Let’s start by looking at how scheduling works with managed threads in .NET.
Scheduling managed threads
When it comes to managed threads, scheduling is not as explicit as it might sound. There is no mechanism to tell the operating system to kick off work at specific times or to execute within certain intervals. While you could write this kind of logic, it is probably not necessary. The process of scheduling managed threads is simply managed by setting priorities on the threads. To do this, set the Thread.Priority property to one of the available ThreadPriority values: Highest, AboveNormal, Normal (default), BelowNormal, or Lowest.
Generally, higher priority threads will execute before those of lower priority. Usually, a thread of Lowest priority will not execute until all the higher priority threads have been completed. If the Lowest priority thread has started and a Normal thread kicks off, the Lowest priority thread will be suspended so that the Normal thread can be run. These rules are not absolute, but you can use them as a guide. Most of the time, you will leave the default of Normal for your threads.
When there are multiple threads of the same priority, the operating system will cycle through them, giving each thread up to a maximum allotment of time before suspending work and moving on to the next thread of the same priority. The logic will vary by the operating system, and the prioritization of a process can change based on whether the application is in the foreground of the UI.
Let’s use our network checking code to test thread priorities:
- Start by creating a new console application in Visual Studio
- Add a new class to the project, named
NetworkingWork, and add a method namedCheckNetworkStatuswith the following implementation:public void CheckNetworkStatus(object data) { for (int i = 0; i < 12; i++) { bool isNetworkUp = System.Net. NetworkInformation.NetworkInterface .GetIsNetworkAvailable(); Console.WriteLine($"Thread priority {(string)data}; Is network available? Answer: {isNetworkUp}"); i++; } }
The calling code will be passing a parameter with the priority of the thread that is currently executing the message. That will be added as part of the console output inside the for loop, so users can see which priority threads are running first.
- Next, replace the contents of
Program.cswith the following code:using BackgroundPingConsoleApp_sched; Console.WriteLine("Hello, World!"); var networkingWork = new NetworkingWork(); var bgThread1 = new Thread(networkingWork.CheckNetworkStatus); var bgThread2 = new Thread(networkingWork.CheckNetworkStatus); var bgThread3 = new Thread(networkingWork.CheckNetworkStatus); var bgThread4 = new Thread(networkingWork.CheckNetworkStatus); var bgThread5 = new Thread(networkingWork.CheckNetworkStatus); bgThread1.Priority = ThreadPriority.Lowest; bgThread2.Priority = ThreadPriority.BelowNormal; bgThread3.Priority = ThreadPriority.Normal; bgThread4.Priority = ThreadPriority.AboveNormal; bgThread5.Priority = ThreadPriority.Highest; bgThread1.Start("Lowest"); bgThread2.Start("BelowNormal"); bgThread3.Start("Normal"); bgThread4.Start("AboveNormal"); bgThread5.Start("Highest"); for (int i = 0; i < 10; i++) { Console.WriteLine("Main thread working..."); } Console.WriteLine("Done"); Console.ReadKey();
The code creates five Thread objects, each with a different Thread.Priority value. To make things a little more interesting, the threads are being started in reverse order of their priorities. You can try changing this on your own to see how the order of execution is impacted.
- Now run the application and examine the output:

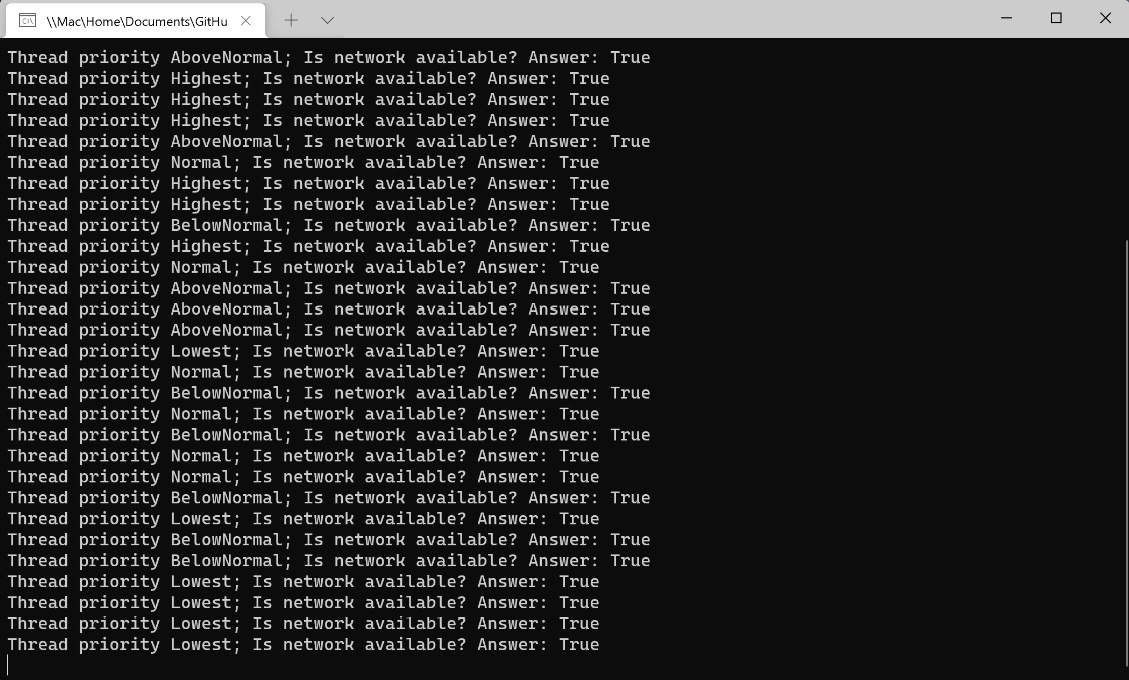
Figure 1.3 – Console output from five different threads
You can see that the operating system, which, in my case, is Windows 11, sometimes executes lower priority threads before all the higher priority threads have completed their work. The algorithm for selecting the next thread to run is a bit of a mystery. You should also remember that this is multithreading. Multiple threads are running at once. The exact number of threads that can run simultaneously will vary by the processor or virtual machine configuration.
Let’s wrap things up by learning how to cancel a running thread.
Canceling managed threads
Canceling managed threads is one of the more important concepts to understand about managed threading. If you have long-running operations running on foreground threads, they should support cancelation. There are times when you might want to allow users to cancel the processes through your application’s UI, or the cancelation might be part of a cleanup process while the application is closing.
To cancel an operation in a managed thread, you will use a CancellationToken parameter. The Thread object itself does not have built-in support for cancellation tokens like some of the modern threading constructs .NET. So, we will have to pass the token to the method running in the newly created thread. In the next exercise, we will modify the previous example to support cancelation:
- Start by updating
NetworkingWork.csso that the parameter passed toCheckNetworkStatusis aCancellationTokenparameter:public void CheckNetworkStatus(object data) { var cancelToken = (CancellationToken)data; while (!cancelToken.IsCancellationRequested) { bool isNetworkUp = System.Net .NetworkInformation.NetworkInterface .GetIsNetworkAvailable(); Console.WriteLine($"Is network available? Answer: {isNetworkUp}"); } }
The code will keep checking the network status inside a while loop until IsCancellationRequested becomes true.
- In
Program.cs, we’re going to return to working with only oneThreadobject. Remove or comment out all of the previous background threads. To pass theCancellationTokenparameter to theThread.Startmethod, create a newCancellationTokenSourceobject, and name itctSource. The cancellation token is available in theTokenproperty:var pingThread = new Thread(networkingWork.CheckNetworkStatus); var ctSource = new CancellationTokenSource(); pingThread.Start(ctSource.Token); ...
- Next, inside the
forloop, add aThread.Sleep(100)statement to allowpingThreadto execute while the main thread is suspended:for (int i = 0; i < 10; i++) { Console.WriteLine("Main thread working..."); Thread.Sleep(100); } - After the
forloop is complete, invoke theCancel()method, join the thread back to the main thread, and dispose of thectSourceobject. TheJoinmethod will block the current thread and wait forpingThreadto complete using this thread:... ctSource.Cancel(); pingThread.Join(); ctSource.Dispose();
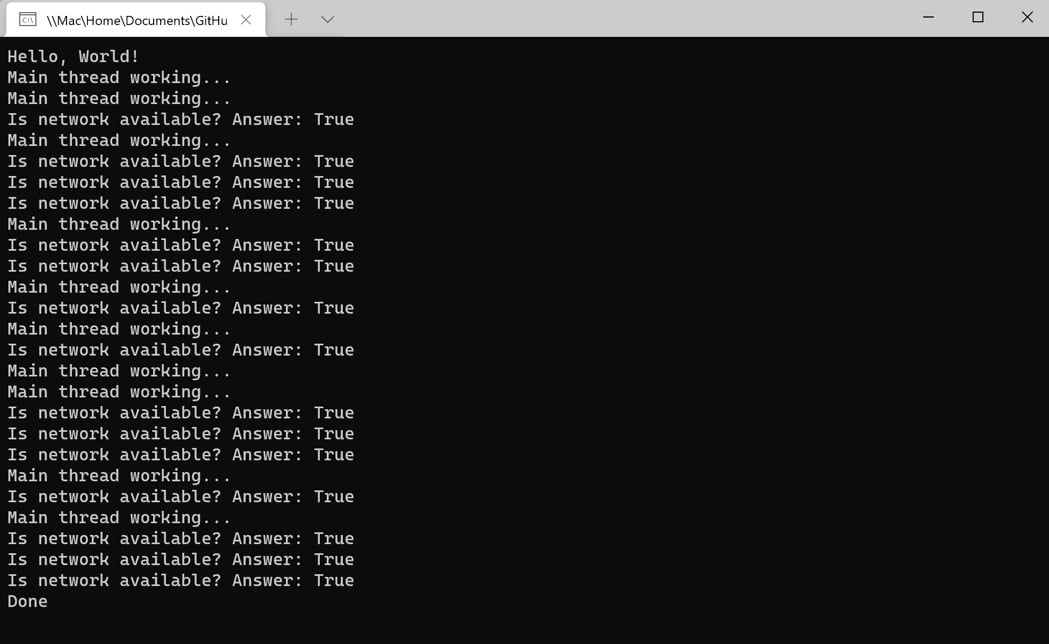
- Now, when you run the application, you will see the network checking stops shortly after the final
Thread.Sleepstatement on the main thread has been executed:

Figure 1.4 – Canceling a thread in the console application
Now the network checker application is gracefully canceling the threaded work before listening for a keystroke to close the application.
When you have a long-running process on a managed thread, you should check for cancellation as the code iterates through loops, begins a new step in a process, and at other logical checkpoints in the process. If the operation uses a timer to periodically perform work, the token should be checked each time the timer executes.
Another way to listen for cancellation is by registering a delegate to be invoked when a cancellation has been requested. Pass the delegate to the Token.Register method inside the managed thread to receive a cancellation callback. The following CheckNetworkStatus2 method will work exactly like the previous example:
public void CheckNetworkStatus2(object data)
{
bool finish = false;
var cancelToken = (CancellationToken)data;
cancelToken.Register(() => {
// Clean up and end pending work
finish = true;
});
while (!finish)
{
bool isNetworkUp = System.Net.NetworkInformation
.NetworkInterface.GetIsNetworkAvailable();
Console.WriteLine($"Is network available? Answer:
{isNetworkUp}");
}
}
Using a delegate like this is more useful if you have multiple parts of your code that need to listen for a cancellation request. A callback method can call several cleanup methods or set another flag that is monitored throughout the thread. It encapsulates the cleanup operation nicely.
We will revisit cancellation in Chapter 11, as we introduce new parallelism and concurrency concepts. However, this section should provide a solid foundation for understanding what comes next.
That concludes the final section on managed threads. Let’s wrap things up and review what we have learned.


