Sara wants to show all cases to the customer, whereas the customer wants to see a list of cases created by logged-in users only, and no other cases raised by another user for the same account.
Follow these steps to add a new page to show only contact cases:
- Go to the www.portal.office.com site and log in using your Dynamics 365 credentials.
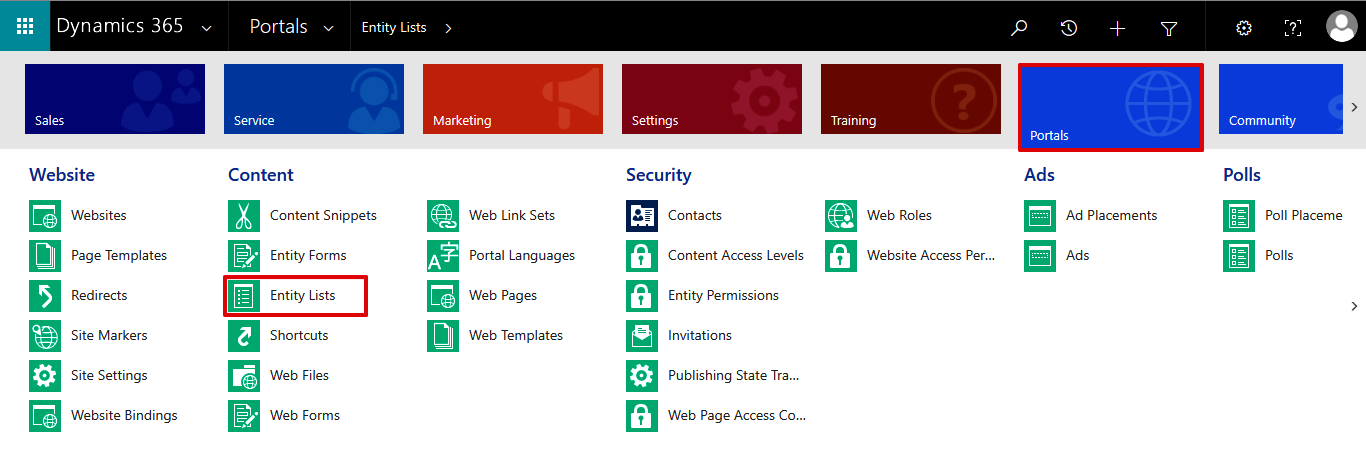
- Go to Dynamics 365 and click on Portals | Entity Lists:
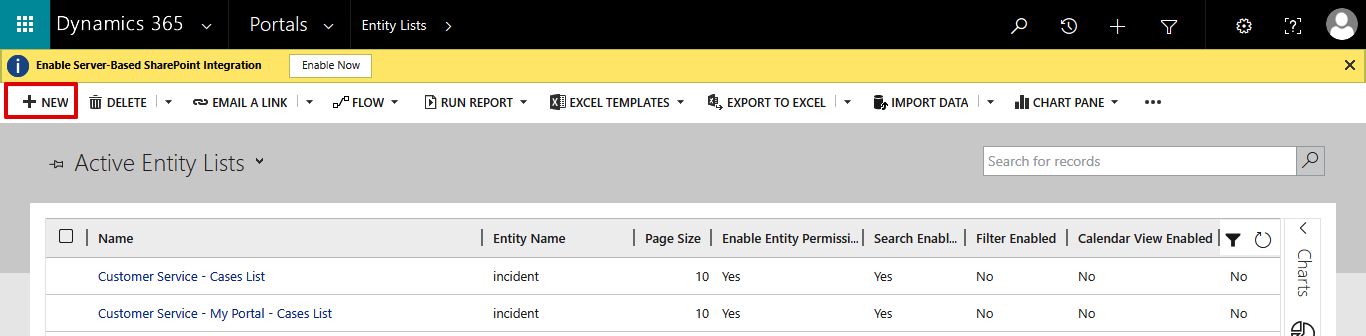
- Click on the NEW menu button to add new Entity Lists:
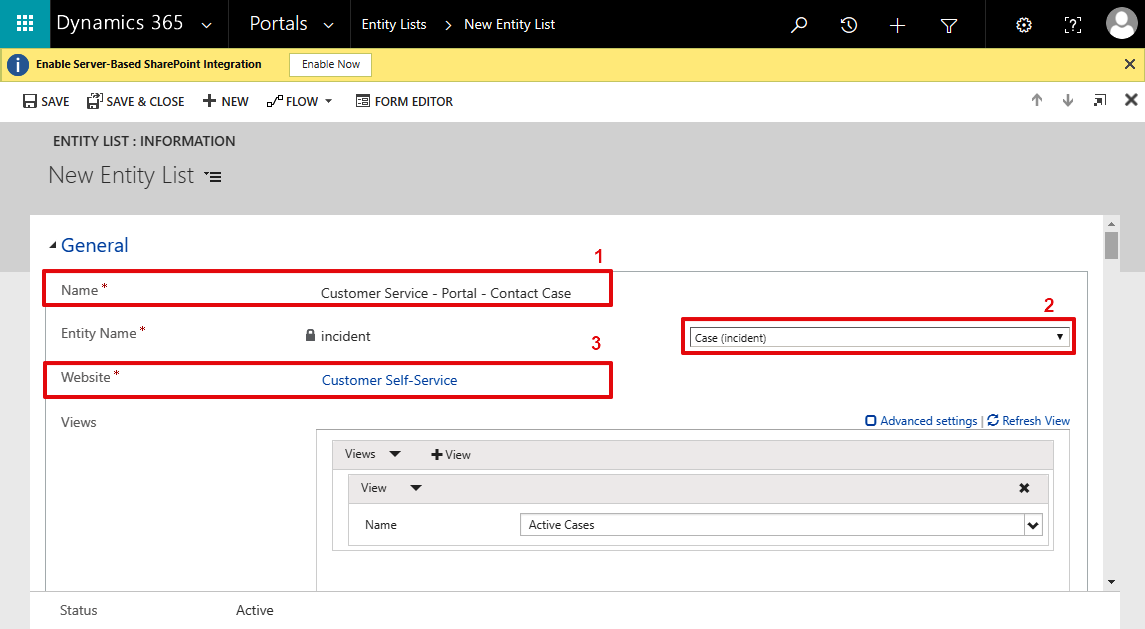
- The New Entity List form will be opened. Fill in the information, as shown in the following screenshot, and save:
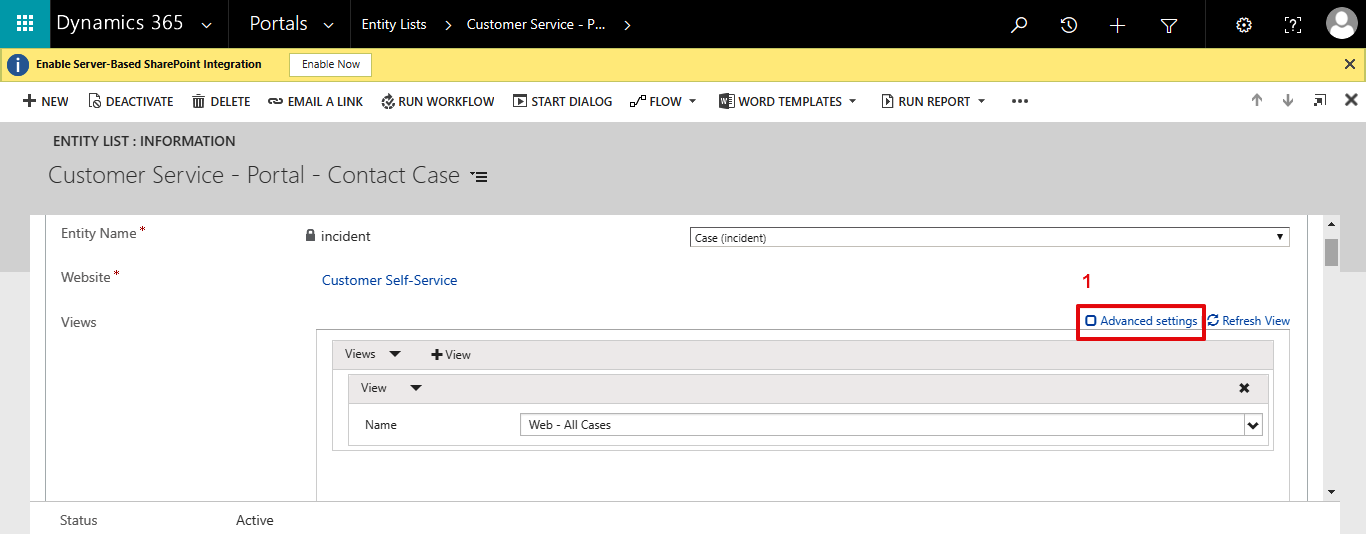
- Now, to show records, there is a need to select entity view. Scroll down the form and add a view in the entity list. Click on Advanced settings:
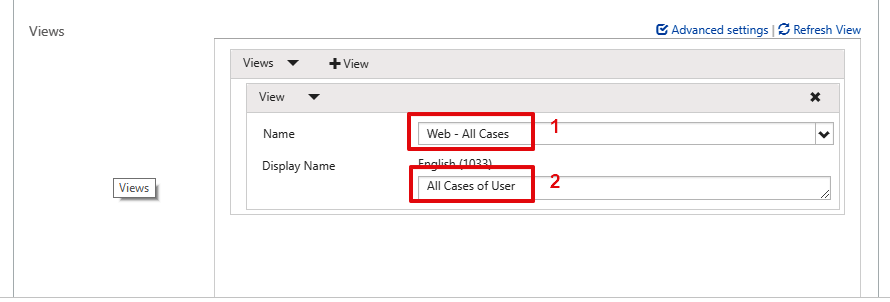
- Select the Web - All Cases view in the list and add the display name All Cases of User:
- Scroll down the form and enable the properties, as shown in the...