Setting up Elastic Stack
In this section, we will install all four components of Elastic Stack on two popular operating systems - Microsoft Windows and Ubuntu. As a pre-requisite for installation of Elasticsearch or Logstash, Java should be installed. In case you have Java installed you can skip the Installation of Java section.
Installation of Java
In this section, JDK needs to be installed for accessing Elasticsearch. Oracle Java 8 (Oracle JDK version 1.8.0_73 onwards) should be installed, as it is the recommended version for Elasticsearch 5.0.0 onwards.
Installation of Java on Ubuntu 14.04
Install Java 8 using terminal and apt package in the following manner:
- Add Oracle Java PPA (Personal Package Archive) to apt repository list:
sudo add-apt-repository -y ppa:webupd8team/java
Note
In this case, we use a third-party repository. It does not violate the Oracle Java Rules by not including Java binaries; instead this PPA directly downloads Java Binaries from Oracle and installs the binaries.
You will be prompted to enter a password after running sudo command (unless you are not logged into as root) and you would receive OK on successful addition to repository, which indicates repository has been imported.
- Update the apt package database to include all the latest files under the packages:
sudo apt-get update - Install the latest version of Oracle Java 8:
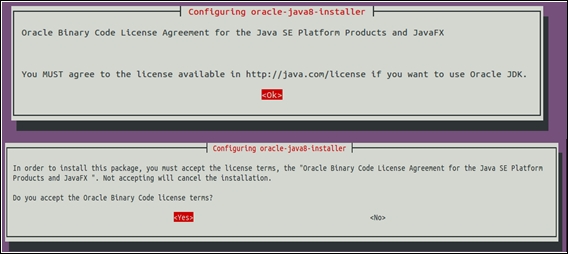
sudo apt-get -y install oracle-java8-installerAlso during installation, you will be prompted to accept the license agreement which pops up as shown in the following screenshot:
- To check whether Java has successfully installed, type the following command into the terminal:
java -version
The preceding screenshot signifies Java has installed successfully.
Installation of Java on Windows
We can install Java on windows by going through the below steps:
- Download the latest version of Java JDK from Sun Microsystems site using the following link:
http://www.oracle.com/technetwork/java/javase/downloads/index.html
Upon opening the link click on the Download button of JDK to download.
You will be redirected to the download page - first click on the Accept License Agreement radio button, then click on your Windows version (use x86 for 32-bit or x64 for 64-bit) to download the EXE file.
- Double click on installation file and it will open as an installer.
- Click on Next followed by accepting license by reading it, and keep clicking next until it shows JDK has successfully installed.
- Now for running Java in windows, you need to set the path of JAVA in the environment variable settings of Windows. Firstly open properties of My Computer. Select Advanced system settings and then click on the Advanced tab wherein you will click environment variables options as shown in the following screenshot:
After opening environment variables, click on New (under System Variables) and give the variable name as
JAVA_HOMEand variable value asC:\Program Files\Java\jdk1.8.0_74.(Do check in your system where jdk has been installed and provide that path):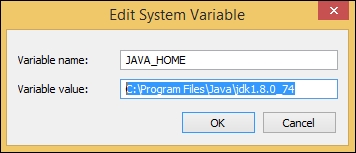
Then double click Path variable (under System Variables) and move towards the end of the text box - insert a semi colon if not inserted and add the location of the
binfolder of JDK such as:%JAVA_HOME%\bin. Then click on OK to all the windows opened.Note
Do not delete anything within the path variable textbox.
- To validate whether Java is successfully installed, type the following command in command prompt:
java -version
The preceding screenshot signifies Java has installed successfully.
Installation of Elasticsearch
In this section, Elasticsearch v5.1.1 installation will be covered for Ubuntu and Windows separately.
Installation of Elasticsearch on Ubuntu 14.04
In order to install Elasticsearch on Ubuntu, refer to the following steps:
- Download Elasticsearch 5.1.1 as a debian package using terminal:
wget https://artifacts.elastic.co /downloads/elasticsearch/elasticsearch-5.1.1.deb - Install the debian package using following command:
sudo dpkg -i elasticsearch-5.1.1.debNote
Elasticsearch will be installed in
/usr/share/elasticsearchdirectory. The configuration files will be present at/etc/elasticsearch. The init script will be present at/etc/init.d/elasticsearch. The log files will be present within/var/log/elasticsearchdirectory. - Configure Elasticsearch to run automatically on bootup . If you are using SysV init distribution, then run the following command:
sudo update-rc.d elasticsearch defaults 9510The preceding command will print on screen:
Adding system startup for, /etc/init.d/elasticsearchCheck status of Elasticsearch using following command:
sudo service elasticsearch statusRun Elasticsearch as a service using following command:
sudo service elasticsearch startNote
Elasticsearch may not start if you have any plugin installed which is not supported in ES-5.0.x version onwards. As plugins have been deprecated, it is required to uninstall any plugin if exists in prior version of ES. Remove a plugin after going to ES Home using following command:
bin/elasticsearch-plugin remove headUsage of Elasticsearch command:
sudo service elasticsearch {start|stop|restart|force-reload|status}If you are using systemd distribution, then run following command:
        sudo /bin/systemctl daemon-reload
        sudo /bin/systemctl enable elasticsearch.service
To verify elasticsearch installation open open
http://localhost:9200in browser or run the following command from command line:curl -X GET http://localhost:9200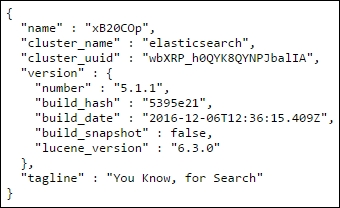
Installation of Elasticsearch on Windows
In order to install Elasticsearch on Windows, refer to the following steps:
- Download Elasticsearch 5.1.1 version from its site using the following link:
https://artifacts.elastic.co/downloads/elasticsearch/elasticsearch-5.1.1.zip
Upon opening the link, click on it and it will download the ZIP package.
- Extract the downloaded ZIP package by unzipping it using WinRAR, 7-Zip, and other such extracting softwares (if you don't have one of these then download it).
This will extract the files and folders in the directory.
- Then click on the extracted folder and navigate the folder to reach inside the
binfolder. - Click on the
elasticsearch.batfile to run Elasticsearch.Note
If this window is closed Elasticsearch will stop running, as the node will shut down.
- To verify Elasticsearch installation, open
http://localhost:9200in the browser:
Installation of Elasticsearch as a service
After installing Elasticsearch as previously mentioned, open Command Prompt after navigating to the bin folder and use the following command:
elasticsearch-service.bat install

Usage: elasticsearch-service.bat install | remove | start | stop | manager
Installation of Kibana
This section covers installation of Kibana 5.1.1 on Ubuntu and Windows separately, before running Kibana, there are some prerequisites:
- Elasticsearch should be installed and running on port
9200(default port). - Make sure the port on which Kibana is running is not being used by any other application. By default, Kibana runs on port
5601.
Installation of Kibana on Ubuntu 14.04
In order to install Kibana on Ubuntu, refer to the following steps:
- Before installing Kibana, please check whether your system is 32 bit or 64 bit which can be done using the following command:
uname -mIf it gives an output as x86_64 it means it is 64-bit system else, if it gives i686 it means it is a 32-bit system.
- Download Kibana 5.1.1 as a debian package using terminal:
- For 64-bit system:
wget https://artifacts.elastic.co/ downloads/kibana/kibana-5.1.1-amd64.deb - For 32-bit system:
             wget https://artifacts.elastic.co/
             downloads/kibana/kibana-5.1.1-i386.deb
- For 64-bit system:
- Install the debian package using following command:
- For 64-bit system:
sudo dpkg -i kibana-5.1.1-amd64.deb - For 32-bit system:
sudo dpkg -i kibana-5.1.1-i386.debNote
Kibana will be installed in
/usr/share/kibanadirectory. The configuration files will be present at/etc/kibana. The init script will be present at/etc/init.d/kibana. The log files will be present within/var/log/kibanadirectory.
- For 64-bit system:
- Configure Kibana to run automatically on bootup . If you are using SysV init distribution, then run the following command:
sudo update-rc.d kibana defaults 9510The above command will print on screen:
Adding system startup for /etc/init.d/kibanaCheck status of Kibana using following command:
sudo service kibana statusRun Kibana as a service using following command:
sudo service kibana startUsage of Kibana command:
sudo service kibana {start|force-start|stop|force-stop|status|restart}If you are using systemd distribution then run following command:
        sudo /bin/systemctl daemon-reload
        sudo /bin/systemctl enable kibana.service
Tip
If you want to install any other version of Kibana, you can visit the Elastic Team download site and copy the debian package link and use wget to fetch the package.
- To verify Kibana installation open
http://localhost:5601in the browser: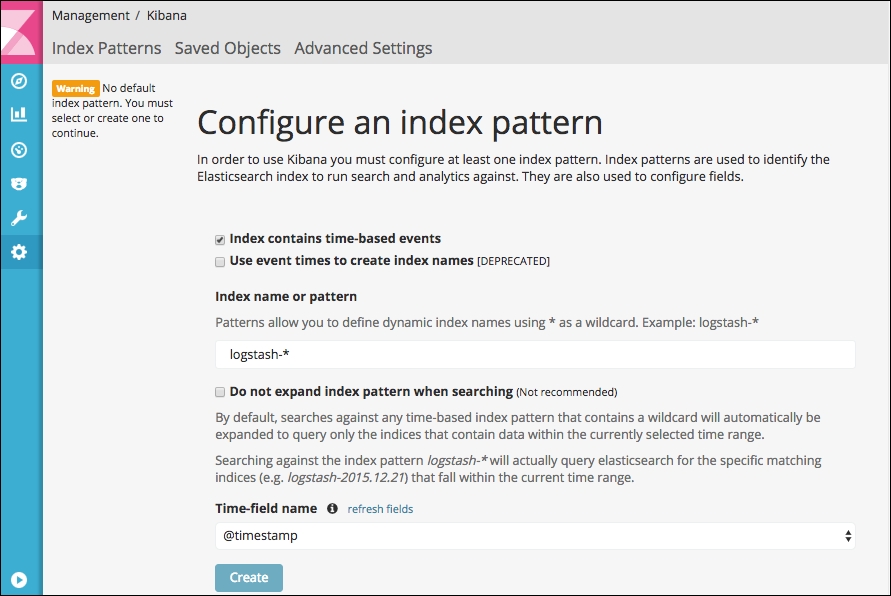
Installation of Kibana on Windows
In order to install Kibana on Windows, refer to the following steps:
- Download Kibana version 5.1.1 from the Elastic website using the following link:
https://artifacts.elastic.co/downloads/kibana/kibana-5.1.1-windows-x86.zip
Upon opening the link, click on it and it will download the ZIP package.
- Extract the downloaded ZIP package by either it using WinRAR, 7-Zip, or other such software.This will extract the files and folders in the directory.
- Then click on the extracted folder and navigate the folder to reach inside the
binfolder. - Click on the
kibana.batfile to run Kibana. - To verify Kibana installation, open
http://localhost:5601in the browser: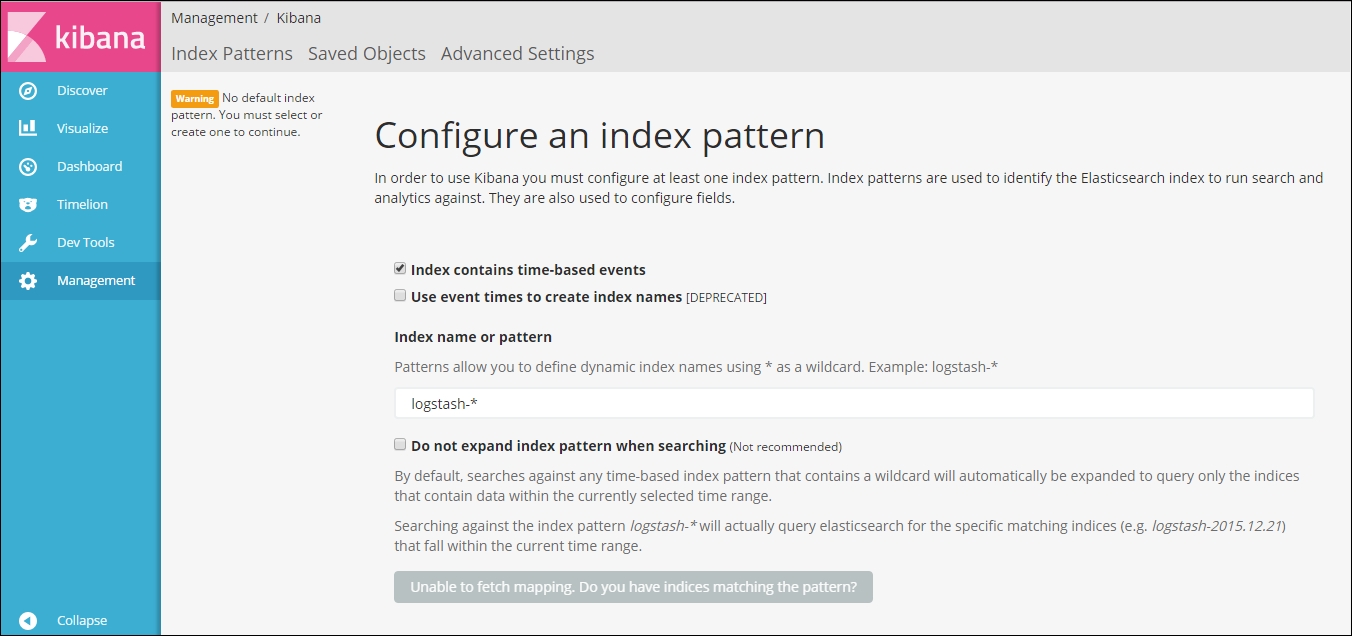
Installation of Logstash
In this section, Logstash will be installed. Logstash 5.1.1 will be installed and this section covers installation on Ubuntu and Windows separately.
Installation of Logstash on Ubuntu 14.04
In order to install Logstash on Ubuntu, refer to the following steps:
- Download Logstash 5.1.1 as a debian package using terminal:
wget https://artifacts.elastic.co /downloads/logstash/logstash-5.1.1.deb - Install the debian package using following command:
sudo dpkg -i logstash-5.1.1.debNote
Logstash will be installed in
/usr/share/logstash directory. The configuration files will be present at/etc/logstash. The log files will be present within/var/log/logstashdirectory - Check status of Logstash using following command:
sudo initcl status logstashRun Logstash as a service using following command:
sudo initctl start logstashNote
Logstash is installed in location
/usr/share/logstash
Installation of Logstash on Windows
In order to install Logstash on Windows, refer to the following steps:
- Download Logstash 5.1.1 version from the Elastic site using the following link:
https://artifacts.elastic.co/downloads/logstash/logstash-5.1.1.zip
Upon opening the link click it to download the ZIP package.
- Extract the downloaded ZIP package by unzipping it using WinRar, 7Zip and other such software.
This will extract the files and folders in the directory.
- Then click on the extracted folder and navigate the folder to reach inside the bin folder.
- To validate whether Logstash is successfully installed, type the following command into command prompt after navigating to the
binfolder:logstash --versionThis will print the Logstash version installed.
Installation of Filebeat
In this section, Filebeat will be installed. Filebeat 5.1.1 will be installed and this section covers installation on Ubuntu and Windows separately.
Installation of Filebeat on Ubuntu 14.04
In order to install Filebeat on Ubuntu, refer to the following steps:
- Before installing Filebeat, please check whether your system is 32 bit or 64 bit which can be done using the following command:
uname -mIf it gives an output as x86_64 it means it is 64-bit system else, if it gives i686 it means it is a 32-bit system.
- Download Filebeat 5.1.1 as a debian package using terminal
- For 64-bit system:
wget https://artifacts.elastic.co /downloads/beats/filebeat/filebeat-5.1.1-amd64.deb - For 32-bit system:
               wget https://artifacts.elastic.co
               /downloads/beats/filebeat/filebeat-5.1.1-i386.deb
- For 64-bit system:
- Install the debian package using following command:
- For 64-bit system:
sudo dpkg -i filebeat-5.1.1-amd64.deb - For 32-bit system:
sudo dpkg -i filebeat-5.1.1-i386.debNote
Filebeat will be installed in /usr/share/filebeat directory. The configuration files will be present at /etc/filebeat. The init script will be present at /etc/init.d/filebeat. The log files will be present within /var/log/filebeat directory.
- For 64-bit system:
- Configure Filebeat to run automatically on bootup. If you are using SysV init distribution, then run the following command:
sudo update-rc.d filebeat defaults 95 10The above command will print on screen:
Adding system startup for /etc/init.d/filebeat.
Check status of Filebeat using following command:
sudo service filebeat statusRun Filebeat as a service using following command:
sudo service filebeat startUsage of Filebeat command:
sudo service filebeat {start|stop|status|restart|force-reload}Note
If you run Filebeat as a service, then it will run the /etc/filebeat/filebeat.yml configuration file.
Tip
If you want to install any other version of Filebeat, you can visit the Elastic Team download site and copy the debian package link and use wget to fetch the package.
Installation of Filebeat on Windows
In order to install Filebeat on Windows, refer to the following steps:
- Before installing Filebeat, please check whether your system is 32 bit or 64 bit which can be done using the following command in command prompt:
wmic os get osarchitectureIt will give an output as 64-bit or 32-bit.
- Download Filebeat 5.1.1 version from Elastic site using the following link:
Upon opening the link, click on it and it will download the ZIP package.
- Extract the downloaded ZIP package by unzipping it using WinRAR, 7-Zip, or other such software:
This will extract the files and folders in the directory.
- Open Windows PowerShell as an administrator (install if not present).
- Navigate to the directory where Filebeat is extracted and stored (such as
C:\Users\username\Desktop) and run the following command in Windows PowerShell:.\install-service-filebeat.ps1Note
If script execution is disabled on your system, you need to set the execution policy for the current session to allow the script to run. For example:
PowerShell.exe -ExecutionPolicy UnRestricted -File .\install-service-filebeat.ps1.This will install Filebeat as a Windows service.


