Using an IDE
Writing good code starts with a good development environment. An Integrated Development Environment (IDE) is the main part of a good development environment. NetBeans is a free and open source PHP editor that can be used for Magento development. In this recipe, we will set up a Magento 2 project in NetBeans.
Getting ready
Install the latest version of NetBeans IDE on your computer. You can download it from the following URL:
https://netbeans.org/downloads/
For PHP development, you need to download the HTML5 & PHP bundle.
How to do it...
- To create a new project, open NetBeans and navigate to File | New Project.
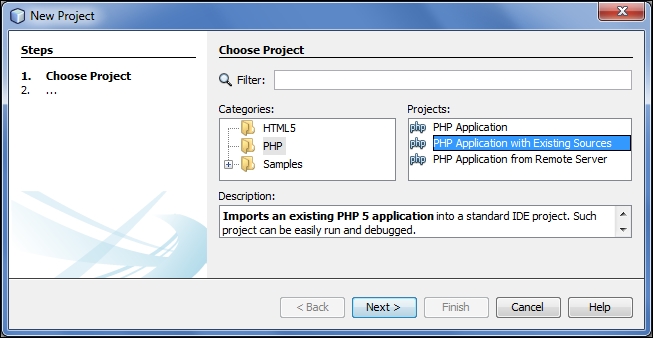
- A window like the one in the following screenshot will appear on your screen. Click on PHP and PHP Application with Existing Sources.

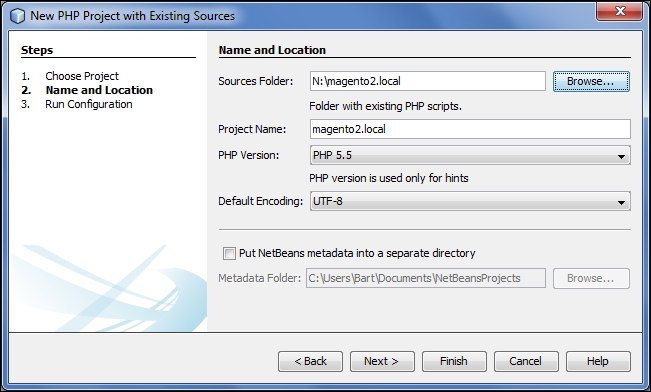
- Click on Next and configure the following settings:
- Source Folder: This field is set to the location of your Magento code (like
/var/www/html/magento2/) - Project Name: The NetBeans project name is entered in this field
- PHP Version: This field is set to PHP 5.5
- Default Encoding: This field is set to UTF-8
- Source Folder: This field is set to the location of your Magento code (like
- In the next screenshot, you can see how everything is configured:

Tip
When you are working with a version control system like GIT, it is recommended that you check the checkbox. Put NetBeans metadata into a separate directory. If not checked, a
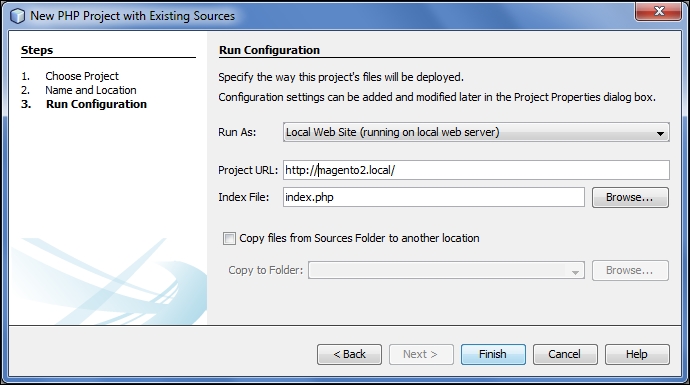
.nbprojectfolder is created in your Magento root, and you don't want to have that folder in your version control system. Another possibility is to add the.nbprojectfolder in the.gitignorefile. - Click on Next and configure the final settings:
- Run as: If you are developing on a local PC, choose Local Web Server
- Project URL: The URL of your website
- Index file: Set this to
index.php
The settings are shown in the following screenshot:

- Click on the Finish button and your NetBeans project is ready. You can now start developing.
There's more...
In this recipe, we used the free code editor NetBeans, but there are also some other good alternatives on the market, such as:
- PHPStorm
- Eclipse with PDT (PHP Development Tools)
- Zend Studio


