Configuring SSPR
Microsoft Entra ID SSPR allows users to reset their own passwords without the need to contact IT support or administrators. With SSPR, users can verify their identity using different methods, such as email, text message, or a mobile app notification, and reset their password without any help. This feature is not only convenient for end users but also reduces the workload for IT support, increases security by ensuring that users have strong passwords, and saves time and resources. SSPR is an essential feature for any organization that wants to improve user productivity and reduce IT costs.
There are several things to keep in mind when considering implementing this feature in your organization:
- Firstly, SSPR requires a Microsoft Entra ID account with Global Administrator privileges to manage SSPR options. This permission will allow the user to always be able to reset their own passwords, no matter what options are configured.
- Additionally, SSPR uses a security group to limit the users who have SSPR privileges, providing an added layer of security to the feature.
- It’s important to note that all user accounts in your organization must have a valid license to use SSPR. This means that if your organization has licenses for Office 365 or Microsoft Entra P1 or P2, you can enable SSPR for all users. If not, you must purchase Microsoft Entra P1 licenses to enable SSPR for your users.
Overall, implementing Microsoft Entra ID SSPR can be a useful and convenient tool for both users and IT administrators. However, it’s important to carefully consider the requirements and characteristics of this feature before enabling it for your organization.
Next, we will explore how to configure SSPR for your users.
Configuring SSPR
By enabling SSPR for your users, they are able to change their passwords automatically without calling the help desk. This can significantly eliminate the management overhead.
Note
The Microsoft Entra free-tier license only supports cloud users for SSPR, and only password change is supported, not a password reset.
SSPR can be easily enabled from the Azure portal. To do this, perform the following steps:
- Navigate to the Azure portal by opening https://portal.azure.com.
- From the left-hand hamburger menu or the main search bar, select
MicrosoftEntra ID. - From the left-hand menu under the
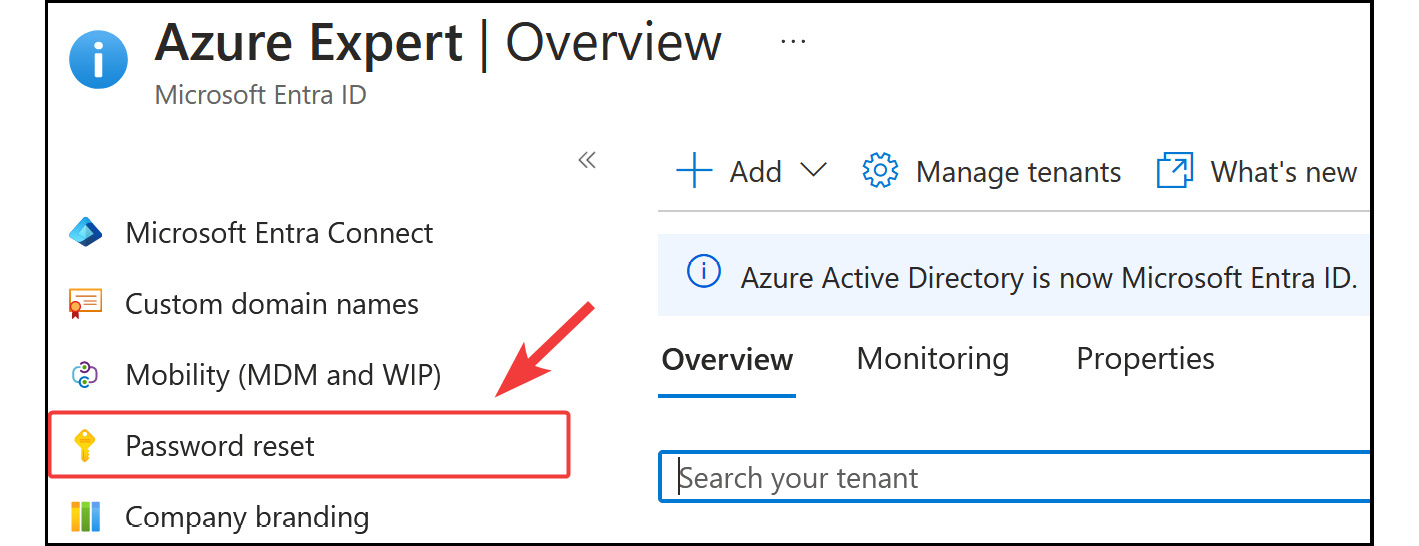
Managecontext, selectPassword reset, as follows:

Figure 2.48: The Password reset blade
- In the
Password resetblade, you can enable SSPR for all your users by selectingAll; for selected users and groups, selectSelected. For this demonstration, enable it for all users, and then click onSavein the top-level menu, as follows:

Figure 2.49: SSPR
- Next, you need to set the different required authentication methods for your users. To do this, under the
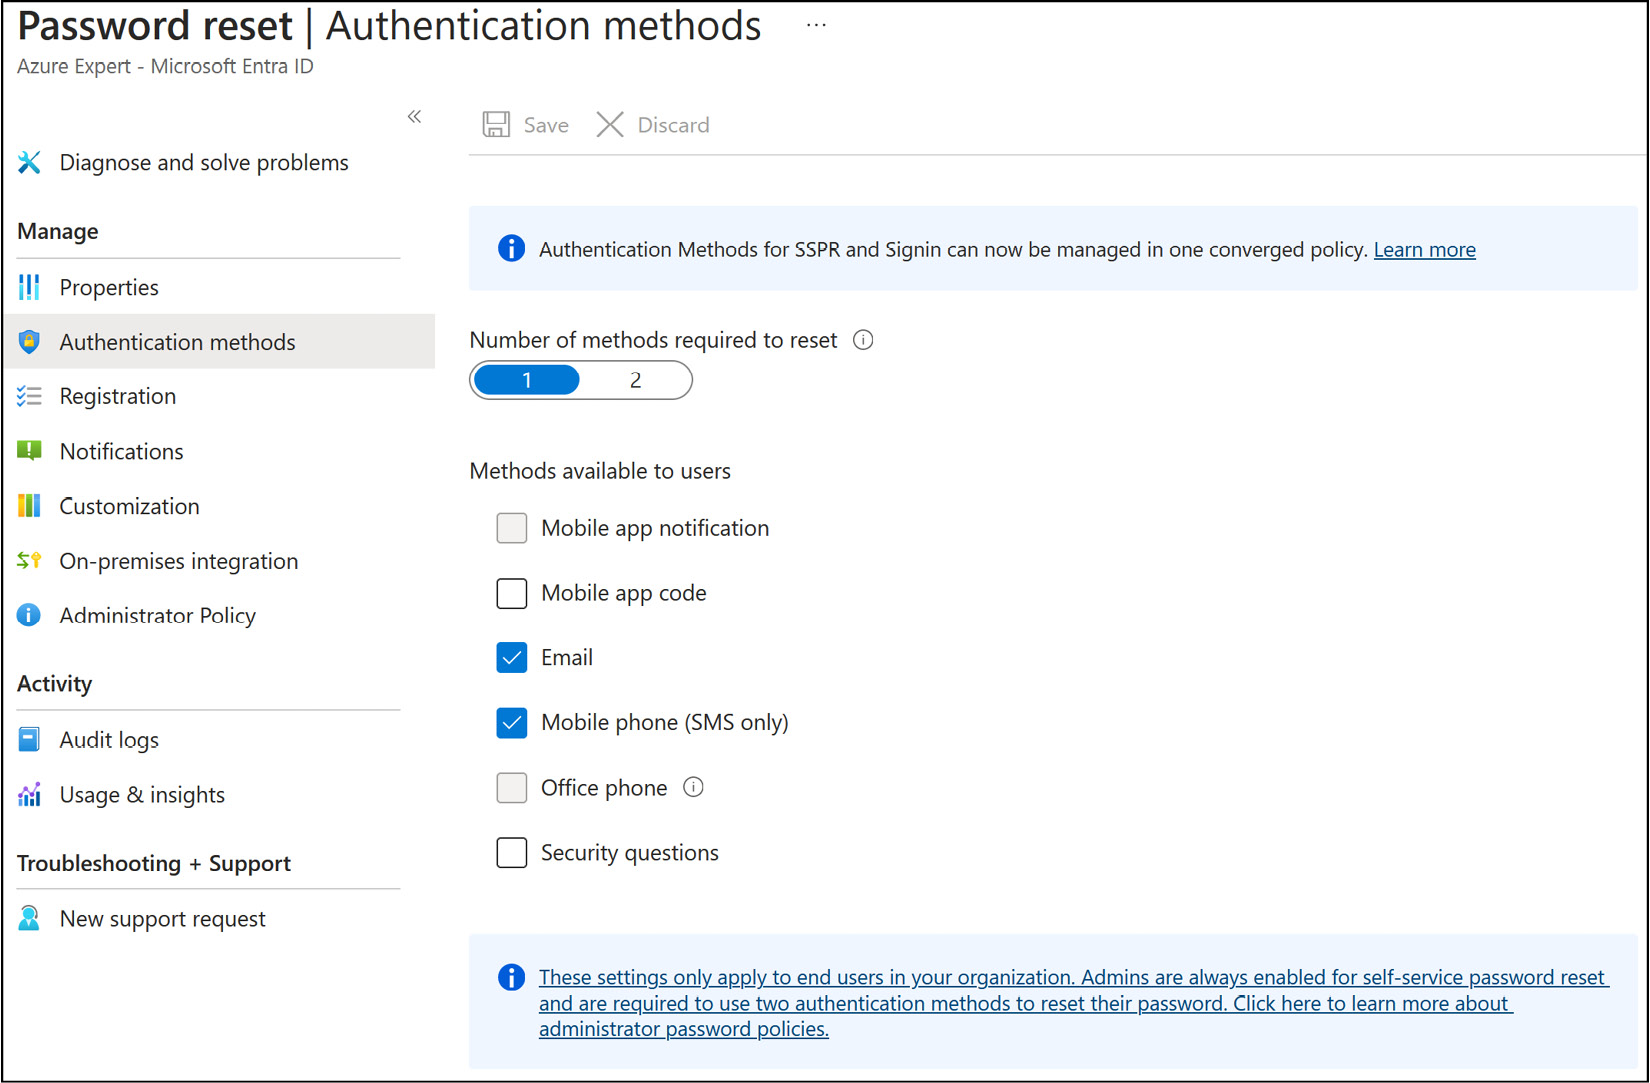
Managecontext from the left menu, selectAuthentication methods. - In the next blade, you can set the number of authentication methods that are required to reset a password and explore what methods are available for your users, as follows:

Figure 2.50: Authentication methods for a password reset
- Make a selection, and then click
Saveat the top of the screen. If you want to test SSPR after configuration, make sure that you use a user account without administrator privileges.
Note
You are encouraged to read further by using the following links:
https://learn.microsoft.com/en-us/entra/identity/authentication/concept-sspr-howitworks
https://learn.microsoft.com/en-us/entra/identity/authentication/tutorial-enable-sspr


