Creating your first Android project
In order to get started in the world of Android application projects, it would be very useful to set up a very basic project that goes through the two main processes in Android application development: coding the application and then testing it on an Android physical device.
Tip
Downloading the example code
You can download the example code files for all Packt books you have purchased from your account at http://www.packtpub.com. If you purchased this book elsewhere, you can visit http://www.packtpub.com/support and register to have the files e-mailed directly to you.
Setting up your first Hello Arduino project
Click on New Project when Android Studio launches as shown in the following screenshot:

An important step within Android application development is configuring your project. This project will be using Android 4.3 as the minimum target SDK, since we intend to use the
Bluetooth Low Energy API, which was introduced in this particular version of Android. In this case, we will name the project Hello Arduino and write down your company domain, as the convention for application package names is the reverse of your chosen domain.
Refer to the following screenshot:

For the purposes of this particular project, we will go ahead and choose the most basic project, Blank Activity, as shown in the following screenshot. The other choices provide added functionality that we do not need at this stage.

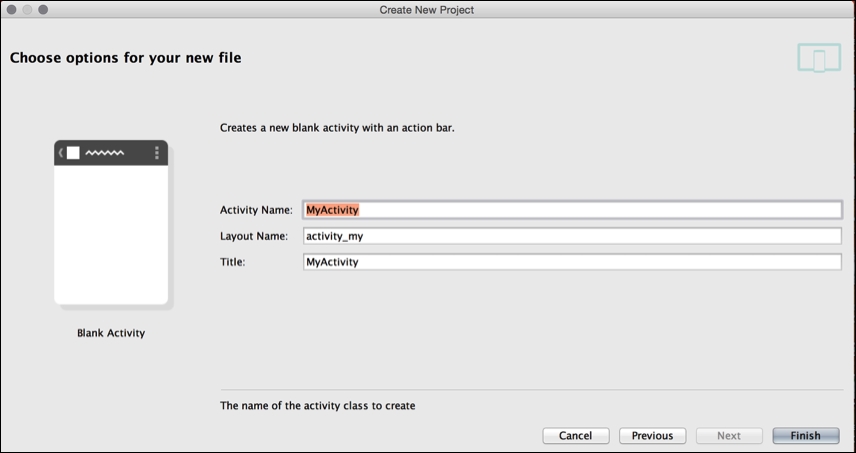
In the following screenshot, we choose Blank Activity, and we need to give a name to our main Java file. Let's keep it as MyActivity:

Once you follow through all the previous steps, you will be welcomed to this workspace, which gives a good overview of the project tree, main code editor, and the device that shows a preview of the User Interface (UI), as shown in the following screenshot:

In this particular project, there will be no need to modify the existing code and therefore we will proceed with building our app and launching it on our physical Android device.
Installing your app on your physical device
Previously, we have connected and enabled our physical Android device via a USB. Within Android Studio, we need to set up the configuration to run our Android application.
This is done by choosing Editing Configurations from the main toolbar as shown in the following screenshot:

In the Editing Configurations window, we will click on the + sign and choose Android Application where we set up the configuration with the following settings and confirm them by pressing OK:

After setting up everything, we are ready to run the app. Choose the App configuration, which we previously set up, and press the Play button (green triangle) as shown in the following screenshot:

There is the possibility of creating an Android Virtual Device (AVD) to install the application. However, at this point in time, there are no virtual emulators that support Bluetooth, which we will need for a number of projects in this book. So, we will focus on setting up your Android physical device running Android 4.3 or higher.
In the next step, choose your physical device and press OK, as shown in the following screenshot:

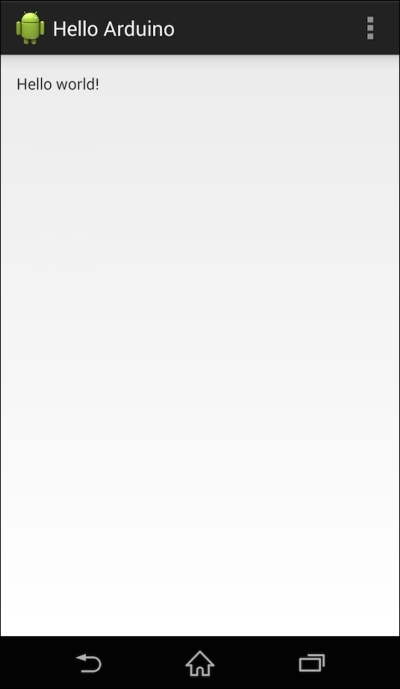
You should expect the following to show up on your Android device if you have set up everything in the correct manner:


