Adding the IK constraint
In this first IK setup, we will cover the configuration of a very basic single IK constraint on the hands. A constraint is just a function in Blender that limits/modifies how an element might behave. In our case, we will be working with bone constraints.
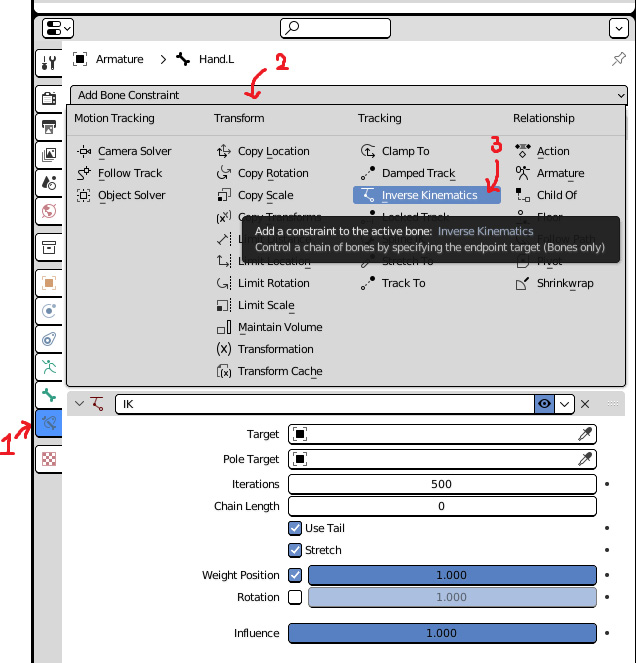
Head into Pose Mode with our armature selected, select either of the hands and head on over to the Bone constraints tab, pictured in Figure 6.5. Then, add an Inverse Kinematics bone constraint.

Figure 6.5 – IK constraint added
The steps to add the constraint are shown in Figure 6.5, but the navigation should be somewhat familiar by now. With this IK constraint added you will see plenty of boxes for us to fill. We will cover each box in descending order, starting with the Target field.
Target:
- Click the box next to Target and select the armature. There should only be one armature in the scene.
- A new box appears directly below asking for a bone. Click this...


