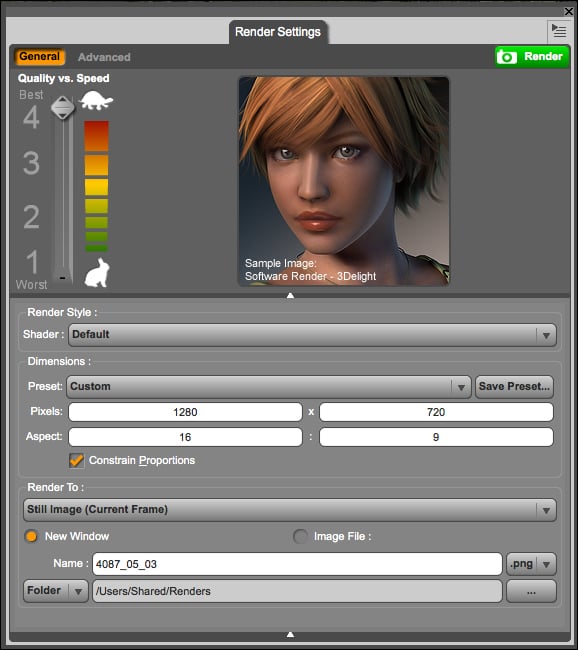
The Render Settings menu
Studio can render an image in several formats and at any resolution that you need. To determine those choices, we need to access the Rendering Settings panel. This is done by navigating to Render | Render Settings. We can also use the Cmd + Shift + R (Mac) or Ctrl + Shift + R (Windows) keyboard shortcut. Either way, the result will be presented with the Render Settings panel, which looks like this:

Your settings will very likely be different. Let's see what all those values mean.
The first slider at the top-left controls the quality of the final image, from 1 (worst) to 4 (best). Why would we like to degrade the quality of our image? As higher quality rendering takes more time, we can save some seconds by using the lower quality settings. This is in theory. In practice, the lower quality settings are so horrible to be useless. Stay at the highest quality; even in that way we need to work quite a bit to make the images look good.
Next is the Shader: field value under...


