Android Studio comes with the official Android emulator, which is the emulator that Expo recommends for use during development.
Installing Android Studio
How to do it...
- Download Android Studio from https://developer.android.com/studio/.
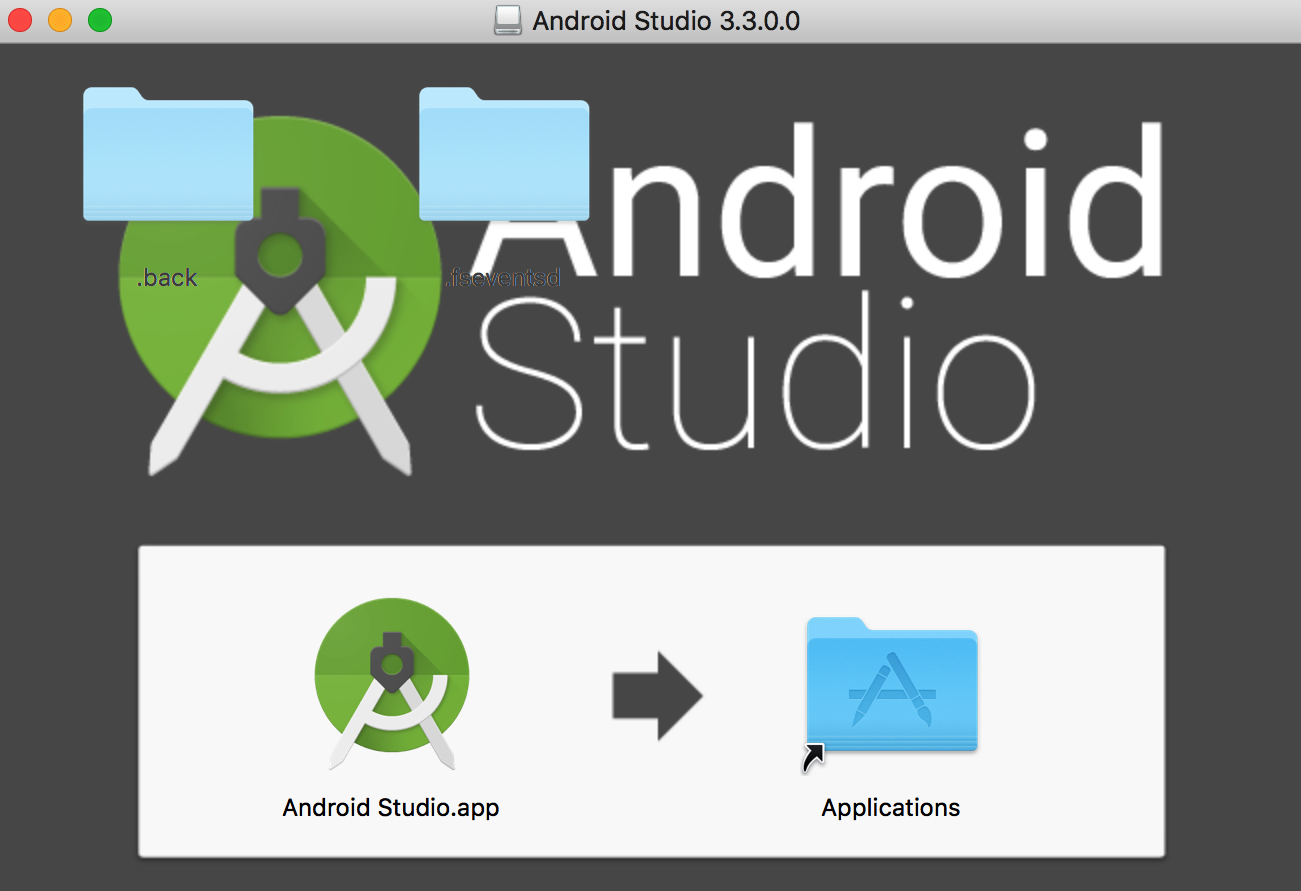
- Open the downloaded file and drag the Android Studio.app icon to the Applications folder icon:

- Once installed, we'll need to change the Android Studio preferences. Open Android Studio, and then open Preferences from the Android Studio menu in the system bar. In the Preferences submenus, select Appearance & Behavior | System Settings | Android SDK. Under the SDK Tools tab, ensure that you have some version of Android SDK Build-Tools installed, and install it if isn't installed already.
- We'll also need to add the Android SDK location to the system PATH by editing ~/.bash_profile or ~/.bashrc. You can do this by adding the following line:
export PATH=$PATH:/Users/MY_USER_NAME/Library/Android/sdk
Be sure to replace MY_USER_NAME with your system username.
- On macOS, you will also need to add platform-tools to your PATH in ~/.bash_profile or ~/.bashrc. You can do this by adding the following line:
PATH=$PATH:/Users/MY_USER_NAME/Library/Android/platform-tools Be sure to replace MY_USER_NAME with your system username.
- If the PATH was correctly updated, the adb command should work in the Terminal. You may have to restart your Terminal for the changes to take effect.
- On a fresh install of Android Studio, you'll see a welcome screen. Start a new app to fully open the software. Then, select the AVD Manager from the buttons in the top -right corner of the window, as indicated in the following steps:

- Press Create Virtual Device in the opened modal.
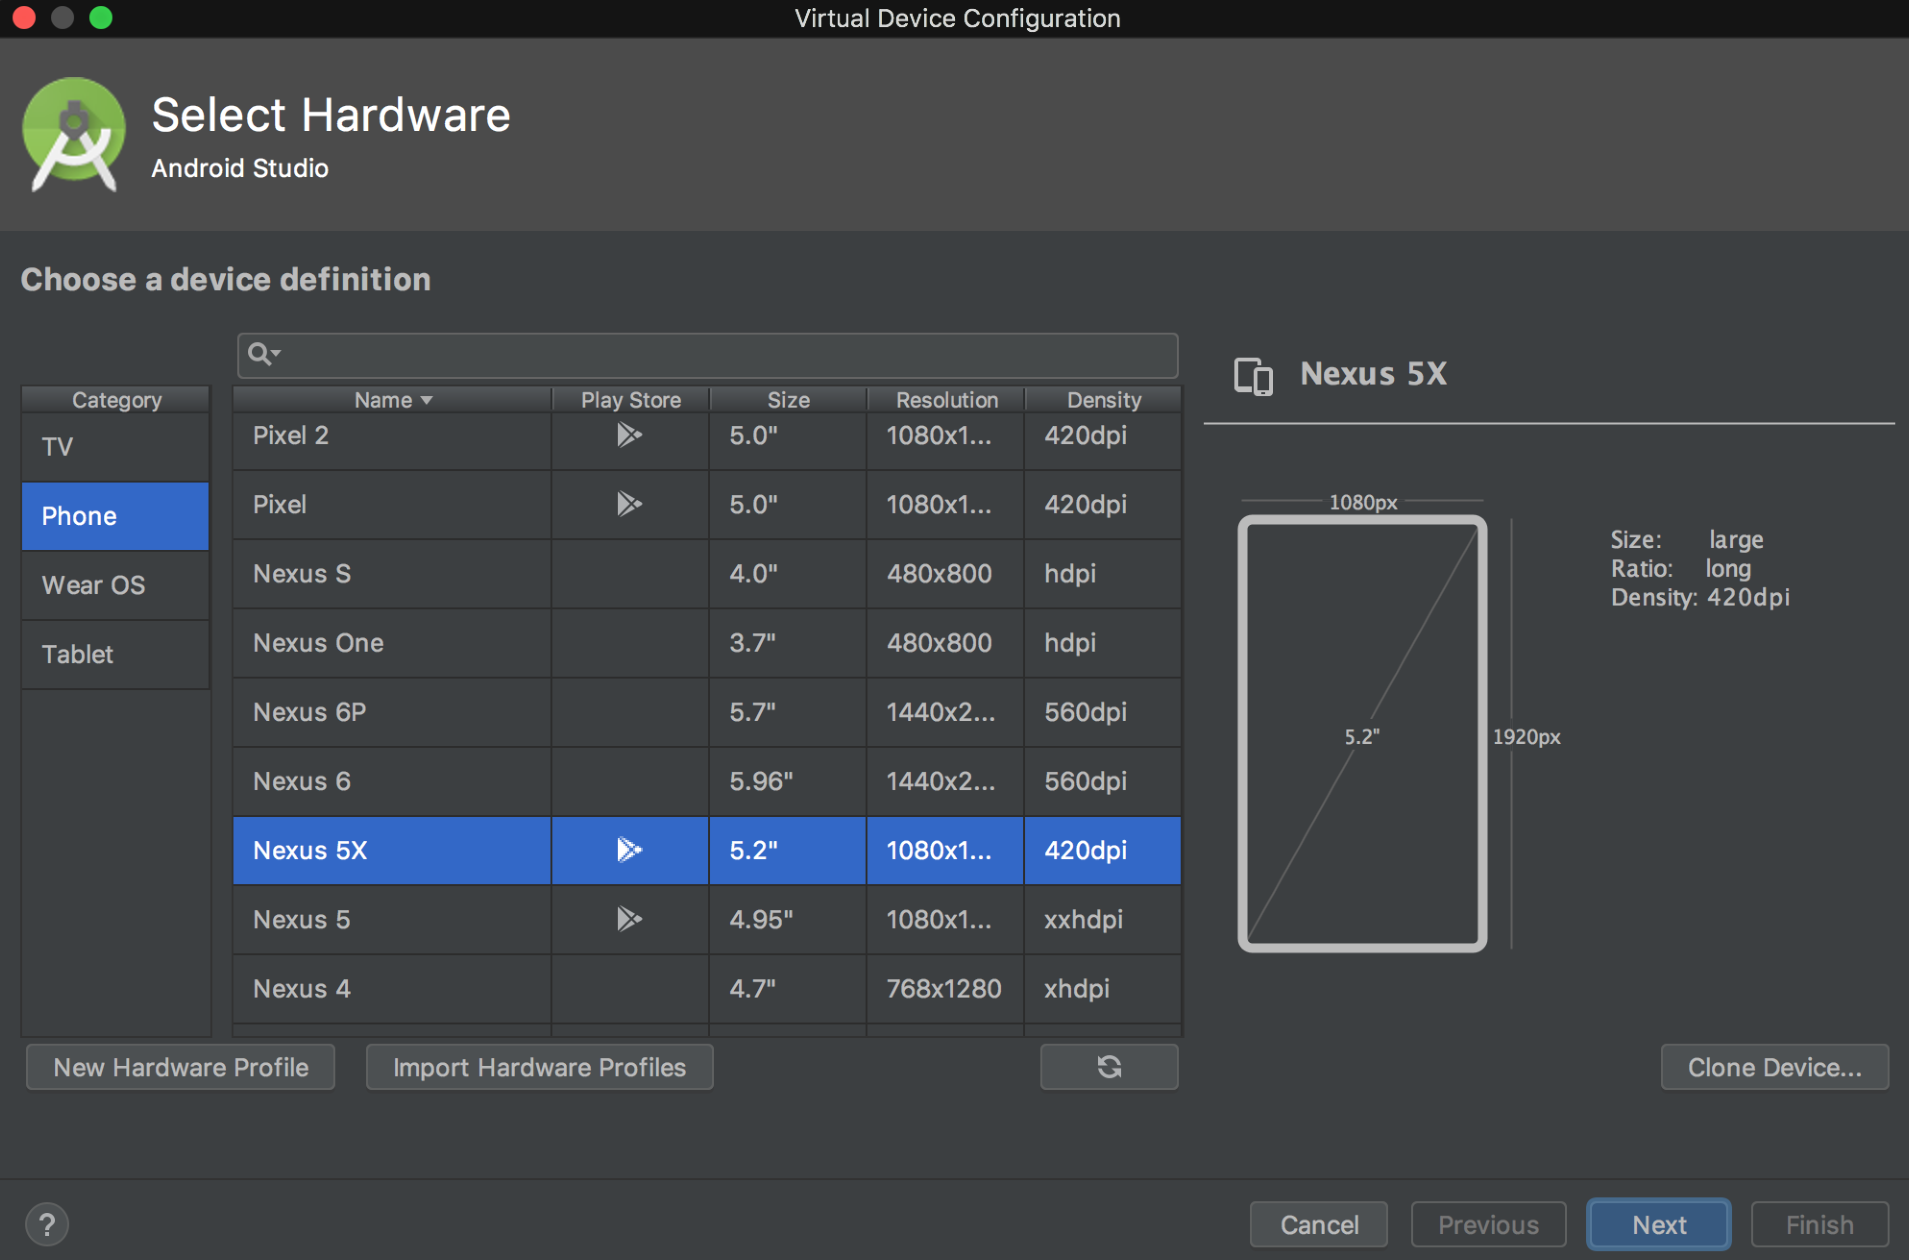
- Select a device in the Select Hardware screen, and then press Next:

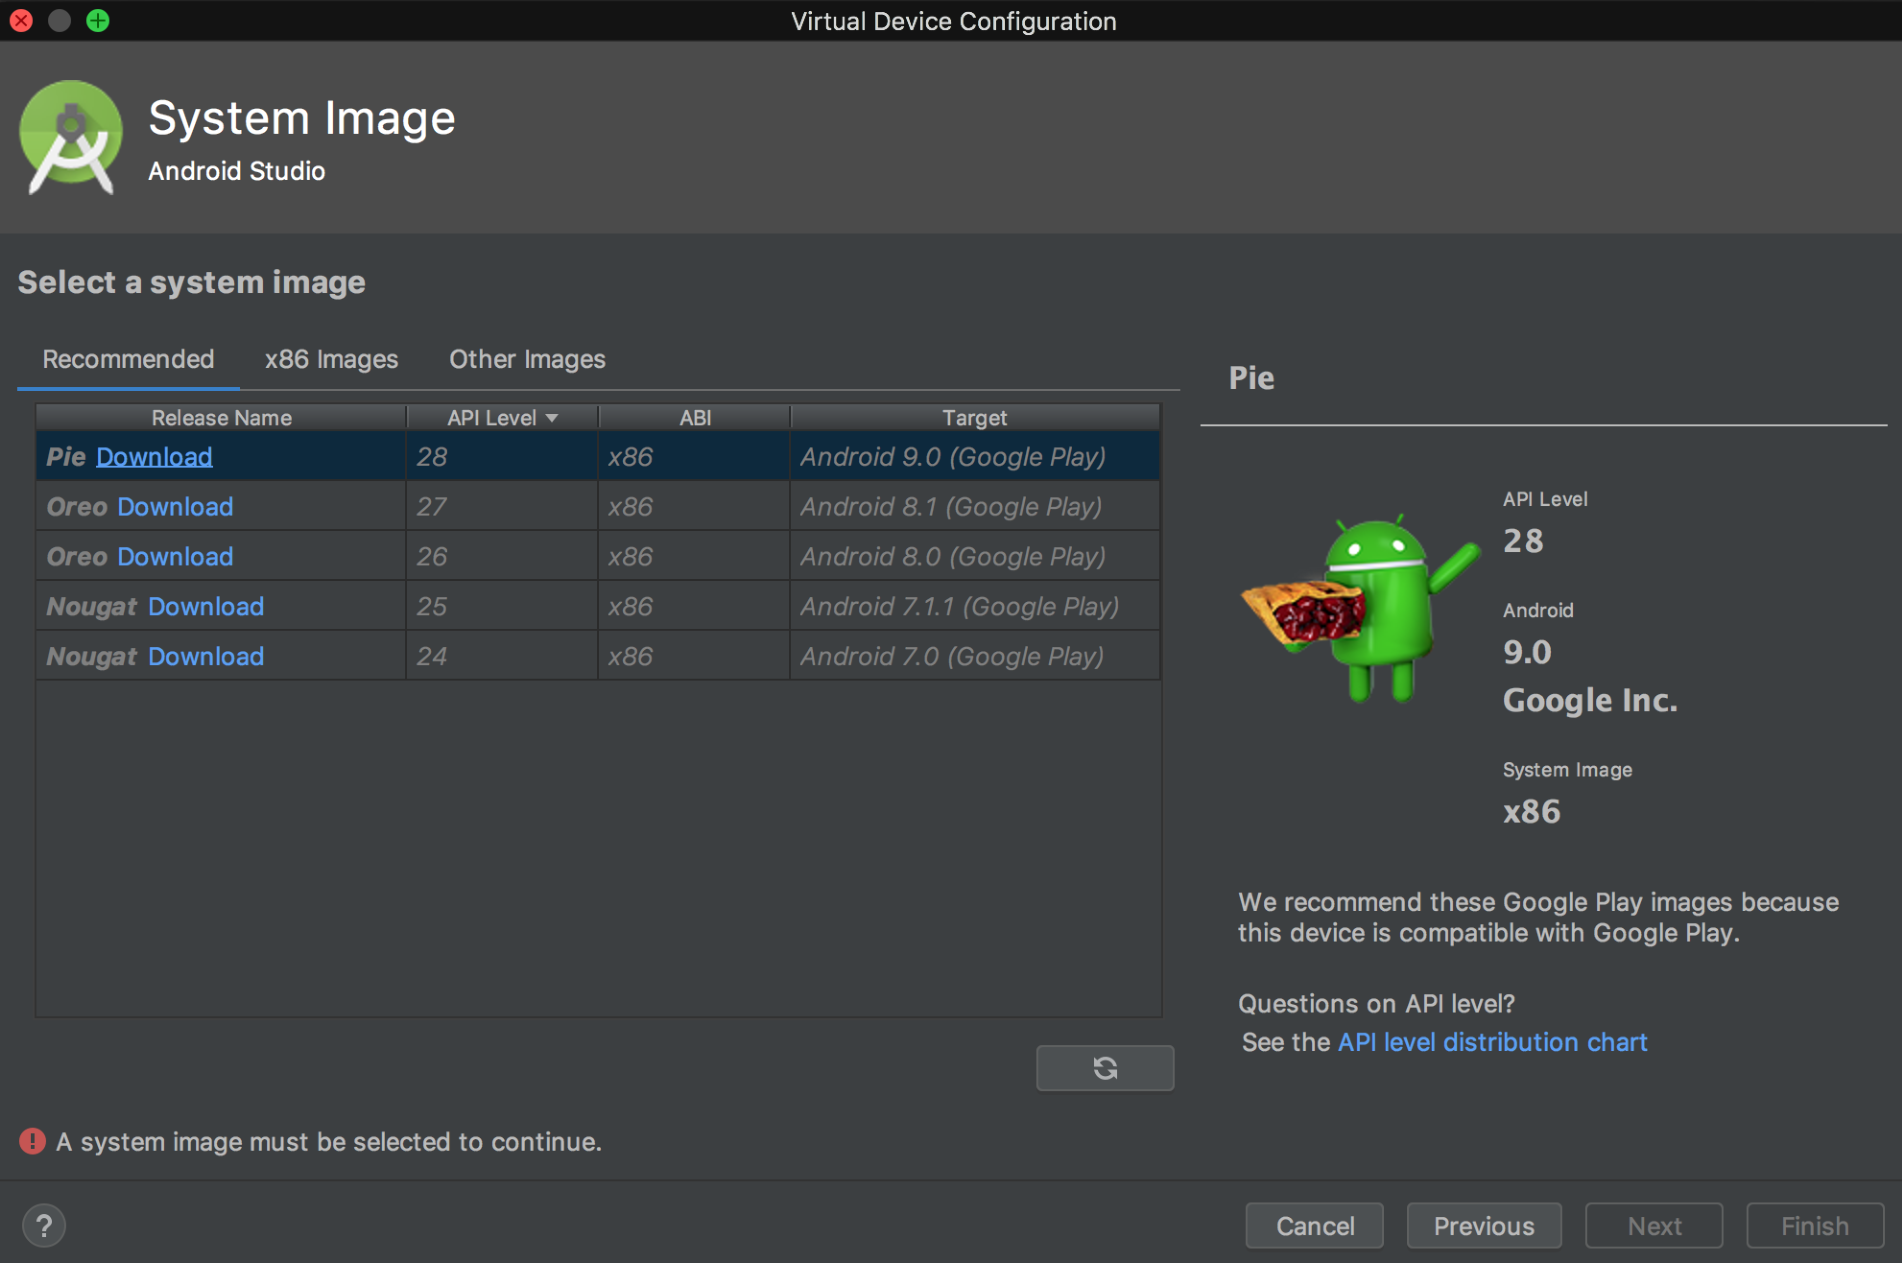
- Download one of the system images under the Recommended tab of the System Image screen:

- Press Finish on the final screen and Android Studio will create your new virtual device. The device can be run at any time by pressing the play button in the row of buttons in the top-right corner:

To run your app on an Android emulator during development, Expo used to recommend using the excellent third-party emulator Genymotion. As of Expo version 29, however, they now recommend using the official emulator that ships with Android Studio.
You can follow the step-by-step guide provided in the official Expo documentation to ensure that Android Studio is set up to work properly with your Expo development workflow. The guide can be found at https://docs.expo.io/versions/latest/workflow/android-studio-emulator.
This is all the setup you need to get started developing your first React Native app using Expo! There are, however, a few extra steps you'll need to perform for working with pure React Native applications (non-Expo applications). Pure React Native app development will be covered in depth in Chapter 10, App Workflow and Third-Party Plugins. Since this setup process is a little more involved and subject to change, I recommend referring to the official guide. You can find these instructions in the React Native: Getting Started guide, located at https://facebook.github.io/react-native/docs/getting-started.html under the Building Projects with Native Code tab section.
Once Simulator is open, select your desired iOS device via the menu bar: Hardware | Device | [IOS Version] | [ iOS Device ]. When running Expo applications in Simulator in the future, the same device should be used automatically.
The app can be started with the Expo CLI in your Terminal if you run the following command:
expo start
The command will build your app and open the Expo Developer Tools in your web browser. In the Expo Developer Tools, select Run on iOS Simulator.


