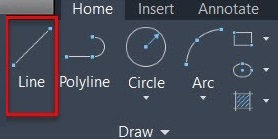
You can select the Line command from the command bar, using its command alias, or you can also select the command from the ribbon panel. The Line command will make a straight-line segment of any specified length. This is the most basic of the draw tools and one of the most frequently used ones in the drawing workflow.
The Line command is in the Draw panel of the Home tab. To start the command, you need to left-click on its icon once or you can use its command alias, L. In this case, let's start the Line command from the ribbon panel:

Once your command is active, you will notice that the cursor will change into a point selection cursor that looks like two perpendicular intersecting lines and the command line will also show the name of the command, along with the prompt, as shown in the following screenshot:

In case you are not able to see the command line/bar at the bottom of the drawing area, press the Ctrl + 9 keys to make it visible or to hide it.
Now, AutoCAD is ready for your input and you can start making the line. To do that, perform the following steps:
- Click on any point in the drawing area and the line will start from that point. Move your cursor and you will notice that the line will follow the movement of the cursor and it will stretch with the cursor, too. This line is also called a rubber bending line, which follows your cursor.
- Click on a second point in the drawing area and the fixed-length segment of the line will be made and the rubber bending line will again follow from the last point where you clicked. Repeat the process to make additional lines, and when you are done making the geometry, press the Enter or Esc key to exit the command.
This is the general workflow for making a random curve in AutoCAD but, as you have noticed, this method lacks precision as the distance was not specified for the line. To make drawings with precise distances, you need to use the direct distance entry method, which is explained in the next section.


