Installing and Configuring Power BI Desktop
Power BI Desktop is the primary tool used to develop the visual and analytical content that is then deployed and collaborated on in the Power BI service, embedded in other applications and portals, or even shared on the public internet. Although Power BI Desktop runs as a single application, it includes three tightly integrated components with their own options and settings:
- The Power Query and Power Query Editor experience, with its underlying M language and data mashup engine
- The Analysis Services tabular data modeling engine and its DAX analytical language
- The interactive reporting and visualization engine
Configuring and leveraging these capabilities; in addition to advanced analytics and customization features such as R, Python, mobile layout, and natural language queries, makes it possible to build robust and elegant BI and analytics solutions.
Getting ready
Most organizations restrict the ability of employees to install software such as Power BI Desktop on their corporate devices. These organizations typically define a policy and process to push a particular version of Power BI Desktop to all user devices or certain groups of users, thus avoiding compatibility issues and ensuring users have access to recent features.
How to install and configure Power BI Desktop
There are actually three different versions of the Power BI Desktop application, as follows:
- Power BI Desktop (Microsoft Store app)
- Power BI Desktop (Microsoft Installer)
- Power BI Desktop RS (Report Server edition)
The preferred method of installation is by using the Microsoft Store app. In order to install Power BI Desktop from the Microsoft Store, follow these steps:
- Open the Microsoft Store app and search for Power BI Desktop. Alternatively, you can enter https://aka.ms/pbidesktop into any browser bar and the Microsoft Store app will automatically open to the Power BI Desktop app, as shown in Figure 1.1.
It is important to make sure that you get the Power BI Desktop app and not just the Power BI app. The Power BI app is for viewing reports published to the Power BI service only.
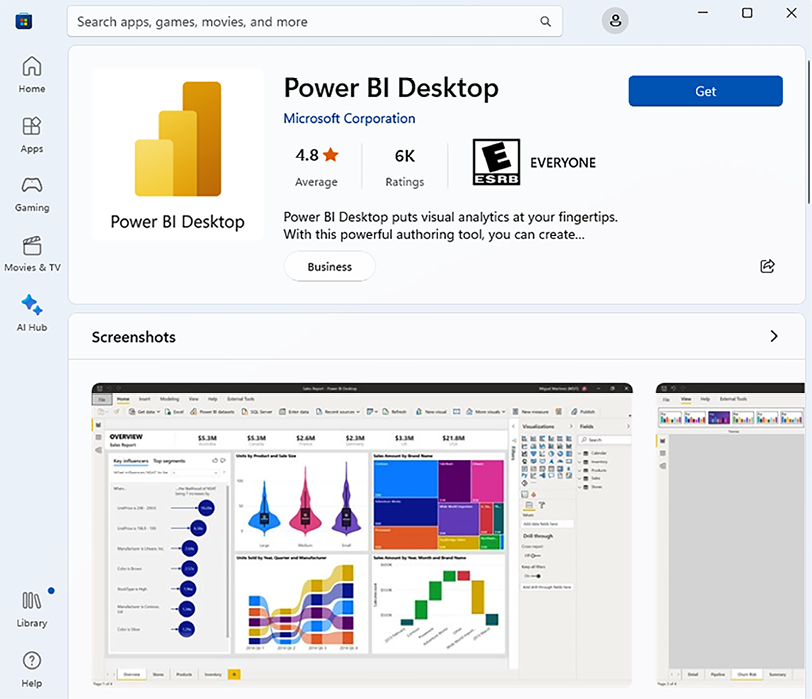
Figure 1.1: The Power BI Desktop app in the Microsoft Store
- Click the Get button.
- Once the download and installation is complete, click the Open button.
Power BI Desktop is now installed, and you are ready to start leveraging this powerful tool for BI.
How it works
Power BI Desktop supports a rich set of configuration options both for the currently open file and all instances of Power BI Desktop on the given device. These options control the availability of the preview and end user features and define default behaviors’ resource usage, security, and privacy/isolation of data sources.
Regardless of the version of Power BI Desktop that is installed, these options are available by using the File menu in the ribbon, selecting Options and settings, and then Options, as shown in Figure 1.2.
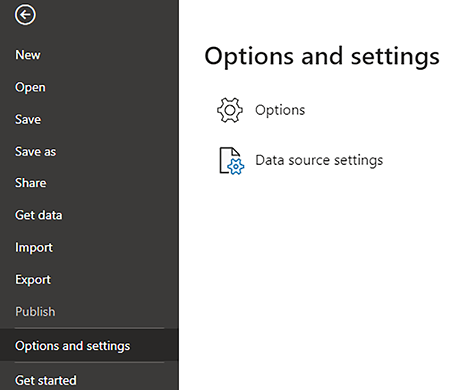
Figure 1.2: Power BI Desktop Options and settings
Selecting Options brings up the Options window, displayed in Figure 1.3.
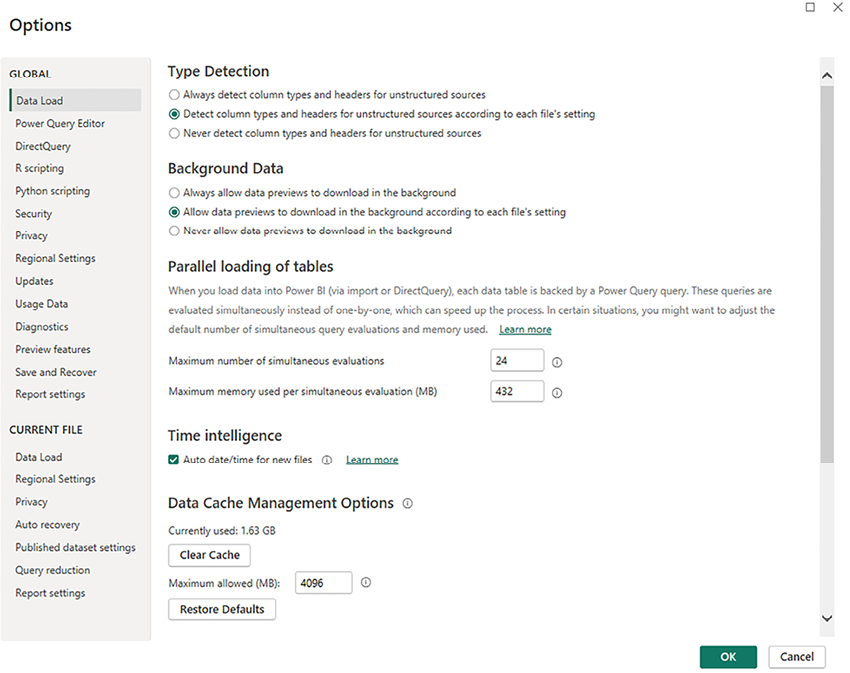
Figure 1.3: Power BI Desktop Options (February 2021)
GLOBAL options are applied to all Power BI Desktop files created or accessed by the user, while CURRENT FILE options must be defined for each Power BI Desktop file. The following steps are recommended for GLOBAL options:
- On the Data Load tab, under Data Cache Management Options, confirm that the currently used data cache is below the Maximum allowed (MB) setting. If it is near the limit and local disk space is available, increase the value of Maximum allowed (MB). Do not clear the cache unless local disk space is unavailable, as this will require additional, often unnecessary, queries to be executed.
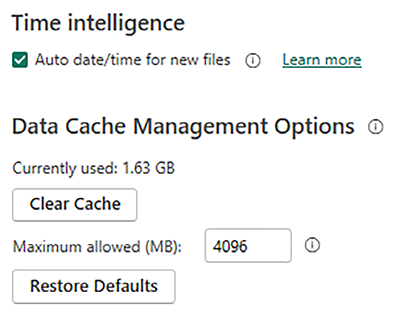
Figure 1.4: Global Data Load options
In addition, under the Time intelligence heading shown in Figure 1.4, consider turning off Auto date/time for new files. While it is perhaps convenient to have out-of-the-box calendar hierarchy functionality for date columns, this can also significantly increase the size of a data model, and it’s strongly recommended to utilize a common date dimension table, preferably from a corporate data warehouse source. Finally, under the Type Detection heading, it is recommended that you choose the Never detect column types and headers for unstructured sources option. The default detection of column types from unstructured sources, such as text or Excel files, will create a hardcoded dependency on the column names in the source file. Additionally, this default transformation will be applied prior to any filter expression and, thus, can require more time and resources to perform the refresh.
- On the Power Query Editor tab, under the Layout header, ensure that Display the Query Settings pane and Display the Formula Bar are both checked, as seen in Figure 1.5.
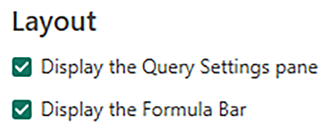
Figure 1.5: Power Query Editor Layout settings
- On the Security tab, under the Native Database Queries header, select the Require user approval for new native database queries option, as shown in Figure 1.6. Native queries are the user-specified SQL statements passed to data sources as opposed to the queries that Power BI generates internally.

Figure 1.6: Security option for Native Database Queries
Optionally, set Show security warning when adding a custom visual to a report as well. Custom visuals can be divided into three categories, as follows:
- Certified for Power BI (only on AppSource)
- Uncertified but available in AppSource
- Third-party and not available in AppSource
Certified custom visuals have been thoroughly tested for safety to ensure that the visuals do not access external services or resources, and that they follow secure coding practices. Uncertified visuals available in AppSource have been through a validation process, although there is no guarantee that all code paths have been tested or that no external services or resources are accessed. Third-party visuals not available in AppSource should be used with caution, and it is recommended that organizations establish policies and procedures regarding their use.
- On the Privacy tab, under the Privacy Levels heading, configure the privacy levels for all data sources and enable the Always combine data according to your Privacy Level settings for each source option, as shown in Figure 1.7. Use the Learn more about Privacy Levels link for details on these settings.

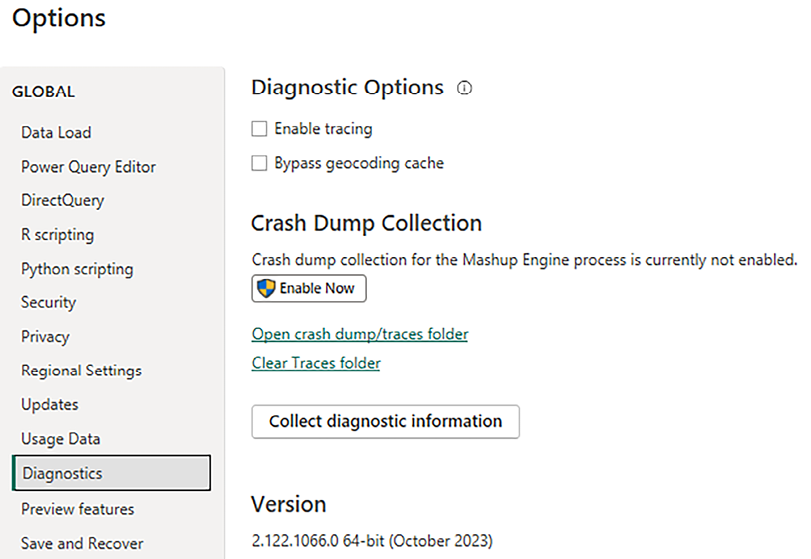
- Use the Diagnostics tab shown in Figure 1.8 to provide version information and diagnostics options if there is a need to troubleshoot a particular problem with Power BI Desktop. The Enable tracing option under the Diagnostic Options header writes out detailed trace event data to the local hard drive and, thus, should only be activated for complex troubleshooting scenarios.
- Use the Preview features tab to enable preview features for evaluation purposes. The options under Preview features change with new versions, as some previous options become generally available and new preview features are introduced. The monthly Power BI Desktop update video and blog post (see https://powerbi.microsoft.com/en-us/blog/) provides details and examples of these new features. Once preview features are changed, a restart of the Power BI Desktop application is required.
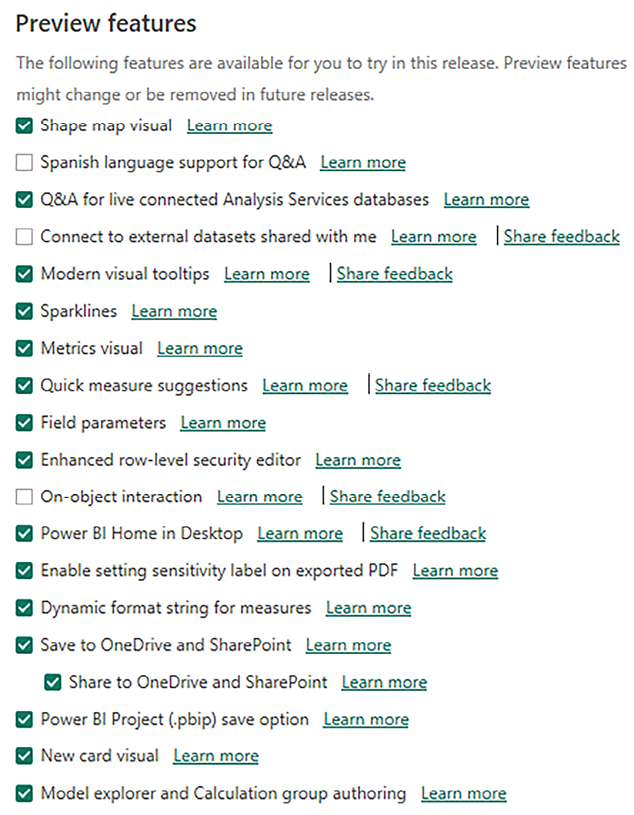
Figure 1.9: Preview features available with the October 2023 release of Power BI Desktop
- On the Data Load tab under CURRENT FILE, more experienced users should disable all of the options under the Type Detection and Relationships headings; these model design decisions should be implemented explicitly by the Power BI developer with knowledge of the source data.
Also, note that you can disable Auto date/time here on an individual file basis if you did not disable this option at a GLOBAL level.
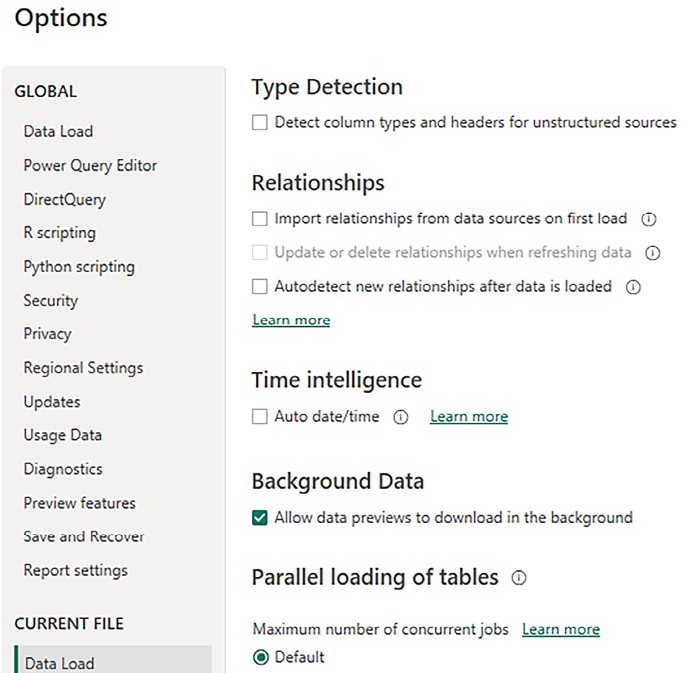
Figure 1.10: Current File Data Load options
There’s more…
There are options for developing and editing Power BI reports, models, and source queries within the Power BI service. However, these web service experiences generally offer only a limited subset of the functionality of the dedicated client applications. Additionally, files created in Power BI Desktop and other client tools can be stored and managed with version control systems. For these reasons, it’s currently recommended to limit web service development to only those artifacts which do not have a dedicated client app such as dataflows.
For a variety of reasons, it may not be possible to install and use the Microsoft Store app version of Power BI Desktop. This may be because of an older version of Windows being run, corporate policies, a desire to use the 32-bit version of Power BI Desktop (the Microsoft Store app is 64-bit only), or you may be working with an on-premises version of Power BI Report Server. In these cases, you can download an executable installer (an .EXE file). To install the EXE version, follow these steps:
- The executable installer version of Power BI Desktop can be downloaded on the Power BI downloads page: https://powerbi.microsoft.com/downloads.
- Under Microsoft Power BI Desktop, choose Advanced download options.
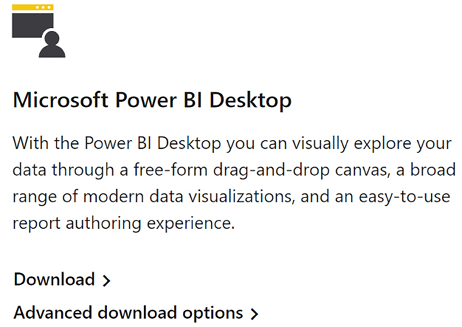
Figure 1.11: Download the executable installer version using Advanced download options
- Select your language preference and click the Download button.
- Choose either the 64-bit version (
PBIDesktopSetup_x64.exe) or the 32-bit version (PBIDesktopSetup.exe), and then click the Next button. - Once the file downloads, click Open file.
- The Microsoft Power BI Desktop Setup Wizard will launch. Select a language and click the Next button. If prompted on whether you want to allow this app to make changes to your device, click the Yes button.
- Complete the rest of the installation wizard, including accepting the license terms and destination folder, and clicking the Next button each time.
- On the final screen, click the Install button.
- Once the installation finishes, click the Finish button.
If you are using Power BI Report Server (on-premises), you need to download the corresponding version of Power BI Desktop optimized for Report Server (the RS version). Updates for Power BI Report Server come out quarterly, and there is a specific version of Power BI Desktop released simultaneously that is optimized to work with each quarterly version. The installation is the same as the executable installer (EXE) version. However, to find the download for the RS version, follow these steps:
- Use a browser to navigate to https://powerbi.microsoft.com/report-server.
- Use the Advanced download options link directly under the DOWNLOAD FREE TRIAL button.

Figure 1.12: Download the RS version using Advanced download options
After this, the instructions are the same as the executable installer version just covered. Pick up the installation steps from step 3.
See also
For additional information on the topics covered in this recipe, refer to the following links:
- Power BI security white paper: http://bit.ly/22NHzRS
- Data source privacy levels: http://bit.ly/2nC0Lmx
- Power BI auto date/time: http://bit.ly/3bH59cn
- Change settings for Power BI reports: http://bit.ly/2OP8m0F


