Setting up Kali Linux in virtual environment
Before using Metasploit, we need to have a test lab. The best idea for setting up a test lab is to gather different machines and install different operating systems on them. However, if we only have a single machine, the best idea is to set up a virtual environment.
Virtualization plays an important role in penetration testing today. Due to the high cost of hardware, virtualization plays a cost-effective role in penetration testing. Emulating different operating systems under the host operating system not only saves you money but also cuts down on electricity and space. However, setting up a virtual penetration test lab prevents any modifications on the actual host system and allows us to perform operations on an isolated environment. A virtual network allows network exploitation to run on an isolated network, thus preventing any modifications or the use of network hardware of the host system.
Moreover, the snapshot feature of virtualization helps preserve the state of the virtual machine at a particular point in time. This proves to be very helpful, as we can compare or reload a previous state of the operating system while testing a virtual environment without reinstalling the entire software in case the files are modified after attack simulation. Virtualization expects the host system to have enough hardware resources, such as RAM, processing capabilities, drive space, and so on, to run smoothly.
Note
For more information on snapshots, refer to https://www.virtualbox.org/manual/ch01.html#snapshots.
So, let us see how we can create a virtual environment with the Kali operating system (the most favored operating system for penetration testing, which contains the Metasploit framework by default).
Tip
You can always download pre-built VMware and VirtualBox images for Kali Linux here: https://www.offensive-security.com/kali-linux-vmware-virtualbox-image-download/
In order to create virtual environments, we need virtual machine software. We can use any one between two of the most popular ones: VirtualBox and VMware player. So, let us begin with the installation by performing the following steps:
- Download the VirtualBox (http://www.virtualbox.org/wiki/Downloads) setup for your machine's architecture.
- Run the setup and finalize the installation.
- Now, after the installation, run the VirtualBox program, as shown in the following screenshot:

- Type an appropriate name in the Name field and select the operating system type and Version, as follows:
- Now, to install a new operating system, select New.
- For Kali Linux, select Operating System as Linux and Version as Linux 2.6/3.x/4.x
- This may look similar to what is shown in the following screenshot:

- Select the amount of system memory to allocate, typically 1 GB for Kali Linux.
- The next step is to create a virtual disk that will serve as a hard drive to the virtual operating system. Create the disk as a dynamically allocated disk. Choosing this option will consume just enough space to fit the virtual operating system rather than consuming the entire chunk of physical hard disk of the host system.
- The next step is to allocate the size for the disk; typically, 10 GB of space is enough.
- Now, proceed to create the disk, and after reviewing the summary, click on Create.
- Now, click on Start to run. For the very first time, a window will pop up showing the selection process for startup disk. Proceed with it by clicking Start after browsing the system path for Kali's .iso file from the hard disk. This process may look similar to what is shown in the following screenshot:

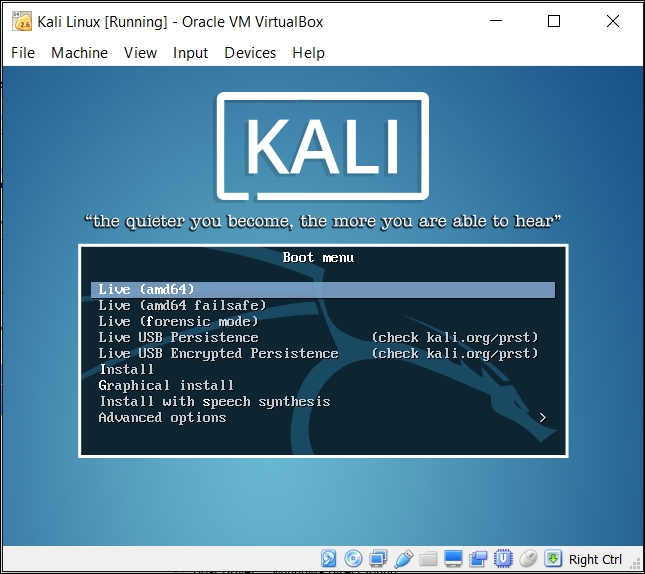
You can run Kali Linux in Live mode or you can opt for Graphical Install/ Install to install it persistently, as shown in the following screenshot:

Note
For the complete persistent install guide on Kali Linux, refer to http://docs.kali.org/category/installation.To install Metasploit through command line in Linux, refer to http://www.darkoperator.com/installing-metasploit-in-ubunt/.To install Metasploit on Windows, refer to an excellent guide https://community.rapid7.com/servlet/JiveServlet/downloadBody/2099-102-11-6553/windows-installation-guide.pdf.


