Users can add favorites within the Application Navigator by clicking the star icon, visible on the right when hovering over any application menu or module in the Application Navigator. Adding a favorite will make it come up first when filtering the Application Navigator using any term that it matches. It'll also show up under your favorites list, which you can see by clicking the tab at the top of the Application Navigator, below the filter text box, with the same star icon you see when adding a module to your favorites.
Let's try out Favorites now by adding some favorites that an admin or developer is likely to want to come back to on frequent occasion.
Add the following modules to your favorites list by filtering the Application Navigator by the module name, hovering over the module, and clicking the star icon on the right:
- Workflow | Workflow Editor
- System Definition | Script Includes
- System Definition | Dictionary
- System Update Sets | Local Update Sets
- System Logs | System Log | All
Now that we've got a few favorites, let's rename them so they're easier to identify at a glance. While we're at it, we'll give them some new icons as well:
- Click the Favorites tab in the Application Navigator, and you should see your newly added favorites in the list.
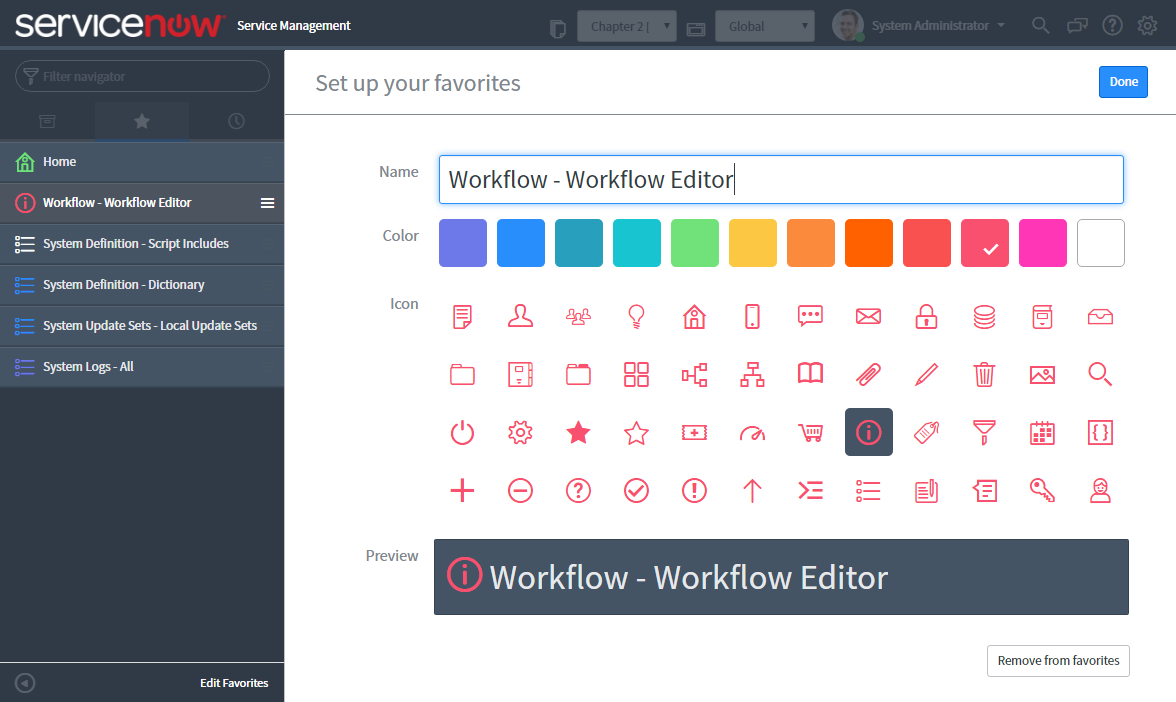
- At the bottom-right of the Application Navigator in the ServiceNow frame, click on Edit Favorites.
- Click on the favorite item called Workflow - WorkflowEditor. This will select it so you can edit it in the content frame on the right:

- In the Name field, give it something simpler, such as Workflow Editor. Then choose a color and an icon. I chose white, and the icon that looks like a flowchart. I also removed my default Home favorite, but you don't have to.
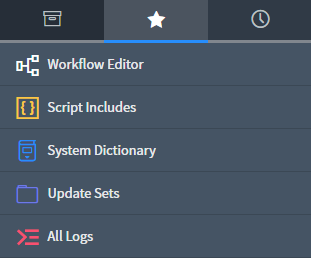
Here is what my favorites look like after I made my modifications:

Another way to add something to your favorites is to drag it there. Certain specific elements in the ServiceNow UI can be dragged directly into your Favorites tab. Let's give it a try!
- Head over to the Incident table by using the .list trick.
- In your developer instance, enter incident.list into the filter text box in the Application Navigator; then press Enter.
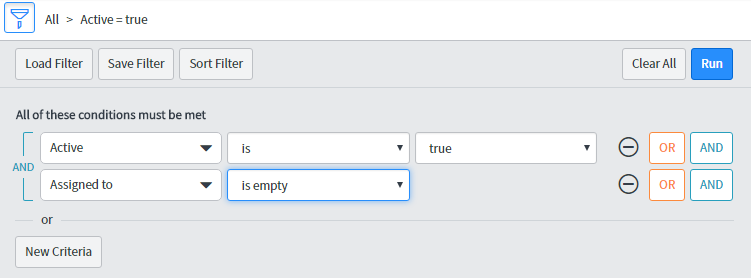
- Click on the Filter icon at the top-left of the Incident list, and filter the Incident list using the condition builder. Add some conditions so that it only displays records where Active is true, and Assigned to is empty. Then click on Run:

- The list should now be filtered, after you hit Run. You should see just a few incidents in the list. Now, at the top-left of the Incident table, to the left of the Incidents table label, click on the hamburger menu (yeah, that's really what it's called). It looks like three horizontal bars atop one another. In that menu, click on Create Favorite.
- Choose a good name, like Unassigned Incidents, and an appropriate icon and color. Then click Done. You should now have an Unassigned Incidents favorite listed!
Finally, if you click on the little white left-facing arrow at the bottom-left of the Application Navigator, you'll notice that whichever navigator tab you have selected, your favorites show up in a stacked list on the left. This gives you a bit more screen real-estate for the content frame.


