Search icon CANCEL
Arrow left icon
Explore Products
Best Sellers
New Releases
Books
Videos
Audiobooks
Learning Hub
Conferences
Free Learning
Arrow right icon
Arrow up icon
GO TO TOP
Learning Informatica PowerCenter 10.x

You're reading from   Learning Informatica PowerCenter 10.x Enterprise data warehousing and intelligent data centers for efficient data management solutions

Arrow left icon
Product type Paperback
Published in Aug 2017
Publisher
ISBN-13 9781788471220
Length 426 pages
Edition 2nd Edition
Arrow right icon
Author (1):
Arrow left icon
Rahul Malewar Rahul Malewar
Author Profile Icon Rahul Malewar
Rahul Malewar
Arrow right icon
View More author details
Toc

Table of Contents (13) Chapters Close

Preface 1. Downloading and Extracting Informatica PowerCenter Software FREE CHAPTER 2. Understanding Admin Console 3. Understanding Designer Screen and its Components 4. The Lifeline of Informatica - Transformations 5. Using the Designer Screen - Advanced Features 6. Implementing SCD Using Designer Screen Wizards 7. Using the Workflow Manager Screen 8. Learning Various Tasks in Workflow Manager screen 9. Advanced Features of Workflow Manager Screen 10. Working with Workflow Monitor - Monitoring the code 11. The Deployment Phase - Using Repository Manager 12. Optimization - Performance Tuning

Repository creation - the centralized database for Informatica


Our first step is to create a repository. As mentioned earlier in the book, the repository is the centralized database of Informatica, which is used to store metadata generated in the client tools.

To create the first repository, follow the process mentioned in the preceding section. Refer to the following screenshot.

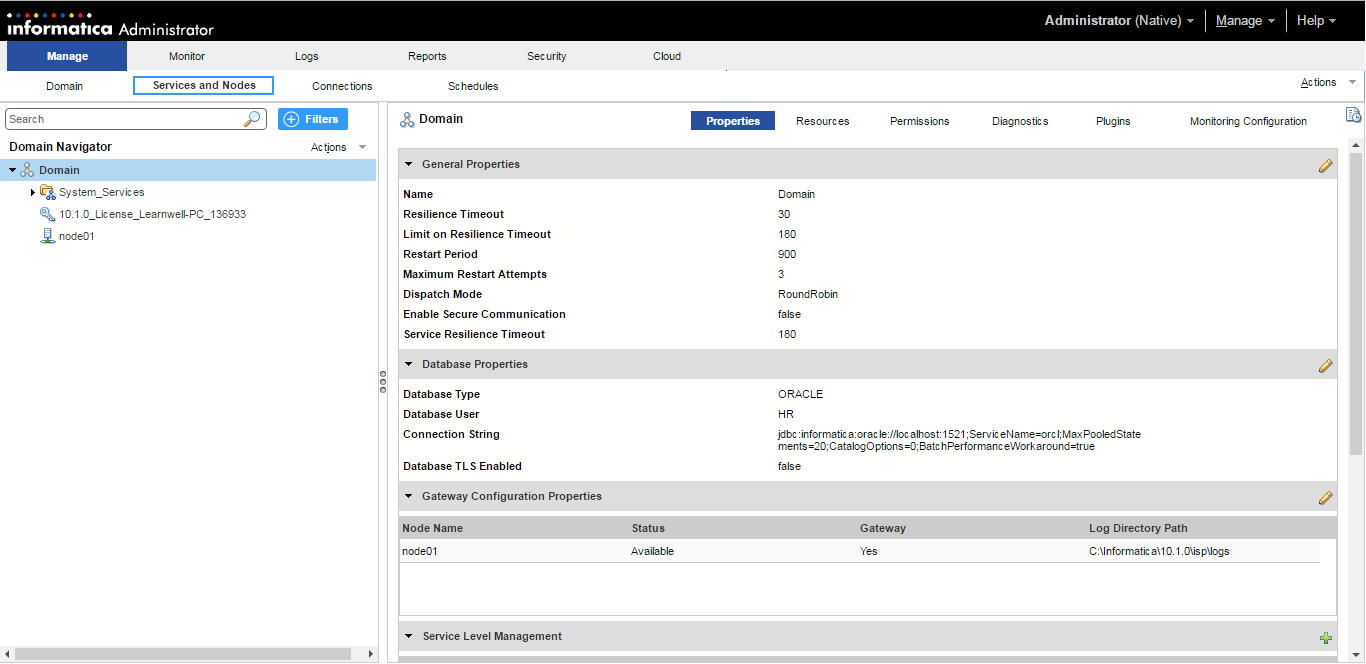
  1. Click on the Services and Nodes option. You will be presented with various services. You will see the domain name and the node name on the left side of the screen, which we created in the earlier section:
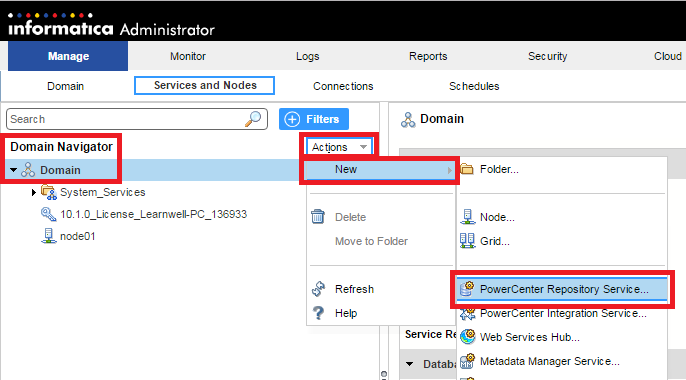
  1. Navigate to Domain under Domain Navigator | Actions | New | PowerCenter Repository Service...:
  1. This will open a pop-up window, which will allow you to provide details for creating the repository, as shown in the following points. Insert the details:
    • Repository name: Add the name of the repository. You can specify any name as per your wish. We are using REPO for our reference in this book.
    • Description: Write a description...
lock icon The rest of the chapter is locked
Register for a free Packt account to unlock a world of extra content!
A free Packt account unlocks extra newsletters, articles, discounted offers, and much more. Start advancing your knowledge today.
Unlock this book and the full library FREE for 7 days
Get unlimited access to 7000+ expert-authored eBooks and videos courses covering every tech area you can think of
Renews at €18.99/month. Cancel anytime