Installing Kali Linux on Cloud - Amazon AWS
Almost 2 years ago, Kali has been listed in Amazon EC2 Marketplace. It was a really good news for penetration testers, as they can setup their very own Kali in Amazon AWS Infrastructure and use for penetration testing, moreover it is eligible for Free Tier, wherein you can use it to set up your EC2 instance for $0, as long as you stay within the designated limits, which is fair enough.
The steps provided in this recipe will help you in setting up an instance running a Kali Linux on Amazon AWS EC2 console securely within minutes.
Getting ready
For this recipe, you require:
- An Amazon AWS Account
- Minimum 2 GB RAM, if you want to run Metasploit
How to do it...
Perform the steps for this recipe:
- Once you have the AWS account created, login to
https://aws.amazon.com
and navigate to
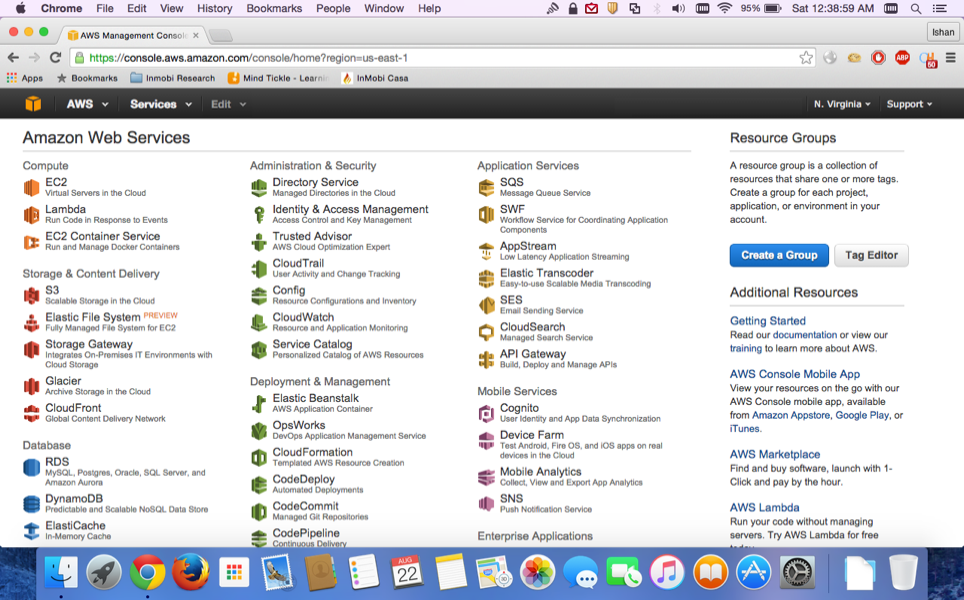
Web Servicesdashboard as shown in the following screenshot. Go toEC2|Launch Instance:
- You will need to select
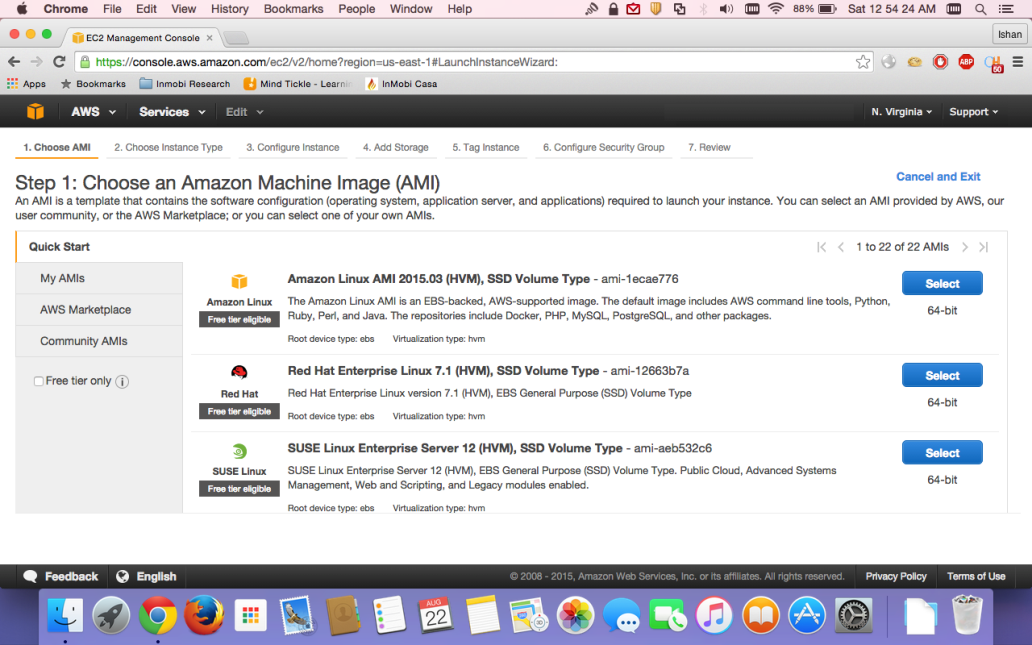
Machine Image (AMI)as shown in the screenshot:
- Click on the
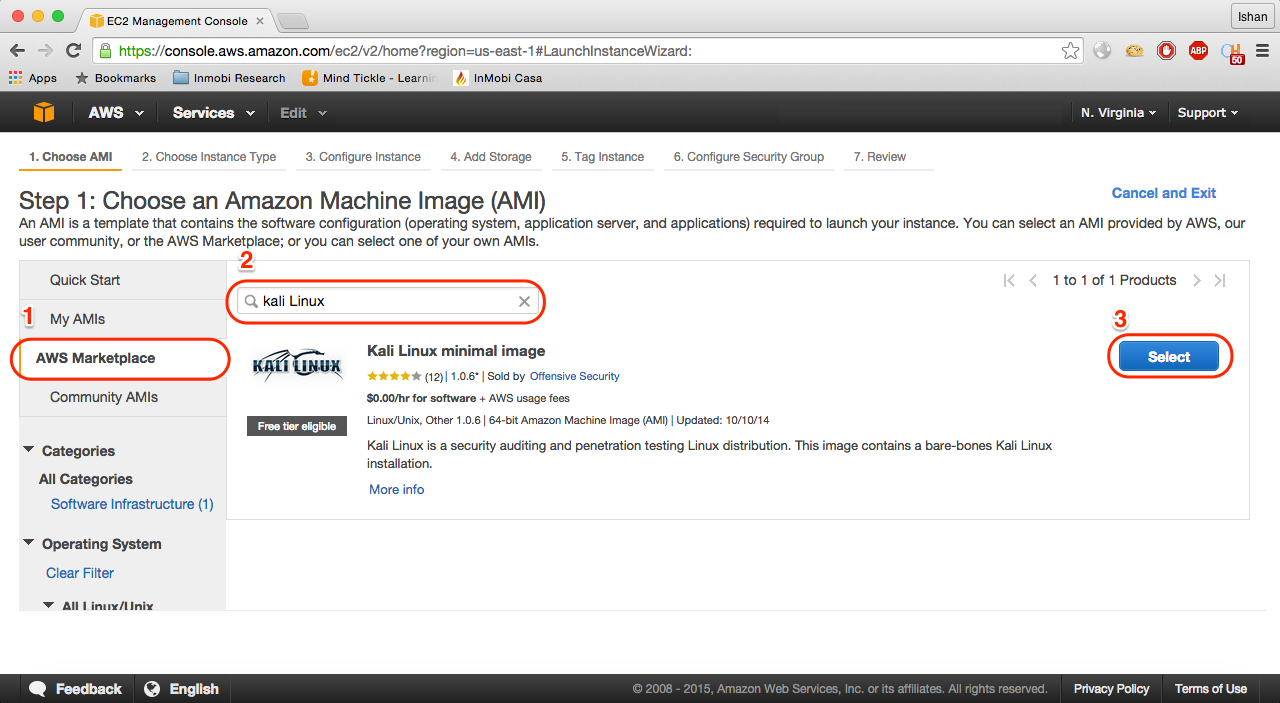
Marketplaceoption and search for Kali Linux onAWS Marketplaceas shown in the screenshot:
- Click on
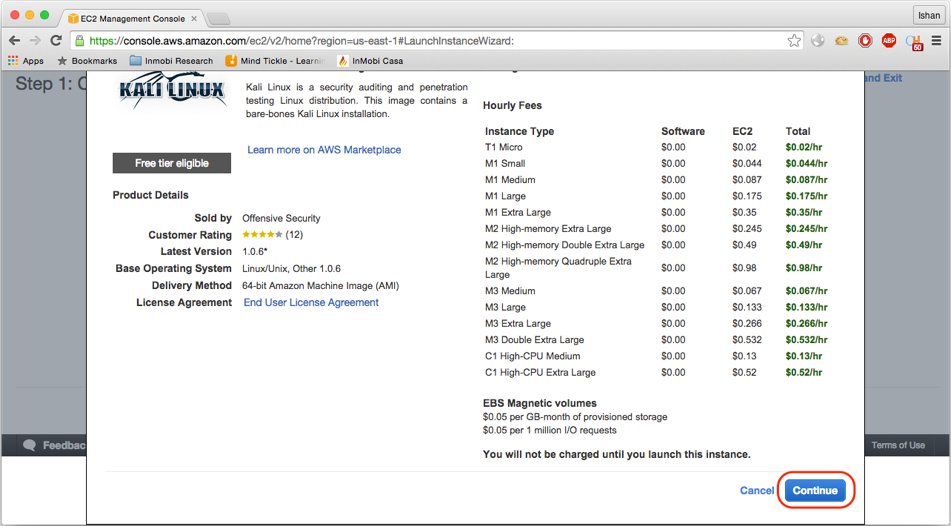
Selectand then click onContinueas in the screenshot:
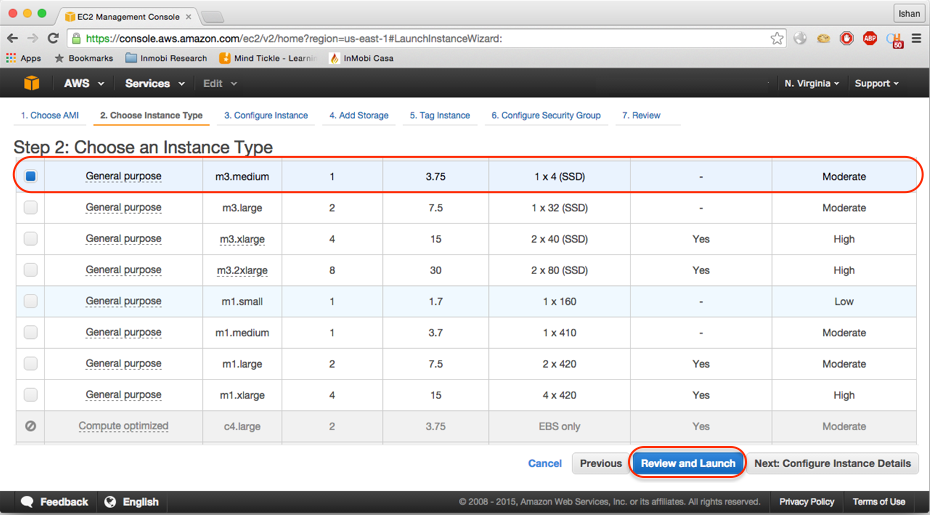
- Now you are on the screen displayed in step 2. Here you can select an instance type; be informed that only
t1.microandt2.microwill be eligible for free tier. However, running Metasploit requires minimum 2 GB RAM. For this you can opt fort2.smallort2.mediumas per your budget as in the screenshot:
- Click on
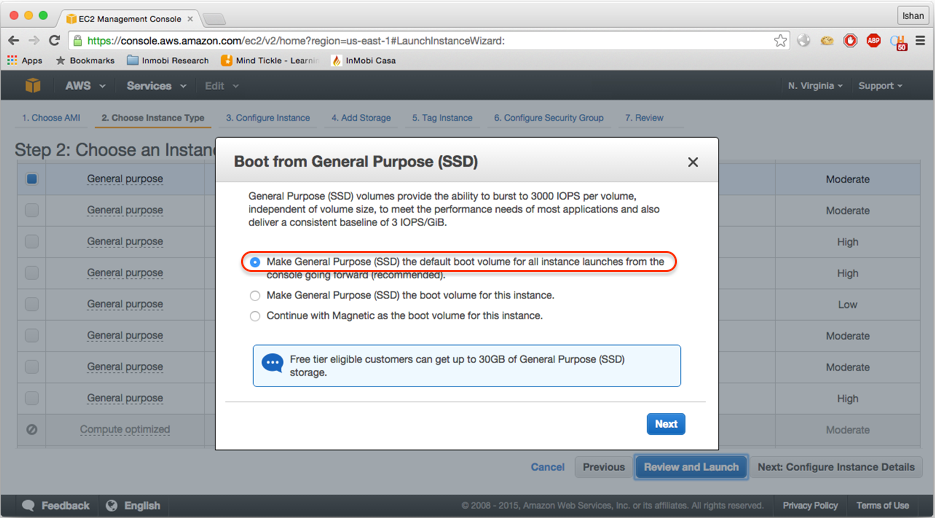
Review and Launch. You will see a popup window asking you to use SSD as your boot volume. SelectMake general purpose (SSH)...(recommended)and click onNext, as in the screenshot:
- You will be directly taken to step 7 for review, as in the screenshot:
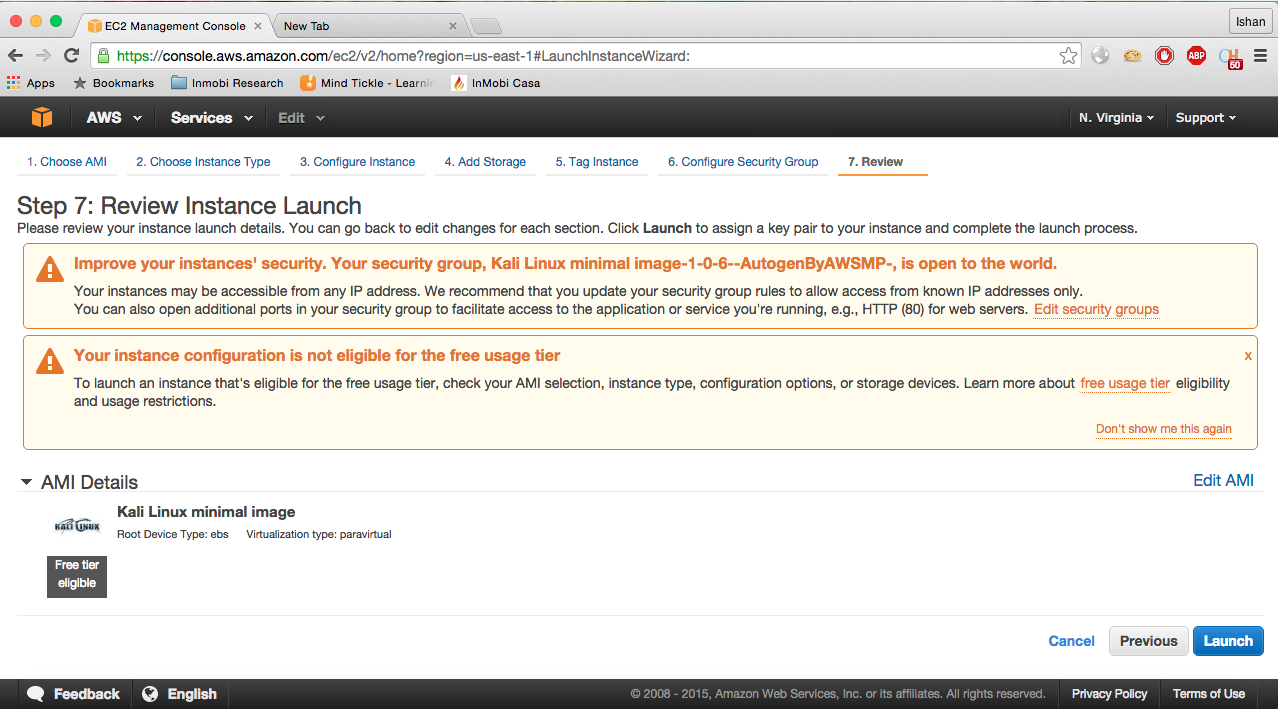
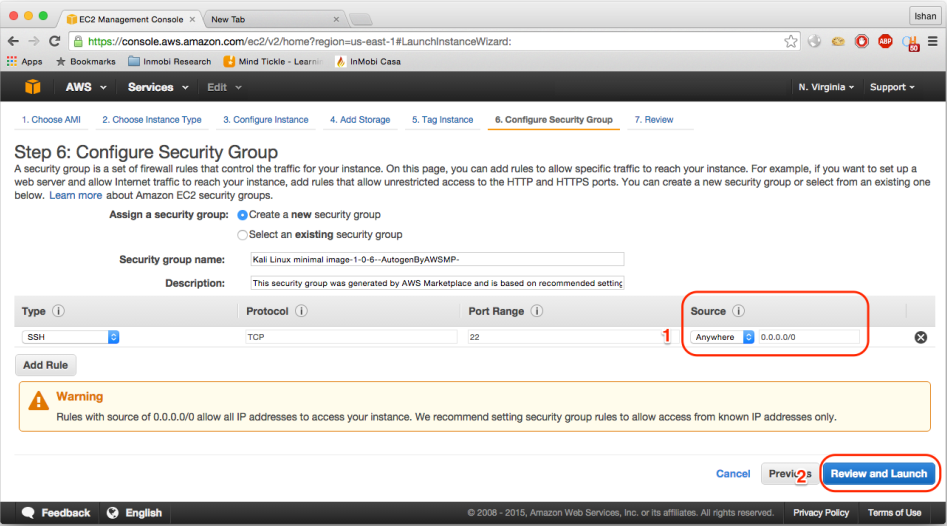
- You will first see the warning, which is to improve your instance security; click on
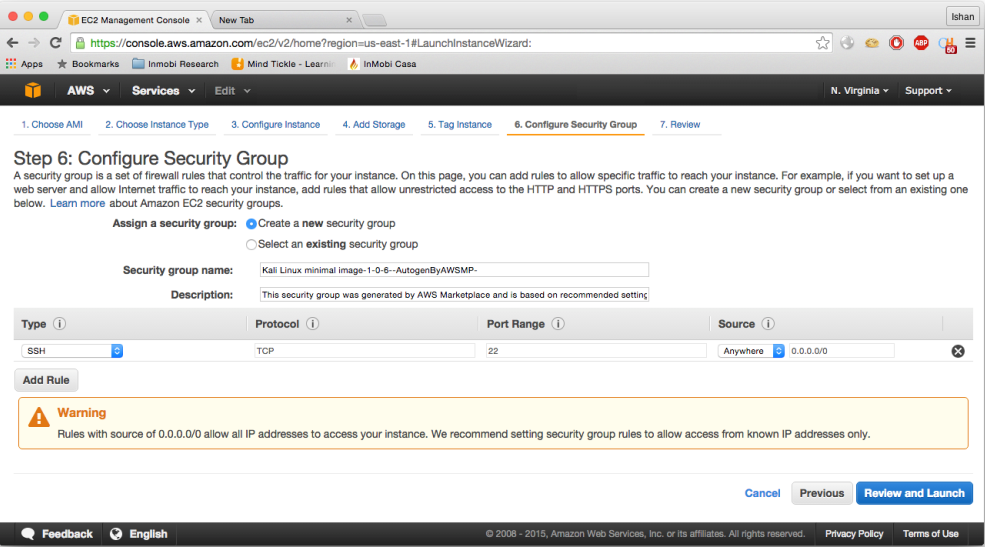
6. Configure Security Group, as in the screenshot:
- Click on the
Sourcelistbox and selectMy IP, it will automatically detect your public IP range. Click onReview and Launch. Note that it would only if you have a public IP. If you have a dynamic IP, you will need to login back to the AWS console and allow your updated IP address:
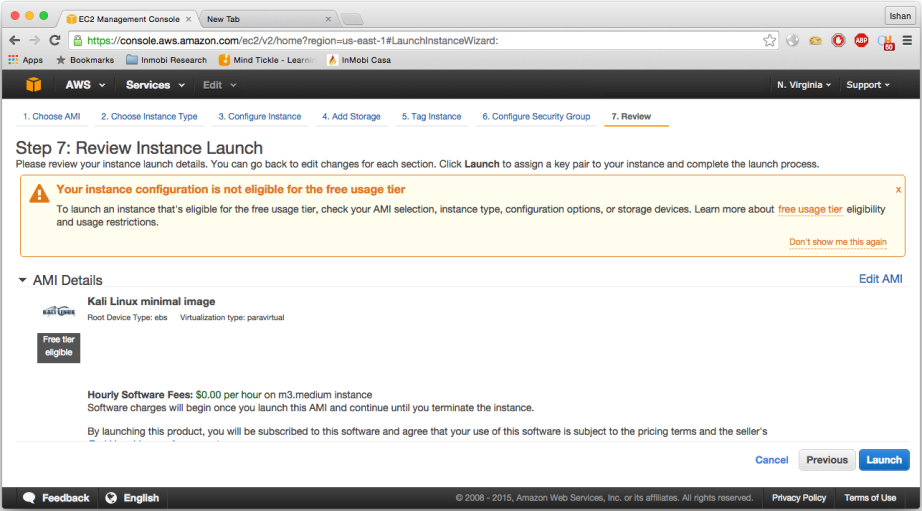
- As you see, there is a that says you are not eligible for free usage tier since we have selected
m2.mediumfor minimum 2GB RAM:
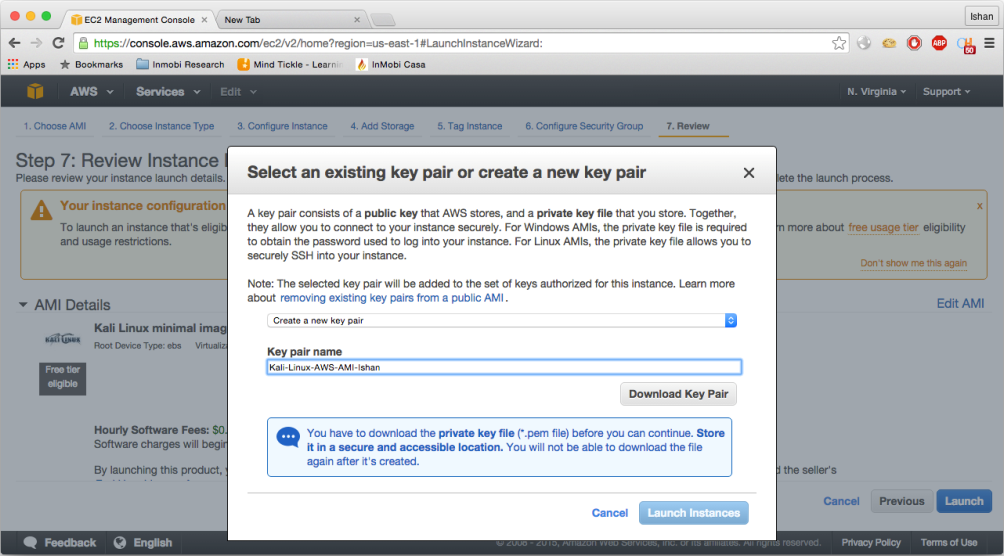
- Click on
Launch; here you need to a new key pair before and download it before you proceed, as shown in the following screenshot:
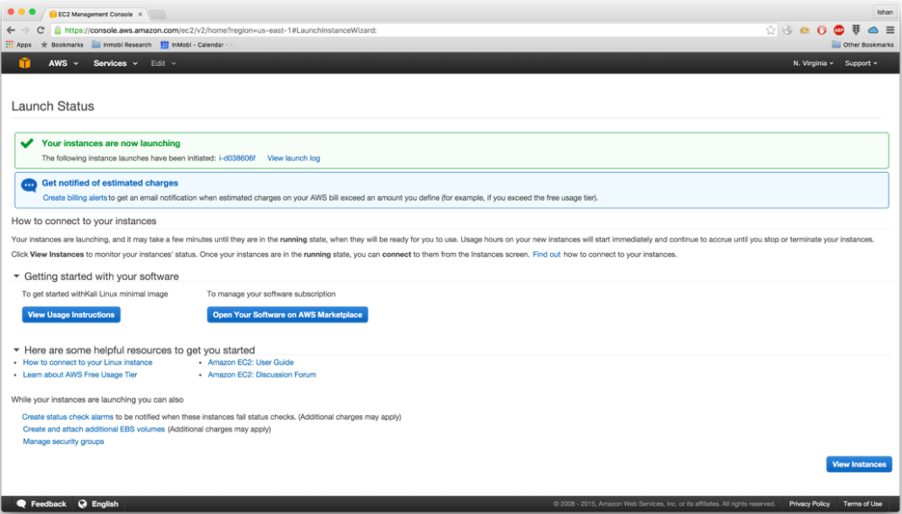
- Once you downloaded the pair, go ahead and click on
Launch Instances, as shown in the following screenshot:
How it works...
EC in EC2 stands for elastic computing, and the short answer is bringing up a virtual in the cloud. Amazon AWS has a collection of all the popular OS images already available and all you need to do is select the one you need for requirement, followed by the hardware requirement. Based on your OS and the hardware configuration you selected, AWS will provision that hardware and install that OS. You can select the type of storage you want, traditional or SSD, and then attach/de-attach the hard drive based on your requirement. Best of all, you only pay for the time you want to use it, and when you stop the EC2 machine, AWS will free up those resources and add them back its stock, that's how flexible AWS is. Now, it's time for a quick recap of what we did in this recipe. As a prerequisite, you need to first create an amazon AWS account, which is very easy to create. Then, step 1 shows you how to select EC2. Steps 2 and 3 show how to search and select Kali Linux's minimal image. In step 4, you get to read everything that Kali Linux AMI has to offer, the basic requirements and the user login information. Step 5 shows you how to select an instance type depending on your requirement and budget. In steps 6 to 7 you will go through the simple wizard while choosing the default recommended SSD to boot from. Step 8 shows you the final page with warnings and points you should take care of or be aware of. In step 9, you choose to set up a security group on SSH protocol port 22 only to allow you from a specific IP range that belongs to you. In step 10, you are shown the review page, where based on your instance type selection it informs you whether you are eligible for free tier or not. In step 11, you create a new SSH Key pair and download it on your local machine. In step 12, you finally click on launch to start the instance.
There's more...
Having Kali Linux installed in Amazon AWS infrastructure with a public IP address, with just few clicks, can prove to be very helpful during external penetration testing. As you know, we have selected and installed Kali Linux's minimal image for use in AWS infrastructure, due to which our installation does not have any tools installed by default.
In our next recipe, we will cover how to use SSH and setup Kali Linux on Amazon AWS box for use. In this recipe, we will also solve few problems that you might face while updating the repository and installing Kali Linux tools and setting up GUI and installing all the required tools we will need for use.


