User Interface
While we've already seen a little bit of the user interface, in this section, we're going to explore more of it and how the pieces work. We'll start off with a reference image to remind you where things are in general, and then drill down into each of the main areas:
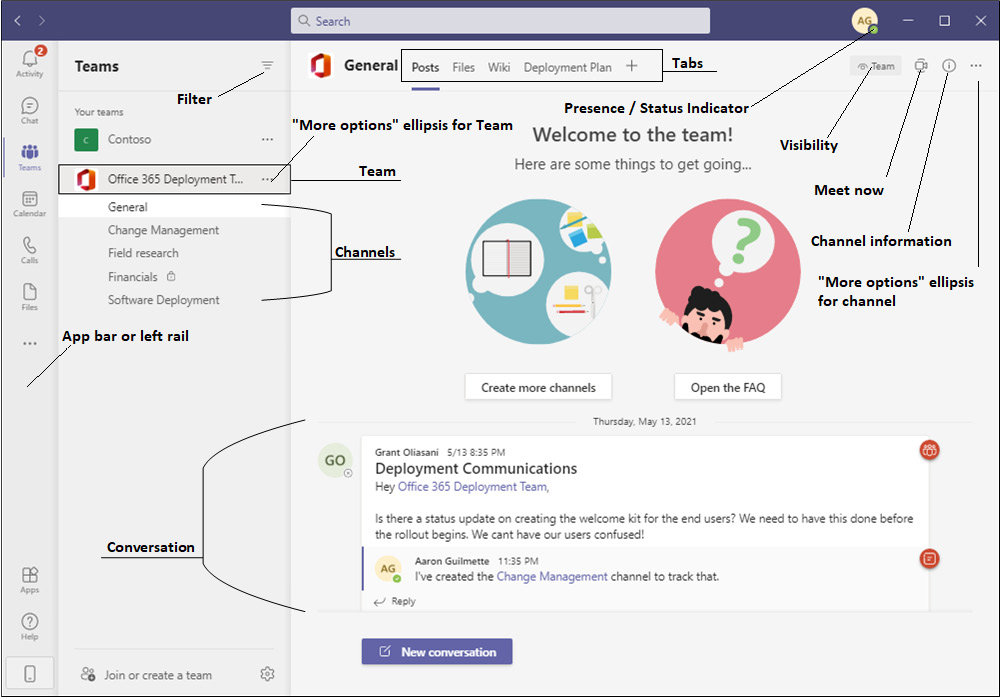
Figure 1.6 – Annotated Teams user interface
There are myriad clickable action buttons and areas in the Teams interface. Here's a quick rundown of the main areas:
- Menu bar: This area, along the top of the user interface, has both new and familiar buttons. If you're familiar with Windows applications, you'll instantly recognize the Minimize, Restore Up/Down, and Exit buttons at the far right of the bar. New to the Teams interface, the Menu bar also displays Forward and Back navigation buttons and hosts a Search bar, which can be used to search across all Teams areas. The Menu bar also displays the logged-in user's avatar (either their initials or an image if they choose to upload one), along with a small bubble indicating their presence (sometimes referred to as status) information.
- App bar (or left rail): This is the area on the far-left side of the screen where icons such as Activity, Chat, Teams, Calendar, Calls, and Files appear. Administrators can manage the icons that appear here, and users can edit the order of the icons.
- List pane: This is the middle area of the Teams user interface and displays the items that correspond to the view selected in the left rail. For example, in Figure 1.6, the Teams view is selected, so the list pane shows all of the user's currently joined teams. The list pane also features a Filter button at the top of the column, which allows you to search and filter items in the list pane to locate things more quickly, and a Join or create a team button at the bottom.
- Main content area: This is the area on the far-right side of the Teams interface. This area will change to display the content of whatever item is selected in the list pane. For example, in Figure 1.6, the Office 365 Deployment Team is selected, and the main content area is displaying data from the Posts tab.
Now that you're familiar with the overall structure and layout of the Teams user interface, let's expand upon each of the items on the left rail.
Activity
If you're familiar with modern applications (social media apps, modern mobile phones, or desktop apps), you're probably familiar with the concept of activity and notifications. Like those modern applications that have notifications, Microsoft Teams also uses notification bubbles to highlight new items.
The Activity view is used to draw your attention to things specifically targeted to either you, a team you're in, or a channel you're in. For example, in the following Activity view example, you can see a few items:
- The user Grant has assigned the logged-in user some tasks.
- The user Grant has modified the priority of these tasks.
- The user Isiah has made the logged-in user the owner of the Contoso group:
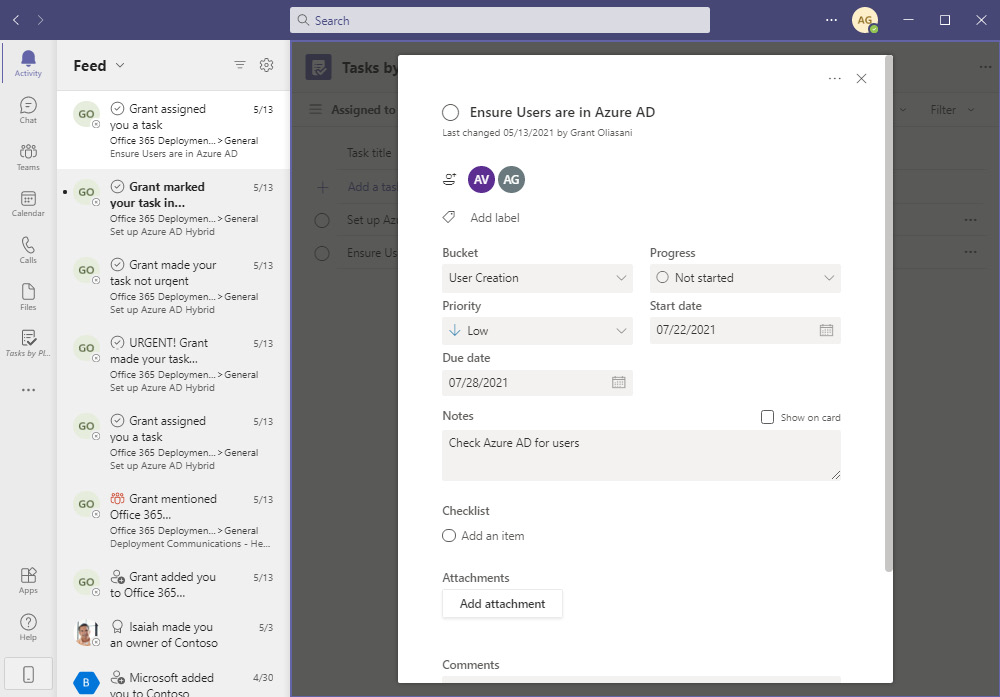
Figure 1.7 – Teams Activity view
As with popular social media platforms, you can use the @ symbol to mention an individual, channel, or team. These mentions will show up in the Activity view for the individual user mentioned (or for each member of a channel or team mentioned), similar to how mentions work in the To line of Outlook. In addition to other users mentioning you or your teammates, apps can also generate notifications that will show up in your activity feed.
Chat and presence
By selecting the Chat view, you can initiate one-to-one or one-to-many (also known as group) conversations. Chat is an essential part of the Microsoft Teams experience. You can search for users from the address book and add them to conversations.
User avatars (both yourself and others you invite) have a presence indicator in the form of a bubble, which lets others know the status of the user. Broad status categories include the following:
- Available
- Busy
- Do not disturb
- Away
- Offline
Each status has a corresponding color. Some statuses may include additional detail (such as Focusing, Presenting, or In a Call). Do not disturb statuses are special in that others cannot contact you during this time (with the exception of people you place on a special list called priority access).
Teams
You should already be familiar with the Teams view, which was displayed previously in Figure 1.6. The Teams view shows all the teams to which you're currently joined and gives you a way to navigate the various teams and channels.
Calendar
The Calendar view shows the entries on your current calendar (whether Exchange Online or on-premises) and allows you to create both impromptu and scheduled meetings:
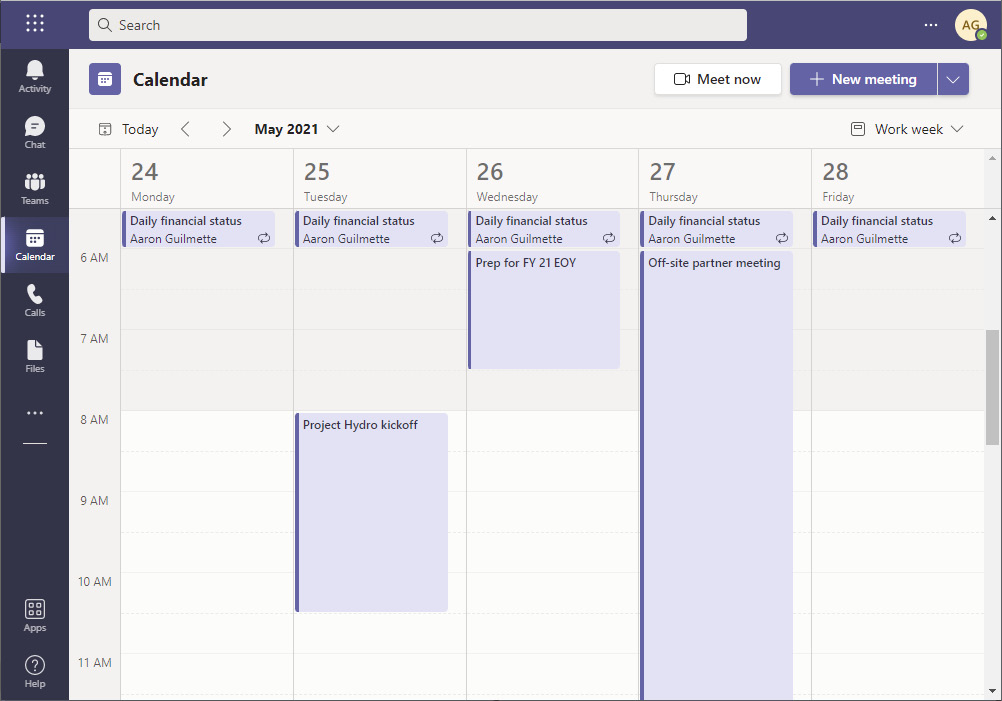
Figure 1.8 – Teams Calendar view
Creating a meeting through the Calendar view automatically adds a Teams meeting link if the meeting has attendees.
Calls
The Calls view shows a mix of information, depending on what features are enabled. The view will show various calling items, such as a call log and voicemail history, as well as the option to view contacts stored in the user's Outlook mailbox. If the user has a voice plan included, then the screen will display a dial pad:
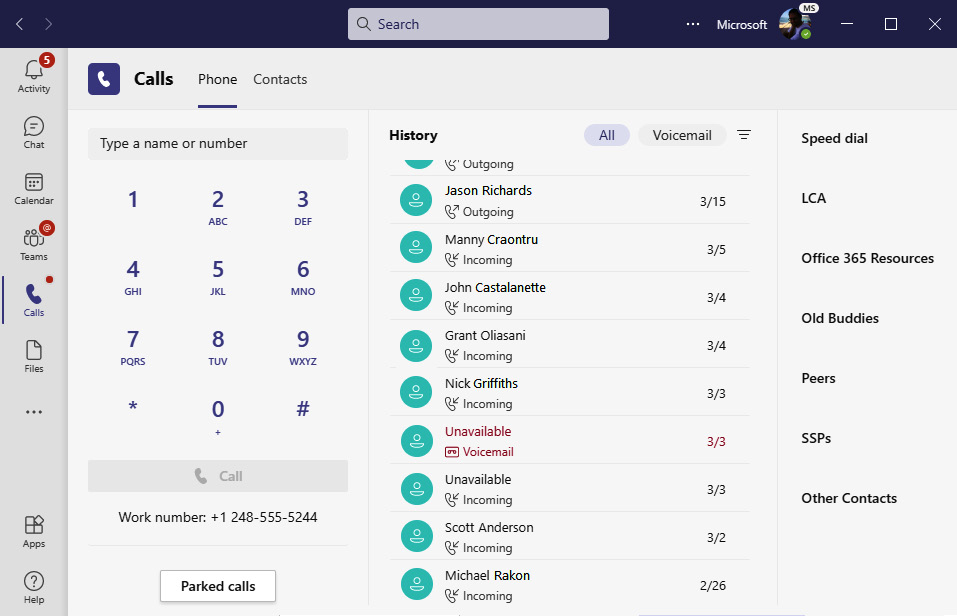
Figure 1.9 – Calls view
As seen in Figure 1.9, call directionality (whether incoming or outbound) is included. There is also a status icon, indicating whether an inbound caller left a voicemail.
Files
The Files view displays files that the user has stored in the OneDrive for Business site, as well as files they have access to through the Teams interface. Additionally, users can configure external storage services (such as Box, Dropbox, or Google Workspace) to make their data visible in Teams.
More added apps
The ellipsis that appears below files is used to show other apps that an administrator has configured and files that have been made available to users in the organization:
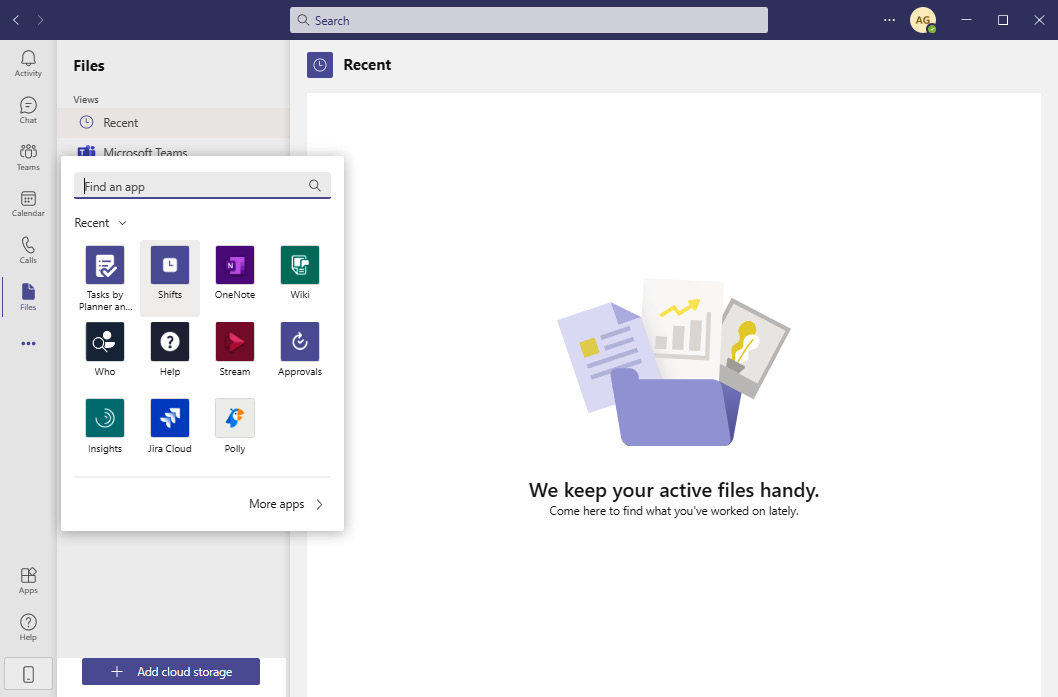
Figure 1.10 – More apps
Administrators can add and remove apps, making them available to the organization as a whole or scoped to individuals and groups of users.
Apps store
The Apps store view contains first-party (created by Microsoft) and third-party apps available to use in the environment. Administrators can block or allow apps and bots from being added to the left rail or channels. Additionally, administrators can deploy apps to individuals or users through policies.
Help
The Help link provides access to web-based training and feedback options.
Download mobile app
Clicking the Download mobile app icon at the bottom of the left rail displays a QR code on screen that you can scan with a mobile phone. The QR code directs you to the Microsoft Teams application in the appropriate platform's mobile app store.
The Microsoft Teams user interface is packed full of features and options, connecting you to the different parts of the Microsoft 365 ecosystem. Spend some time familiarizing yourself with the locations of the different interface elements, as they'll become important when customizing the experience for your users.


