Search icon CANCEL
Arrow left icon
Explore Products
Best Sellers
New Releases
Books
Videos
Audiobooks
Learning Hub
Conferences
Free Learning
Arrow right icon
Arrow up icon
GO TO TOP
Procedural 3D Modeling Using Geometry Nodes in Blender

You're reading from   Procedural 3D Modeling Using Geometry Nodes in Blender Discover the professional usage of geometry nodes and develop a creative approach to a node-based workflow

Arrow left icon
Product type Paperback
Published in Mar 2023
Publisher Packt
ISBN-13 9781804612552
Length 282 pages
Edition 1st Edition
Tools
Concepts
Arrow right icon
Author (1):
Arrow left icon
Siemen Lens Siemen Lens
Author Profile Icon Siemen Lens
Siemen Lens
Arrow right icon
View More author details
Toc

Table of Contents (23) Chapters Close

Preface 1. Part 1 – Familiarizing Yourself with the Node System
2. Chapter 1: An Introduction to Geometry Nodes FREE CHAPTER 3. Chapter 2: Understanding the Functionality of Basic Nodes 4. Chapter 3: Must-Have Add-ons for Building Node Trees 5. Part 2 – Creating a Mesh in the Geometry Node System
6. Chapter 4: Making Use of Node Primitives 7. Chapter 5: Distributing Instances onto a Mesh 8. Chapter 6: Working with the Spreadsheet in Blender 9. Chapter 7: Creating and Modifying Text in the Geometry Node Editor 10. Part 3 – Modifying Meshes and Curves in the Geometry Node System
11. Chapter 8: Editing Curves with Nodes 12. Chapter 9: Manipulating a Mesh Using Geometry Nodes 13. Part 4 – Hands-On Projects Involving Advanced Workflow Techniques
14. Chapter 10: Creating a Procedural Plant Generator 15. Chapter 11: Creating a Procedural Spiderweb Generator 16. Chapter 12: Constructing a Procedural LED Panel 17. Part 5 – Best Practices to Improve Your Workflow
18. Chapter 13: Tips and Tricks for the Geometry Node Editor 19. Chapter 14: Troubleshooting the Most Common Problems in Geometry Nodes 20. Index 21. Other Books You May Enjoy Appendix: Important Shortcuts

Linking weight paint with Geometry Nodes

One of the most important parts of the Blender workflow is making use of the Weight Paint feature in the viewport.
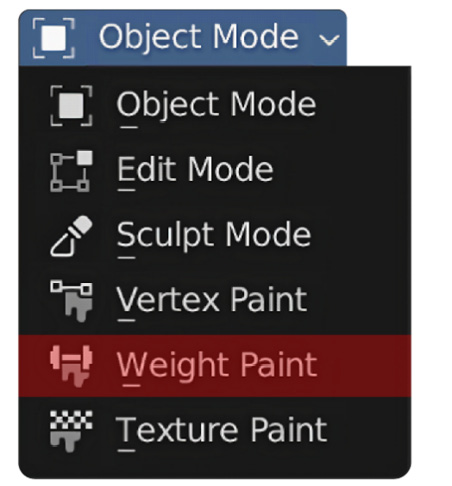
Figure 13.15: Weight Paint

Figure 13.15: Weight Paint

This feature allows you to mark regions of vertices with a specific weight value. Normally, this Weight Paint feature is used to define where hair should be instanced, using hair particles. But let’s say that we want to link these weight values in the Geometry Node editor? How do we do that?

Luckily, this is really easy to do.

You might remember the named attributes from the previous chapter. Luckily, Weight Paint is also saved as a named attribute in the Geometry Node editor and can simply be added by adding a Named Attribute node to your node tree.
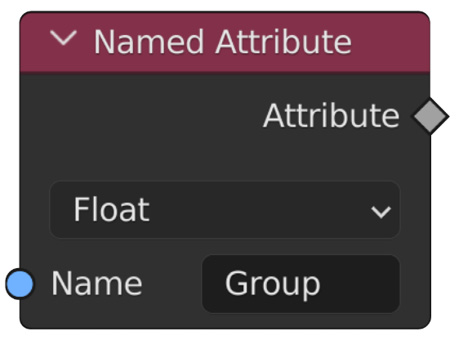
Figure 13.16: The Named Attribute node

Figure 13.16: The Named Attribute node

Now, we’ll show a logical use case of using weight paint in a Geometry Nodes project.

In this demonstration, we’ll be showing you...

lock icon The rest of the chapter is locked
Register for a free Packt account to unlock a world of extra content!
A free Packt account unlocks extra newsletters, articles, discounted offers, and much more. Start advancing your knowledge today.
Unlock this book and the full library FREE for 7 days
Get unlimited access to 7000+ expert-authored eBooks and videos courses covering every tech area you can think of
Renews at $19.99/month. Cancel anytime