Installation
Vim is available on every platform, and comes installed on Linux and macOS (however, you may want to upgrade Vim to a more recent version). You have different options for setting up Vim depending on your operating system and preference, and here’s a handy crude drawing showing some of the more common options:
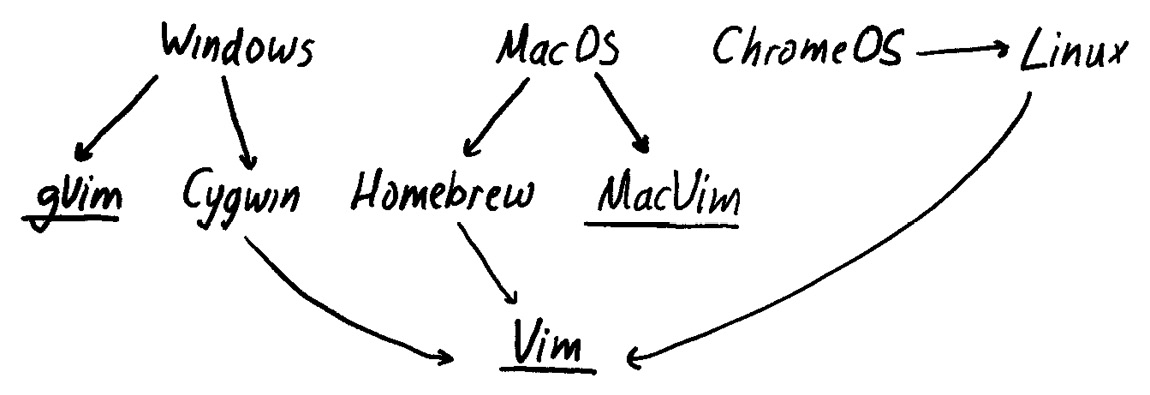
Figure 1.3 – Options for installing Vim across different OSs
Find your system in the following sections, and skim through the instructions to set it up.
Why so many screenshots?
You’ll see that I’ve included a large number of details and screenshots in the following installation instructions. While Vim is easily available on most platforms, getting the latest version of Vim installed is not as straightforward as one would expect. If you realize that you’re using the wrong version of Vim – you can always go back to the instructions in this chapter for help.
Setting up on Linux and Unix-like systems
Linux machines come with Vim installed, which is great news! However, it might be rather out of date, and a new version of Vim often includes new functionality and optimization changes (you can read more about changes between versions in the A brief history lesson section of this chapter). Pull up your Command Prompt and run the following code to build an up-to-date Vim from the latest patch (at the time of cloning the source repository):
$ git clone https://github.com/vim/vim.git
$ cd vim/src
$ ./configure --prefix=/usr/local --with-features=huge
$ make
$ sudo make install
Keep on reading to learn more about Compilation options in the next section.
Missing dependencies
If you’re running into issues as you’re installing Vim, you might be missing some dependencies. If you’re using a Debian-based distribution, the following command should add common missing dependencies:
$ sudo apt-get install make build-essential \
libncurses5-dev libncursesw5-dev --fix-missing
This will make sure that you’re on the latest major and minor patches of Vim. If you don’t care about being on the cutting edge, you can also update Vim using a package manager of your choice. Different Linux distributions use different package managers; the following list includes some common ones:
|
Distribution/System |
Command to install the latest version of Vim |
|
Debian-based (Debian, Ubuntu, Mint) |
$ sudo apt-get update $ sudo apt-get install vim-gtk |
|
CentOS (and Fedora prior to Fedora 22) |
$ sudo yum check-update $ sudo yum install vim-enhanced |
|
Fedora 22+ |
$ sudo dnf check-update $ sudo dnf install vim-enhanced |
|
Arch |
$ sudo pacman -Syu $ sudo pacman -S gvim |
|
FreeBSD |
$ sudo pkg update $ sudo pkg install vim |
Pay attention to names
You can see in the preceding table that Vim uses different package names for different repositories. Packages such as vim-gtk on Debian-based distributions or vim-enhanced on CentOS come with more features enabled (such as GUI support for instance).
Do keep in mind that package manager repositories tend to lag behind from anywhere between a few months to a few years.
That’s it; you’re now ready to dive into the world of Vim! You can start the editor by typing the following command:
$ vim
vim versus vi
Vi is Vim’s predecessor (Vim stands for Vi Improved) and is available to be invoked via the vi command. On some distributions, the vi command links to a feature-stripped version of Vim (aka vim-tiny), while on some it’s merely a symlink to a feature-complete Vim.
Compilation options
Compiling from source is often the best way to receive the latest available version of Vim. If you’re not afraid to get your hands dirty, you might want to know about common compilation options.
This section will cover various options for the configure command. To compile Vim, you’ll have to run the following commands, with <options> replaced with the desired compilation options:
$ git clone https://github.com/vim/vim.git
$ cd vim/src
$ ./configure <options>
$ make
$ sudo make install
You can control installation location with --prefix:
--prefix=/usr/localas a reasonable default for a system-wide installation--prefix=$HOME/.localwill make the newly installed Vim only available to your user
Feature sets allow you to enable different sets of features to be available in Vim, with options being tiny, small, normal, big, and huge. The most interesting options include the following:
--with-features=hugeincludes all possible features, including experimental ones--with-features=normalincludes a reasonable feature set, which is mostly covered in this book--with-features=tinyonly offers bare-bones essentials, without syntax highlighting or plugin support
Language support is controlled via the --enable-<language>interp option. Note that this refers to the ability of Vim’s internals to interact with the selected programming language (e.g., in plugins or your own scripts), and not your ability to edit said files. Some options include the following:
--enable-luainterp=yesenables Lua support--enable-perlinterp=yesenables Perl support--enable-python3interp=yesenables Python 3 support--enable-rubyinterp=yesenables Ruby support
Finally, to integrate the clipboard with the X11 Window System (that is, your system-wide clipboard on Linux), you might want to compile Vim with the --with-x option. Note that you might need the X development library (e.g., you can use sudo apt install libx11-dev libxtst-dev if you’re using the apt package manager).
Setting up on macOS
macOS comes prepackaged with Vim, but the version can be outdated. There are a few ways to install a fresh version of Vim, and this book will cover two. First, you can install Vim using Homebrew, a package manager for macOS. You’ll have to install Homebrew first, though. Second, you can download a .dmg image of MacVim. This experience would be more familiar because Mac users are used to the visual interface.
Since this book covers interactions with the command line, I recommend taking the Homebrew route. However, you’re welcome to go forward with installing the image if interacting with the command line does not interest you.
Using Homebrew
Homebrew is a third-party package manager for macOS, which makes it easy to install and keep packages up to date. Instructions on how to install Homebrew are available on https://brew.sh, and, as of the moment of writing this book, consist of a single line executed in the following command line:
$ /bin/bash -c "$(curl -fsSL https://raw.githubusercontent.com/Homebrew/install/HEAD/install.sh)"
Once you run that prompt, hit Enter to continue (as many times as you need to).
If you don’t have Xcode
If you don’t have Xcode installed (which is often a prerequisite for any kind of development-related activity on Mac), you’ll get an Xcode installation popup. We won’t be using Xcode directly, and you can install it with default settings.
This should take a while to run, but you’ll have Homebrew installed by the end: a fantastic tool you can use to install a lot more than Vim! You’ll see the Installation successful! message in bold font once the installation is complete.
Let’s install a new version of Vim now using the following command:
$ brew install vim
Homebrew will install all the necessary dependencies too, so you won’t have to worry about a thing.
If you already have Homebrew installed, and you have installed Vim in the past, the preceding command will produce an error. You may want to make sure you have the latest version of Vim, though, so, run the following command:
$ brew upgrade vim
You should now be ready to enjoy Vim; let’s try opening it with the following command:
$ vim
Welcome to Vim:
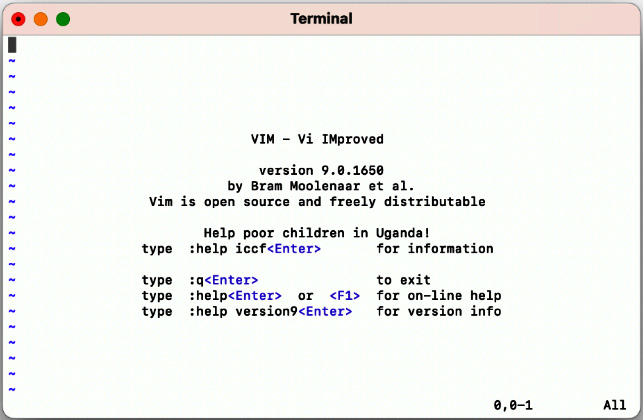
Figure 1.4 – Vim on macOS (installed via Homebrew)
Let’s move on to the next section about downloading a .dmg image.
Downloading a .dmg image
Navigate to https://github.com/macvim-dev/macvim/releases/latest and download MacVim.dmg.
Open MacVim.dmg, and then drag the Vim icon into the Applications directory, as can be seen in the following screenshot:
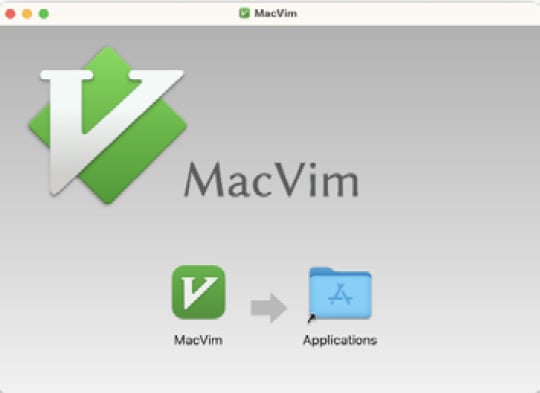
Figure 1.5 – The MacVim installation screen – drag and drop MacVim into the Applications folder
Depending on the security settings of your Mac, you might be greeted by an error when navigating to the Applications folder and trying to open the MacVim app, as demonstrated in the following screenshot:
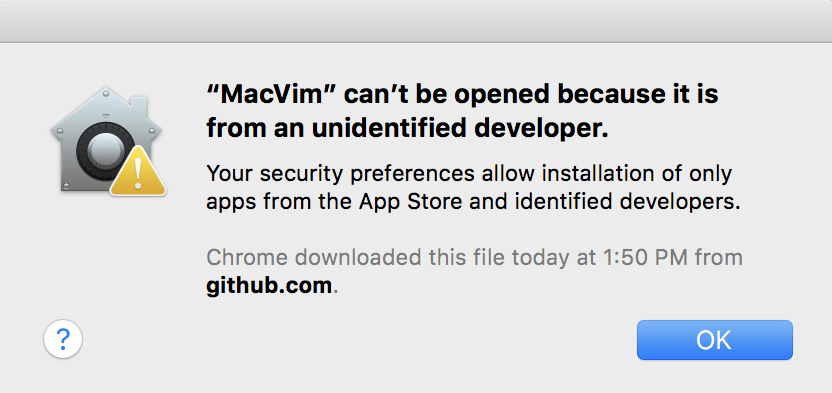
Figure 1.6 – The default “unidentified developer” prompt
Open your Applications folder, find MacVim, right-click the icon, and select Open. The following prompt will pop up:
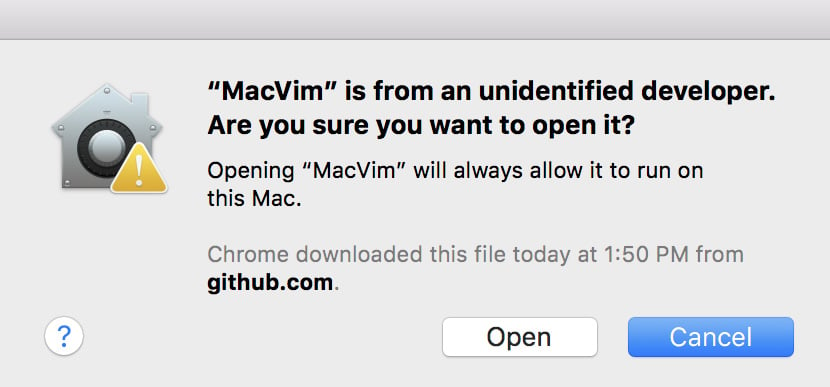
Figure 1.7 – The “unidentified developer” prompt, which you can get by right-clicking and selecting Open
Now, hit Open, and MacVim can be opened as usual from now on. Give it a shot:
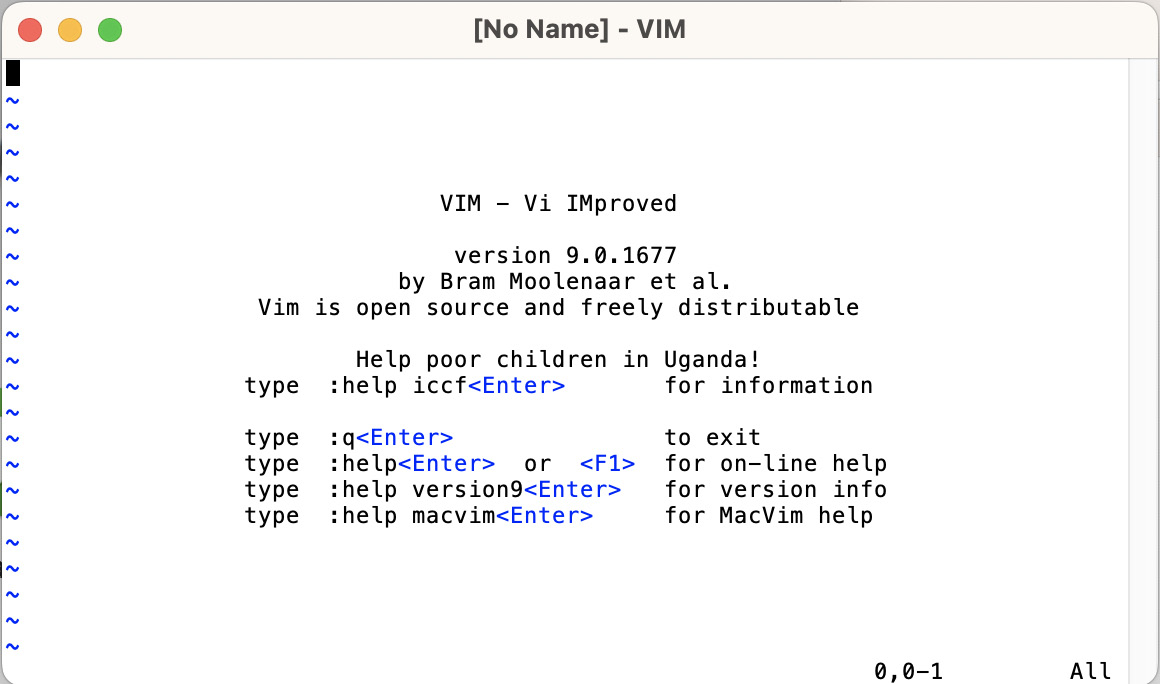
Figure 1.8 – MacVim on macOS
Setting up on Windows
Windows provides two primary routes for using Vim: setting up Cygwin and providing a more Unix-like command-line experience, or installing gVim – a graphical version of Vim (which supports working with cmd.exe on Windows). I recommend installing both and picking your favorite: gVim feels slightly more at home on Windows (and it is easier to install), while Cygwin might feel more at home if you’re used to the Unix shell.
Unix-like experience with Cygwin
Cygwin is a Unix-like environment and a command-line interface for Windows. It aims to bring a powerful Unix shell and supporting tools to a Windows machine.
Windows Subsystem for Linux (WSL)
WSL is a feature in Windows 10+ that allows you to run a Linux environment directly in Windows. While I personally haven’t had experience with WSL, it’s widely praised as a fast, user-friendly, and reliable way to access the Linux command line and tools on Windows. It could be a better alternative to Cygwin as it continues to be developed. You can read more about WSL at https://learn.microsoft.com/windows/wsl.
Installing Cygwin
To begin the installation process, navigate to https://cygwin.com/install.html and download either setup-x86_64.exe or setup-x86.exe, depending on the version of Windows you’re using (64-bit or 32-bit respectively).
How many bits are in your system?
If you’re not sure whether your system is 32-bit or 64-bit, you can open Control Panel | System and Security | System, and look at System type. For example, my Windows machine shows System type: 64-bit Operating System, x64-based processor.
Open the executable file, and you will be greeted by the following Cygwin installation window:
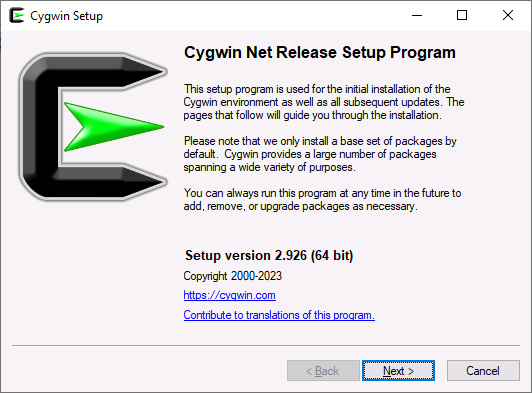
Figure 1.9 – The Cygwin Setup screen on Windows
Hit Next > a few times, proceeding with the default settings:
- Download source: Install from Internet
- Root directory:
C:\cygwin64(or a recommended default) - Install for: all users
- Local package directory:
C:\Downloads(or a recommended default) - Internet connection: Use System Proxy Settings
- Download site:
http://cygwin.mirror.constant.com(or any available option)
After this, you will be greeted with the Select Packages screen. Here, we want to select the vim, gvim, and vim-doc packages. The easiest way to do this is to type vim in a search box, expand the All |Editors category, and click on the arrow-looking icons next to the desired packages, as demonstrated in the following screenshot:
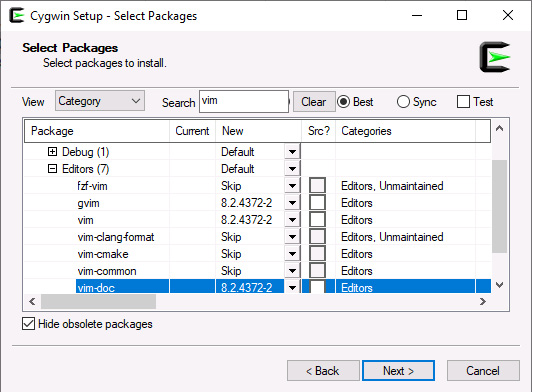
Figure 1.10 – Cygwin package selection screen – note that gvim, vim, and vim-doc are marked to be installed, as seen in the New column
The preceding screenshot shows version 8.2.4372-2. This is the latest version available at the moment of writing this chapter, July 2023. At this time, the latest version of Vim is 9.0, which introduces Vim9script (you can learn more about version differences in the A brief history lesson section).
Use Cygwin to compile Vim
If you’d like to have the latest version of Vim, I recommend using Cygwin to compile Vim from its official Git repository. After installing Cygwin, you should visit the Setting up on Linux section we covered earlier in this chapter for the instructions. If you’d like to do that, you’ll want to install git and make utilities in Cygwin.
You might need additional utilities
You may want to install curl from under the Net category, and git from under the Devel category, as we’ll be using both in Chapter 3. It might also be helpful to install dos2unix from under the Utils category, which is a utility used for converting Windows-style line endings to Linux-style line endings (something you might run into once in a while).
Hit Next > two more times to proceed, which will begin the installation. The installation will take some time, and now would be a great moment to prematurely congratulate yourself with some coffee!
You might get a few post-install script errors, which you can safely dismiss (unless you see any errors related to Vim – then, Google is your friend: search for an error text and try to find a solution).
Hit Next > a few more times, proceeding with the defaults:
- Create icon on Desktop
- Add icon to Start Menu
Congratulations – you now have Cygwin installed with Vim!
Installing Cygwin packages
If you ever need to install additional packages in Cygwin, just rerun the installer while selecting the packages you want.
Using Cygwin
Open Cygwin – the program will be called Cygwin64 Terminal or Cygwin Terminal, depending on the version of your system, as can be seen in the following screenshot:

Figure 1.11 – The Cygwin64 Terminal application icon
Open it! You will see the following prompt, which will be familiar to Linux users:
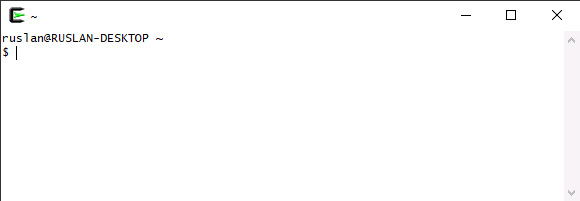
Figure 1.12 – The Cygwin command prompt for the user called ruslan and the RUSLAN-DESKTOP machine
Cygwin supports all of the Unix-style commands we will be using in this book. This book will also say whether any commands need to be changed to work with Cygwin.
Type vim and hit Enter to start Vim, as demonstrated in the following screenshot:
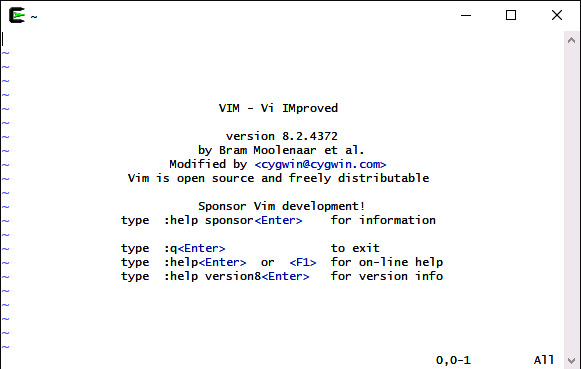
Figure 1.13 – Vim is installed through Cygwin (note Modified by <cygwin@cygwin.com>)
Cygwin is a way to get a Linux-like shell experience on Windows, meaning you’ll have to follow Linux-specific instructions throughout this book if you decide to use Cygwin.
You’ll also want to be careful with Windows-style line endings versus Linux-style line endings, as Windows and Linux treat line endings differently. If you run into an odd issue with Vim complaining about ^M characters it is unable to recognize, run the dos2unix utility on the offending file to resolve the issue.
Visual Vim with gVim
You can read more about the graphical version of Vim in the Vanilla Vim versus gVim section later in this chapter.
As it always is with Windows, the process is slightly more visual. Navigate to github.com/vim/vim-win32-installer in your browser and download an executable installer. At the moment of writing this chapter, July 2023, the latest available version of Gvim is 9.0.
You can use winget instead
Alternatively, if you’re familiar with the winget tool, you can run winget install -e --id vim.vim (substitute with vim.vim.nightly if you’d like to live on the bleeding edge).
Open the executable and follow the prompts on the screen, as demonstrated by the following screenshot:
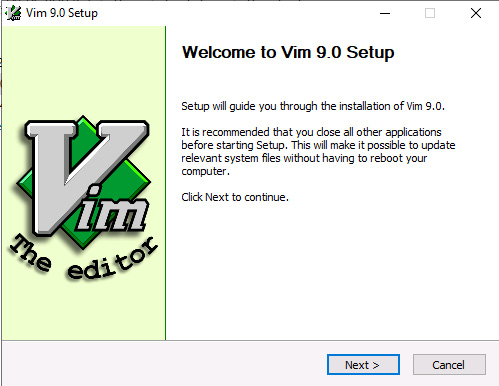
Figure 1.14 – gVim 9.0 setup welcome screen
Let’s go ahead and hit Next, then I Agree until we arrive at the Installation Options screen. We’re happy with most of the default options gVim has to offer, except that you might want to enable Create .bat files for command line use. This option will make the vim command work in the Windows Command Prompt. Some examples in this book rely on having a Command Prompt, so, enabling this option would help you follow along.
Here’s a screenshot of the Installation Options screen with the proper boxes checked off:
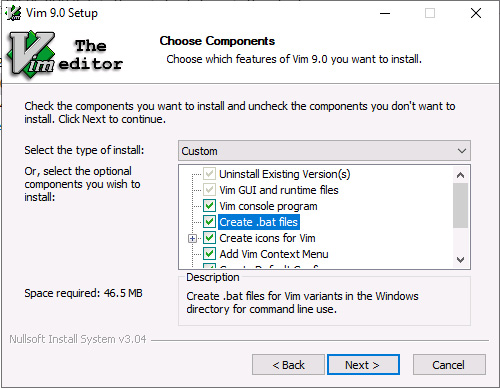
Figure 1.15 – gVim installation screen – note that Create .bat files is selected
Hit Next >. You’ll want to continue with the following settings:
- Select the type of install:
Typical(after Create .bat files for command line use is enabled, the type of install value changes toCustomautomatically) - Do not remap keys for Windows behavior
- Right button has a popup menu, left button starts visual mode
- Destination Folder:
C:\Program Files (x86)\Vim(or a recommended default)
Once you’re done, hit Install and then Close. Say No to the request to see the README file (or say Yes – I’m a book, not a cop).
You will now have a few icons pop up on your desktop, the most interesting one being gVim 9.0 as shown in the following screenshot:

Figure 1.16 – The gVim 9.0 application icon
Start it, and you’re ready to proceed! Happy Vimming!
Setting up on ChromeOS
ChromeOS has become increasingly popular – especially in the education sector and in a fraction of corporate settings. Chrome devices are cheap, user friendly, and can run on a potato with a couple of wires sticking out of it. I have been using a Chromebook as a daily driver for work for a couple of years now – and, thankfully, you don’t have to abandon having Vim if ChromeOS is a platform of choice for you.
To run Vim on your ChromeOS device, you need to be able to install a Linux environment alongside it. It’s not a complicated procedure, doesn’t require dual booting, and provides seamless integration between ChromeOS and a Linux environment.
Linux support in ChromeOS
Some legacy ChromeOS devices don’t support running a Linux environment, and you can check whether your device supports Linux by opening the Settings app and searching for Linux. If this yields no results, you won’t be able to use Vim on your ChromeOS device.
First, set up Linux to run on ChromeOS by opening the Settings app, and navigating through the Advanced | Developers | Linux development environment | Turn on options:

Figure 1.17 – A prompt to turn on a Linux development environment on a Chromebook
You’ll be greeted by a prompt to set up a Linux development environment. Hit Next to continue. The default settings are sufficient, as demonstrated in the following screenshot:
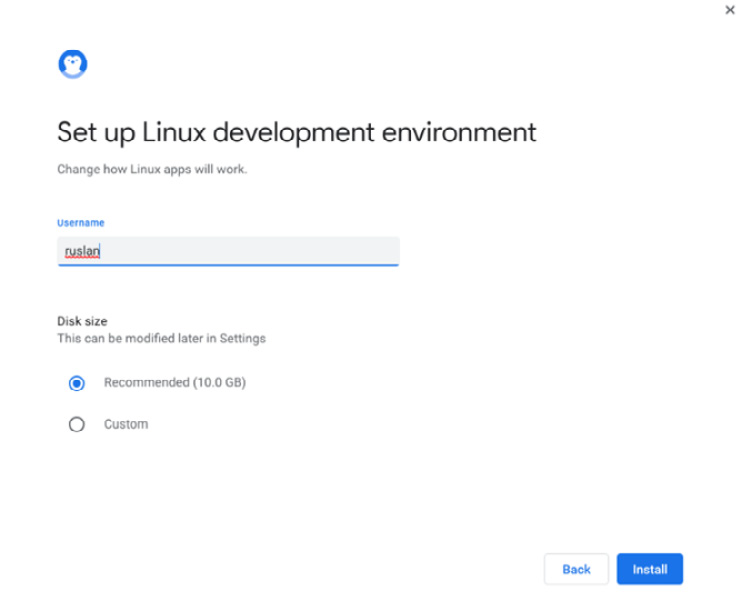
Figure 1.18 – The setup screen for a Linux development environment – it’s fine to go with the recommended settings
Hit Install, and the whole setup should be over in under a couple of minutes.
The newly installed Debian Linux environment is accessible through the Terminal app. The default environment name is penguin, so you just need to select that:

Figure 1.19 – Linux environment titled penguin installed on a ChromeOS
You’ll see a (hopefully familiar) Linux command-line prompt:
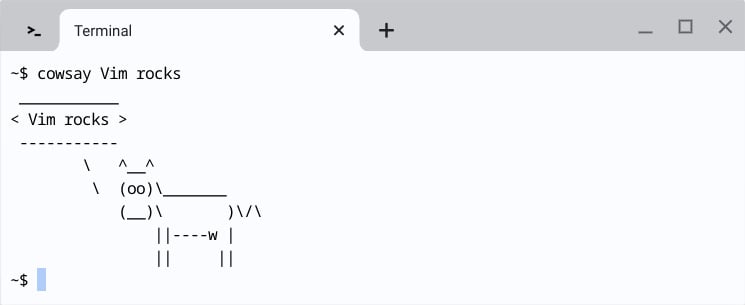
Figure 1.20 – Linux terminal within ChromeOS (a silly cowsay command can be installed by running $ sudo apt install cowsay)
Vim comes preinstalled on a vast majority of Linux machines, and this one is not an exception: you should already have access to Vim.
Compile Vim for the latest version
If you’d like to have the latest version of Vim, I recommend compiling Vim from its official Git repository (it’s easy). Visit the Setting up on Linux section earlier in this chapter for instructions on installing the latest Vim version.
Now, you can launch Vim by invoking it from the terminal:
$ vim
This is the output as shown here:
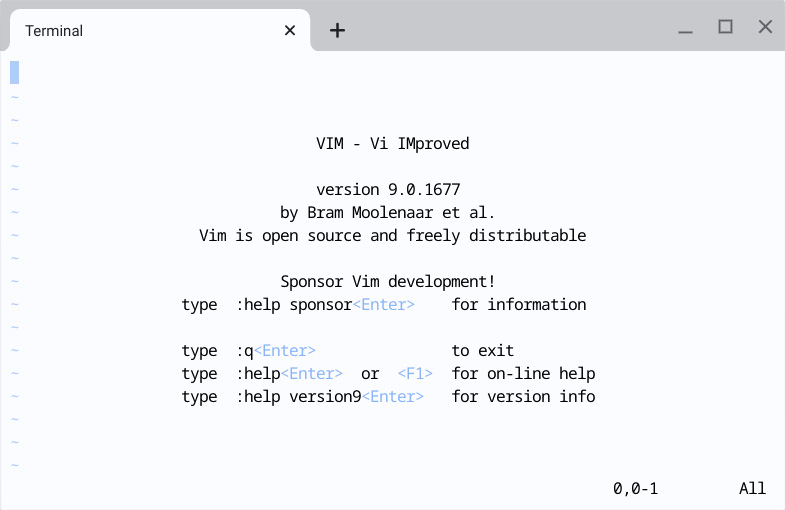
Figure 1.21 – Vim welcome screen, as seen in the ChromeOS terminal
Access ChromeOS files through Linux
Due to integration between ChromeOS and Linux, you can access your Linux home directory (accessible via the cd ~ command from the Terminal window) via the ChromeOS Files app:
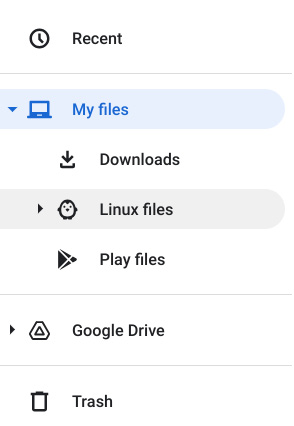
Figure 1.22 – You can access Linux files through the ChromeOS Files app
In addition, you can share individual ChromeOS files with Linux by right-clicking on the file and selecting Share with Linux. This makes the files accessible in Linux via the /mnt/chromeos directory.
Verifying and troubleshooting the installation
Regardless of the platform you use to install Vim, it’s good to make sure that, with Vim, all the right features are enabled. On a command line, run the following command:
$ vim --version
You will see the following output, with a set of features having a + and a - in front of them:
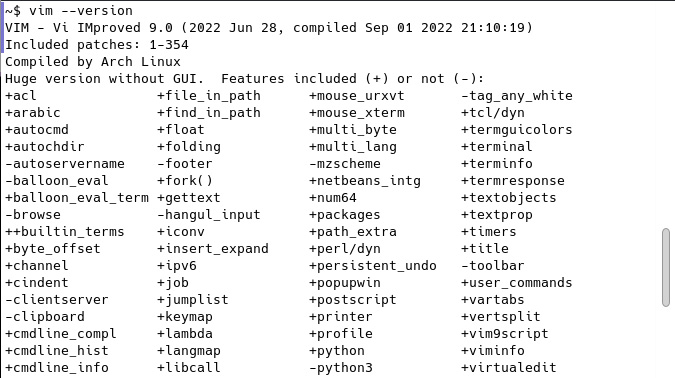
Figure 1.23 – Output of the vim --version command
In the preceding screenshot, you can see that my Vim was actually compiled with Python 2 support (+python) instead of Python 3 support (-python3). To correct the issue, I’d have to either recompile Vim with +python3 enabled (for which I’d have to install required dependencies) or find a package that distributes a compiled version of Vim with +python3 enabled.
Vim integrations
Note that +python3 and similar options refer to Python 3 integration of Vim. You can still edit any file you want (including Python 3), but it does mean your Vim instance, plugins, and scripts won’t be able to run Python 3.
Ask for :help
For a list of all features Vim can have enabled, see :help feature-list.
For instance, if we wanted to recompile Vim with Python 3 support on Linux, we would do the following:
$ git clone https://github.com/vim/vim.git
$ cd vim/src
$ ./configure --prefix=/usr/local \
    --with-features=huge \
    --enable-python3interp
$ make
$ sudo make install
Specifying feature sets
We’re passing the --with-features=huge flag in order to compile Vim with most features enabled. However, --with-features=huge does not install language bindings, so we need to explicitly enable Python 3.
In general, if your Vim is not behaving like other Vim installations (including the behavior described in this book), you might be missing a feature.
Depending on your system and the features you require, the process might be slightly or vastly different. A quick web search along the lines of Installing Vim <version> with +<feature> on <operating system> should help.
Now that you’re through the installation instructions, let’s look a little closer at what we’ve installed.


