Search icon CANCEL
Subscription
0
Cart icon
Your Cart (0 item)
Close icon
You have no products in your basket yet
Save more on your purchases now! discount-offer-chevron-icon
Savings automatically calculated. No voucher code required.
Arrow left icon
Explore Products
Best Sellers
New Releases
Books
Videos
Audiobooks
Learning Hub
Conferences
Free Learning
Arrow right icon
Arrow up icon
GO TO TOP
Mastering Manga Studio 5

You're reading from   Mastering Manga Studio 5 An extensive, fun, and practical guide to streamlining your comic-making workflow using Manga Studio 5

Arrow left icon
Product type Paperback
Published in Sep 2013
Publisher Packt
ISBN-13 9781849697682
Length 298 pages
Edition 1st Edition
Concepts
Arrow right icon
Author (1):
Arrow left icon
Liz Staley Liz Staley
Author Profile Icon Liz Staley
Liz Staley
Arrow right icon
View More author details
Toc

Table of Contents (13) Chapters Close

Preface 1. Getting Familiar with the Story Features 2. The Right Tools for the Job FREE CHAPTER 3. Palettes of a Different Color 4. Setting up Your Space 5. Living in a Material World 6. It's Only a (3D) Model 7. Ready! Set! Action! 8. Rulers and Speech Balloons 9. Putting It All Together! Drawing and Inking 10. Finishing Touches A. Recommended Reading Index

Making line art from a photo


The next action that we're going to learn how to make, is one that will take a photo and give you this effect from it. The photo is shown in the following screenshot:
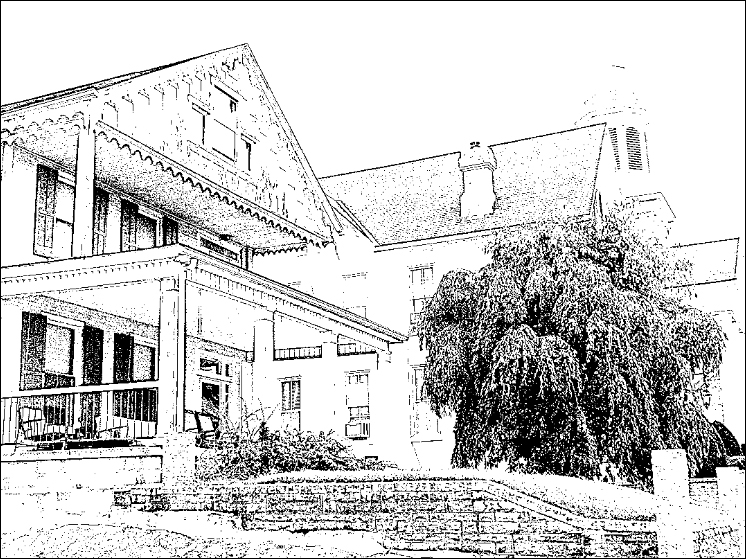
This mimics a filter that was in Manga Studio 4 called 2DLT, that created linework from a photograph. You can get the same effect in Manga Studio 5, and with actions you can set it up once and then apply it to any photograph that you wish.

Start off with a single-layered image, such as a photograph from your digital camera. Add a new auto action to your Auto action palette, and name it Line Drawing. Go ahead and hit the Record icon.

Our first step is to duplicate our image layer. Right-click on the image in the Layers palette and select Duplicate Layer. Or go to Layer | Duplicate Layer at the top of your program window.
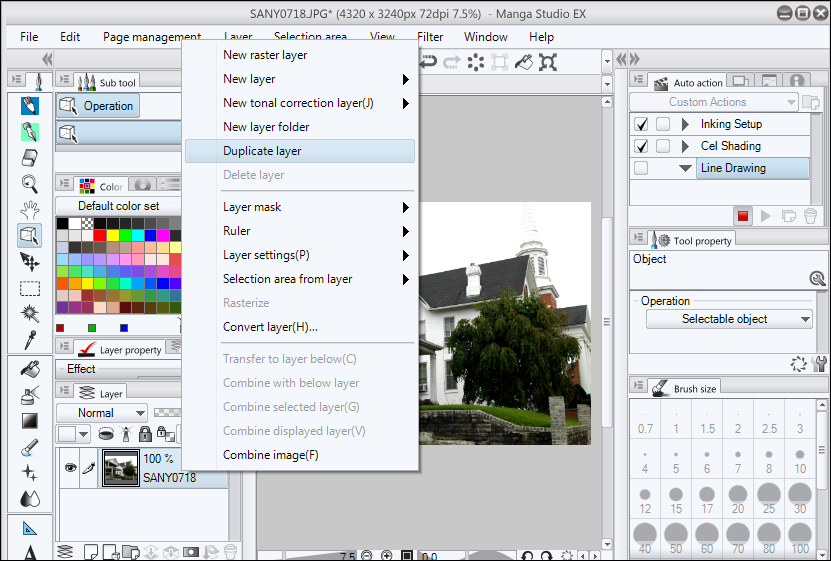
Your new layer will be on top of the original one. With this layer selected, change the blending mode from Normal to Glow Dodge.

Next up, go to Edit | Tonal Correction | Invert Gradation...

lock icon The rest of the chapter is locked
Register for a free Packt account to unlock a world of extra content!
A free Packt account unlocks extra newsletters, articles, discounted offers, and much more. Start advancing your knowledge today.
Unlock this book and the full library FREE for 7 days
Get unlimited access to 7000+ expert-authored eBooks and videos courses covering every tech area you can think of
Renews at $19.99/month. Cancel anytime