Search icon CANCEL
Subscription
0
Cart icon
Your Cart (0 item)
Close icon
You have no products in your basket yet
Save more on your purchases! discount-offer-chevron-icon
Savings automatically calculated. No voucher code required.
Arrow left icon
Explore Products
Best Sellers
New Releases
Books
Videos
Audiobooks
Learning Hub
Newsletter Hub
Free Learning
Arrow right icon
timer SALE ENDS IN
0 Days
:
00 Hours
:
00 Minutes
:
00 Seconds
Arrow up icon
GO TO TOP
Internet of Things Programming Projects

You're reading from   Internet of Things Programming Projects Build modern IoT solutions with the Raspberry Pi 3 and Python

Arrow left icon
Product type Paperback
Published in Oct 2018
Publisher Packt
ISBN-13 9781789134803
Length 436 pages
Edition 1st Edition
Languages
Arrow right icon
Author (1):
Arrow left icon
Colin Dow Colin Dow
Author Profile Icon Colin Dow
Colin Dow
Arrow right icon
View More author details
Toc

Table of Contents (21) Chapters Close

Preface 1. Installing Raspbian on the Raspberry Pi FREE CHAPTER 2. Writing Python Programs Using Raspberry Pi 3. Using the GPIO to Connect to the Outside World 4. Subscribing to Web Services 5. Controlling a Servo with Python 6. Working with the Servo Control Code to Control an Analog Device 7. Setting Up a Raspberry Pi Web Server 8. Reading Raspberry Pi GPIO Sensor Data Using Python 9. Building a Home Security Dashboard 10. Publishing to Web Services 11. Creating a Doorbell Button Using Bluetooth 12. Enhancing Our IoT Doorbell 13. Introducing the Raspberry Pi Robot Car 14. Controlling the Robot Car Using Python 15. Connecting Sensory Inputs from the Robot Car to the Web 16. Controlling the Robot Car with Web Service Calls 17. Building the JavaScript Client 18. Putting It All Together 19. Assessments 20. Other Books You May Enjoy

Using a Python program to control a robot car through the cloud

Being able to see sensory data in a dashboard is pretty impressive. However, what if we wanted to actually control something from our dashboard? In this section, we will do just that. We will start by constructing a simple switch to control an LED on T.A.R.A.S. We will then expand on this and have T.A.R.A.S do its dance from a push of a button over the internet.

Let's start by changing the name of the dashboard from RobotEyes to RobotControl:

  1. In the ThingsBoard application, click on the DASHBOARDS option
  2. Click on the pencil icon under the RobotEyes dashboard:
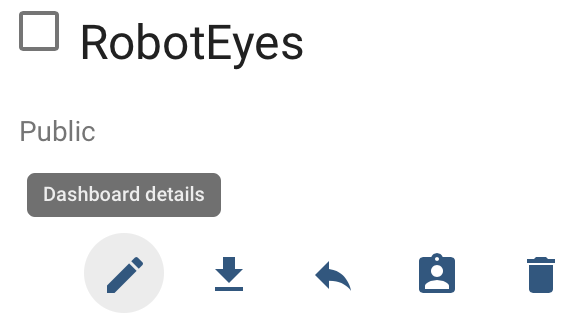
  1. Click on the orange pencil icon
  2. Change the tile from RobotEyes to RobotControl:
  1. Click on the orange check to accept the changes
  2. Exit out of the side dialog

Now let's control an LED on T.A.R.A.S from our ThingsBoard dashboard.

...
lock icon The rest of the chapter is locked
Register for a free Packt account to unlock a world of extra content!
A free Packt account unlocks extra newsletters, articles, discounted offers, and much more. Start advancing your knowledge today.
Unlock this book and the full library FREE for 7 days
Get unlimited access to 7000+ expert-authored eBooks and videos courses covering every tech area you can think of
Renews at $19.99/month. Cancel anytime
Banner background image