Applying shading and borders to paragraphs
A more recent feature in InDesign is the ability to apply shading and borders to paragraphs, and it can be a useful option for everything from creating cut-out coupon effects to simply highlighting a single paragraph of text within your story. In this recipe, we will look at how to apply borders and shading, as well as how to customize the settings to ensure you can make the most of the feature.
Getting ready
In order to complete this recipe, simply open InDesign on your system and create a new document with 12 pages, as shown in the Creating a new document recipe in Chapter 1. You will also need to add a text frame large enough to contain a few paragraphs of text, as shown in the Creating text frames and adding placeholder text recipe. Finally, you will need the Control panel set to show paragraph formatting rather than character formatting options, as shown in step 1 of the Adjusting character formatting recipe.
How to do it…
In order to use the paragraph shading and borders options in InDesign, follow these steps:
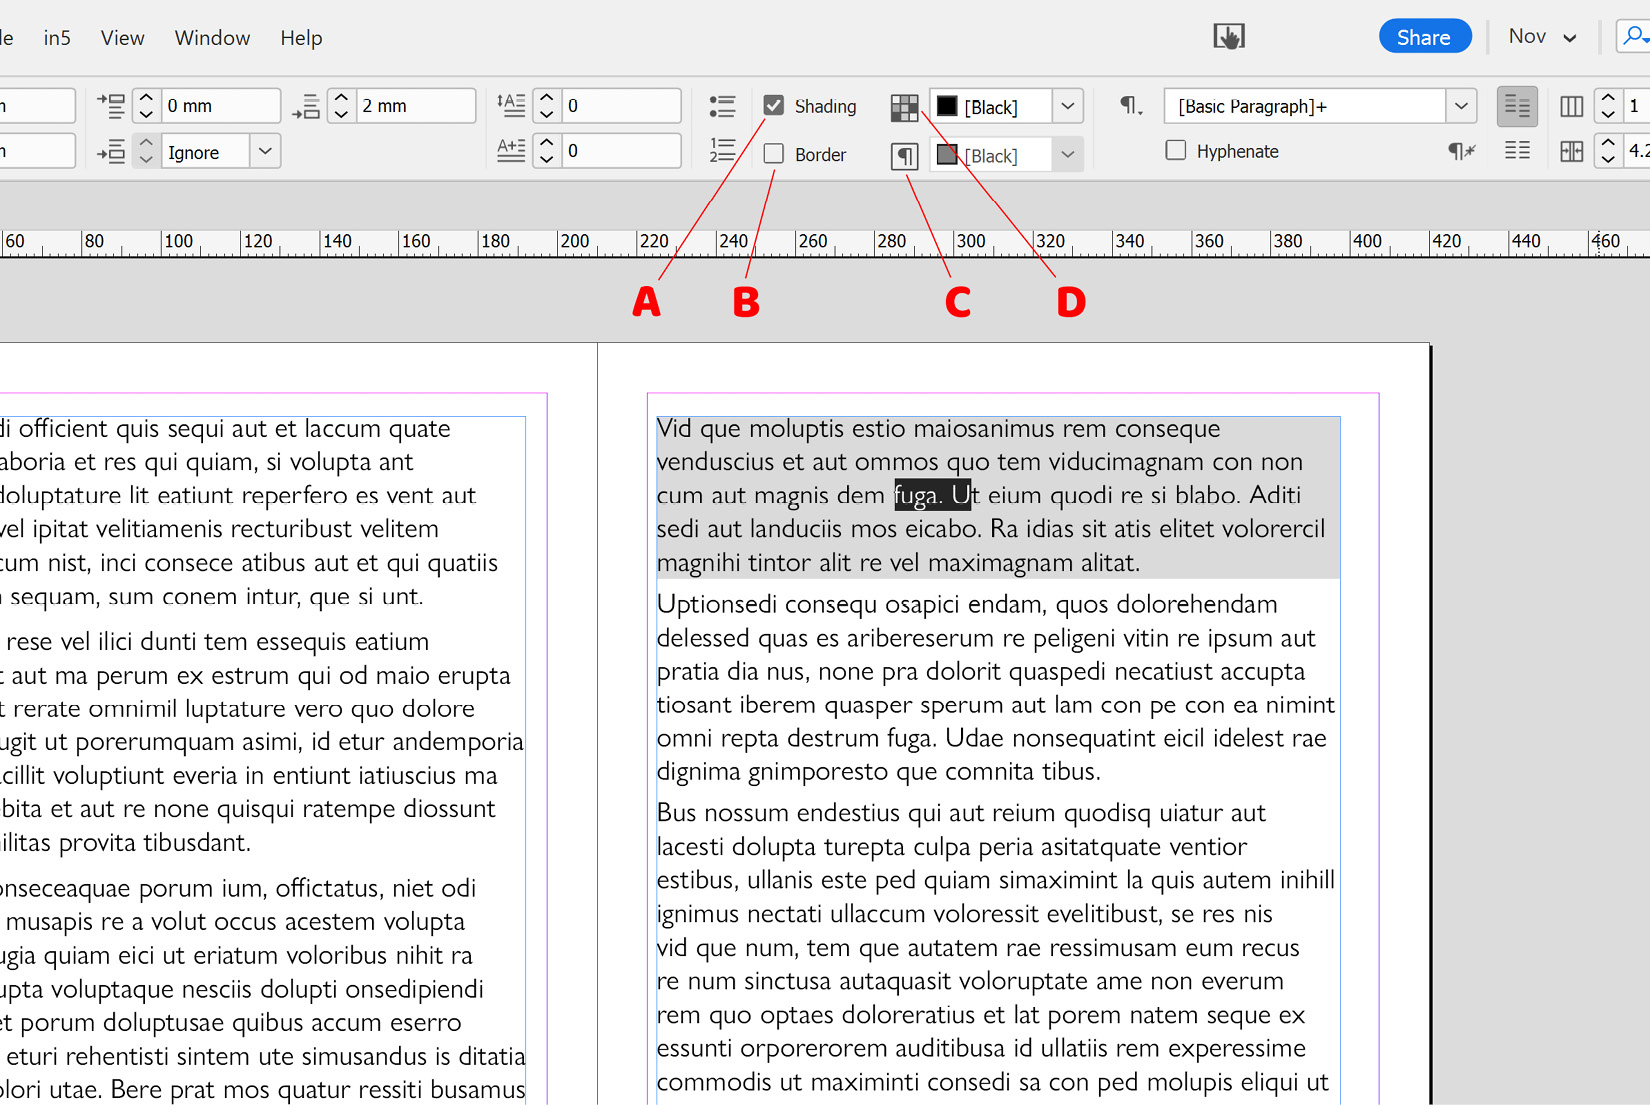
- Select some text within one of your paragraphs. Then, in the Control panel, check the Shading box, marked as A in Figure 2.27:

Figure 2.27: Paragraph shading and border options on the Control panel
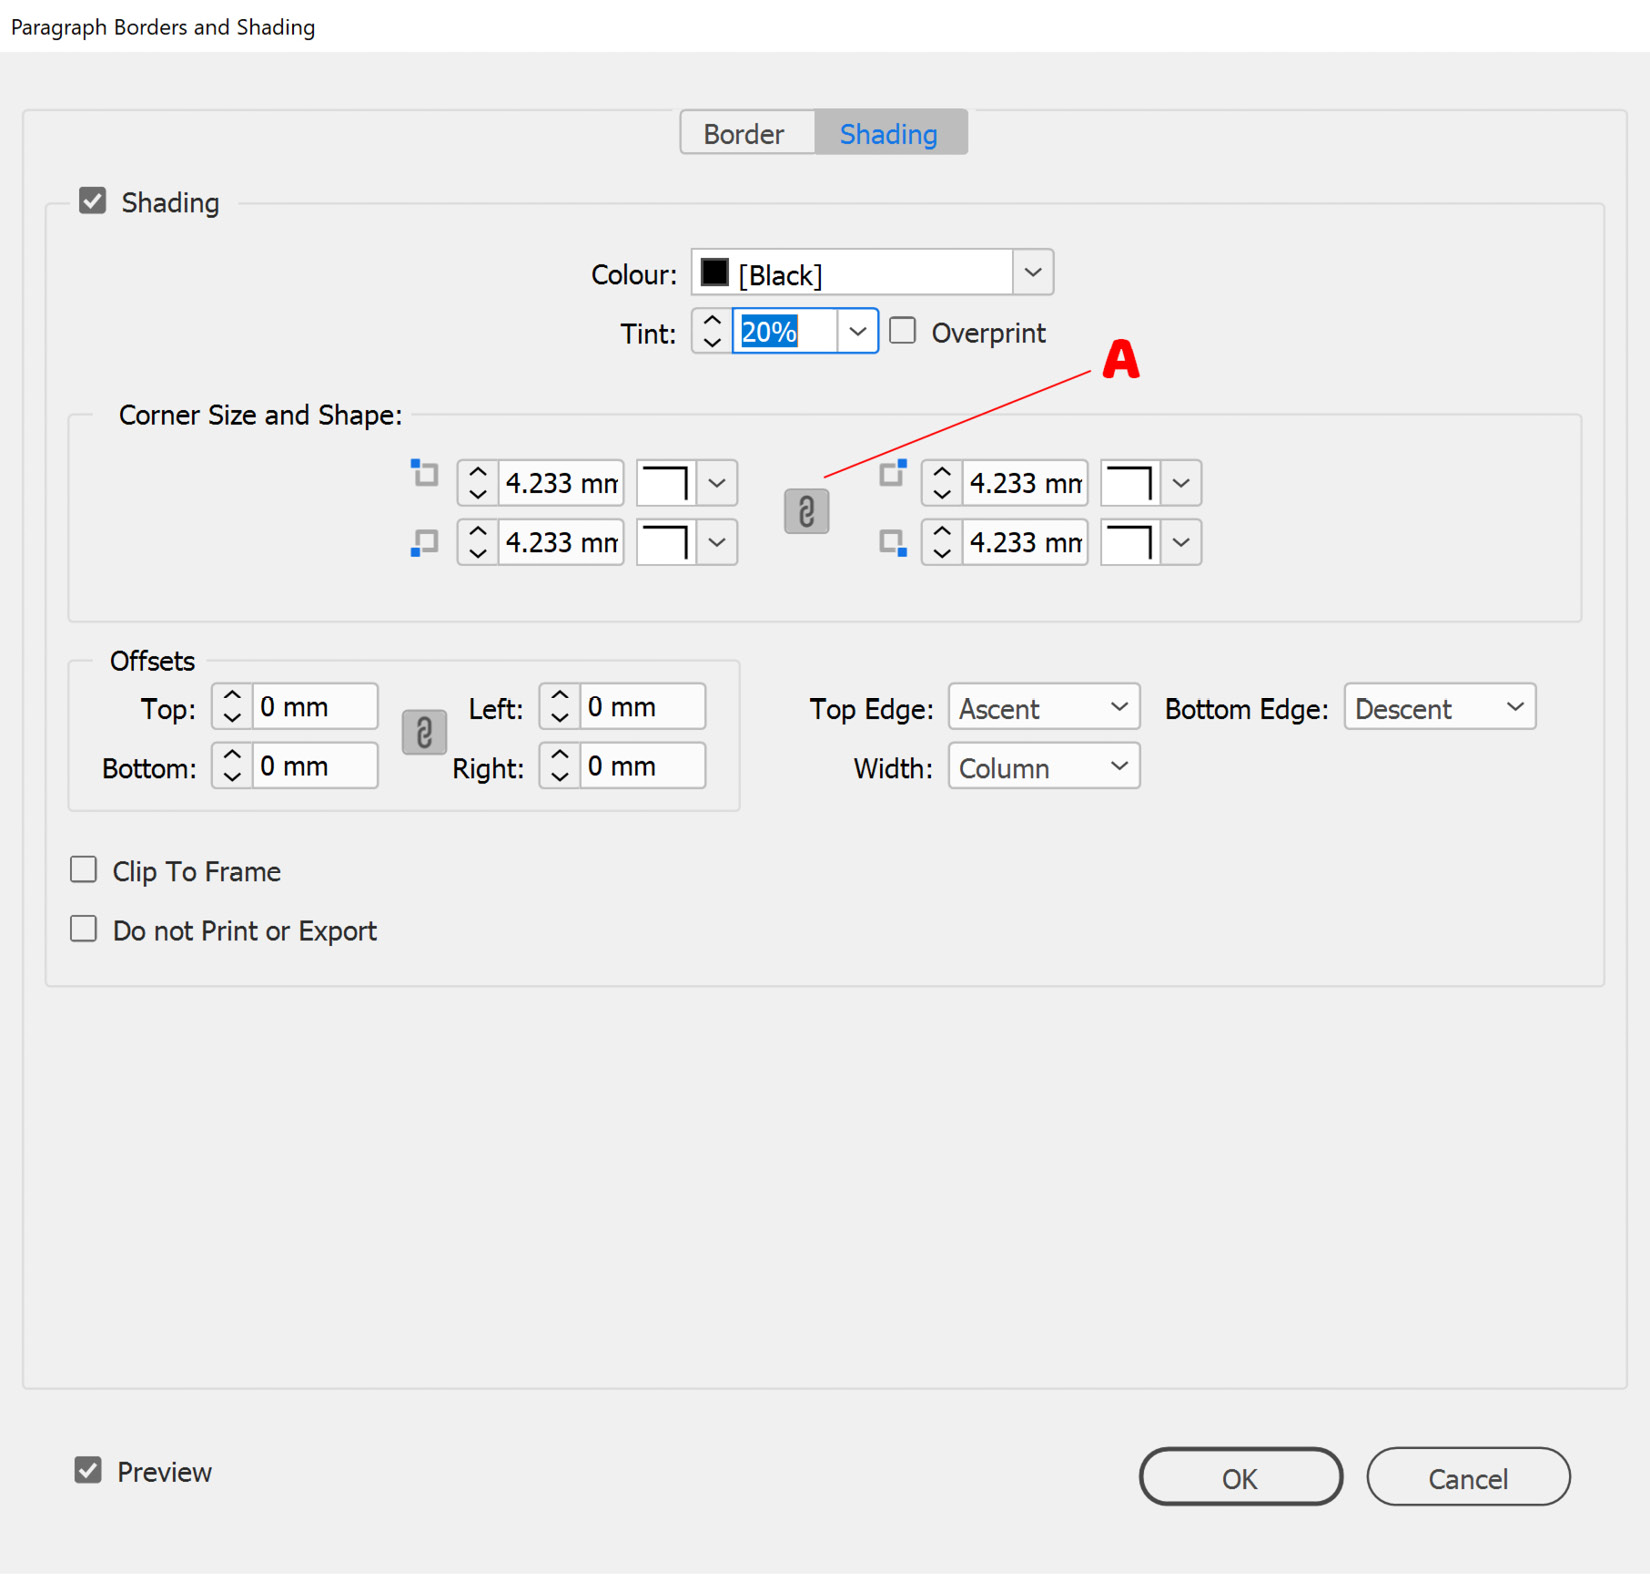
- By default, the shading is applied as a shade of gray, but let’s customize this. With the paragraph still selected, simply hold Alt (PC) or Option (Mac) down and click on the small icon to the right of the word Shading on the Control panel (marked as D in Figure 2.27). This will bring up the Paragraph Borders and Shading dialog box shown in Figure 2.28.
There are a range of options here that may be of interest (if you want to see changes happen as you make them, remember to enable the Preview checkbox, found at the bottom of the shading options dialog box):
- Colour: Sets the color for the shading. We will set this to Cyan.
- Tint: Allows you to lighten the color by increasing the white content. We will set this to 20%.
- Corner Size and Shape: Lets you change the shape of the corner and set the size for each corner. To change corners individually, click the small link symbol (marked as A in Figure 2.28); to change them all together again, click the link symbol again. Set them to 0.
- Offsets: This allows you to push the shading out beyond the edge of the text. You can either change the sides individually or all together, by clicking the link symbol in the middle of the Offsets group, just as we did previously with the Corner Size and Shape options. Change these to 2 mm.
- To the right of the offsets are options for Top Edge, Bottom Edge, and Width. These allow you to fine-tune what the shading is being applied relative to. We won’t adjust these at this time.
- The Clip To Frame option allows you to prevent shading from extending beyond the edge of the frame. We will enable this here.
- Do not Print or Export does exactly what it says, preventing the shading from being printed or included when you export documents:

Figure 2.28: Paragraph shading options in InDesign
Note
If you can’t edit the settings by Alt (PC) or Option (Mac) and clicking on the icon, you can also access these from the drop-down menu at the top right of the InDesign interface, as shown previously at the end of the Using and formatting underlines and strikethroughs recipe.
- Having applied your shading if you wish to disable it, simply uncheck the shading checkbox. In this instance, we will do this in order to look at borders more clearly.
- Next, select part of a paragraph and click the Border button on the Control panel (marked as B in Figure 2.27. This will apply a thin 1 pt black border around the selected paragraph.
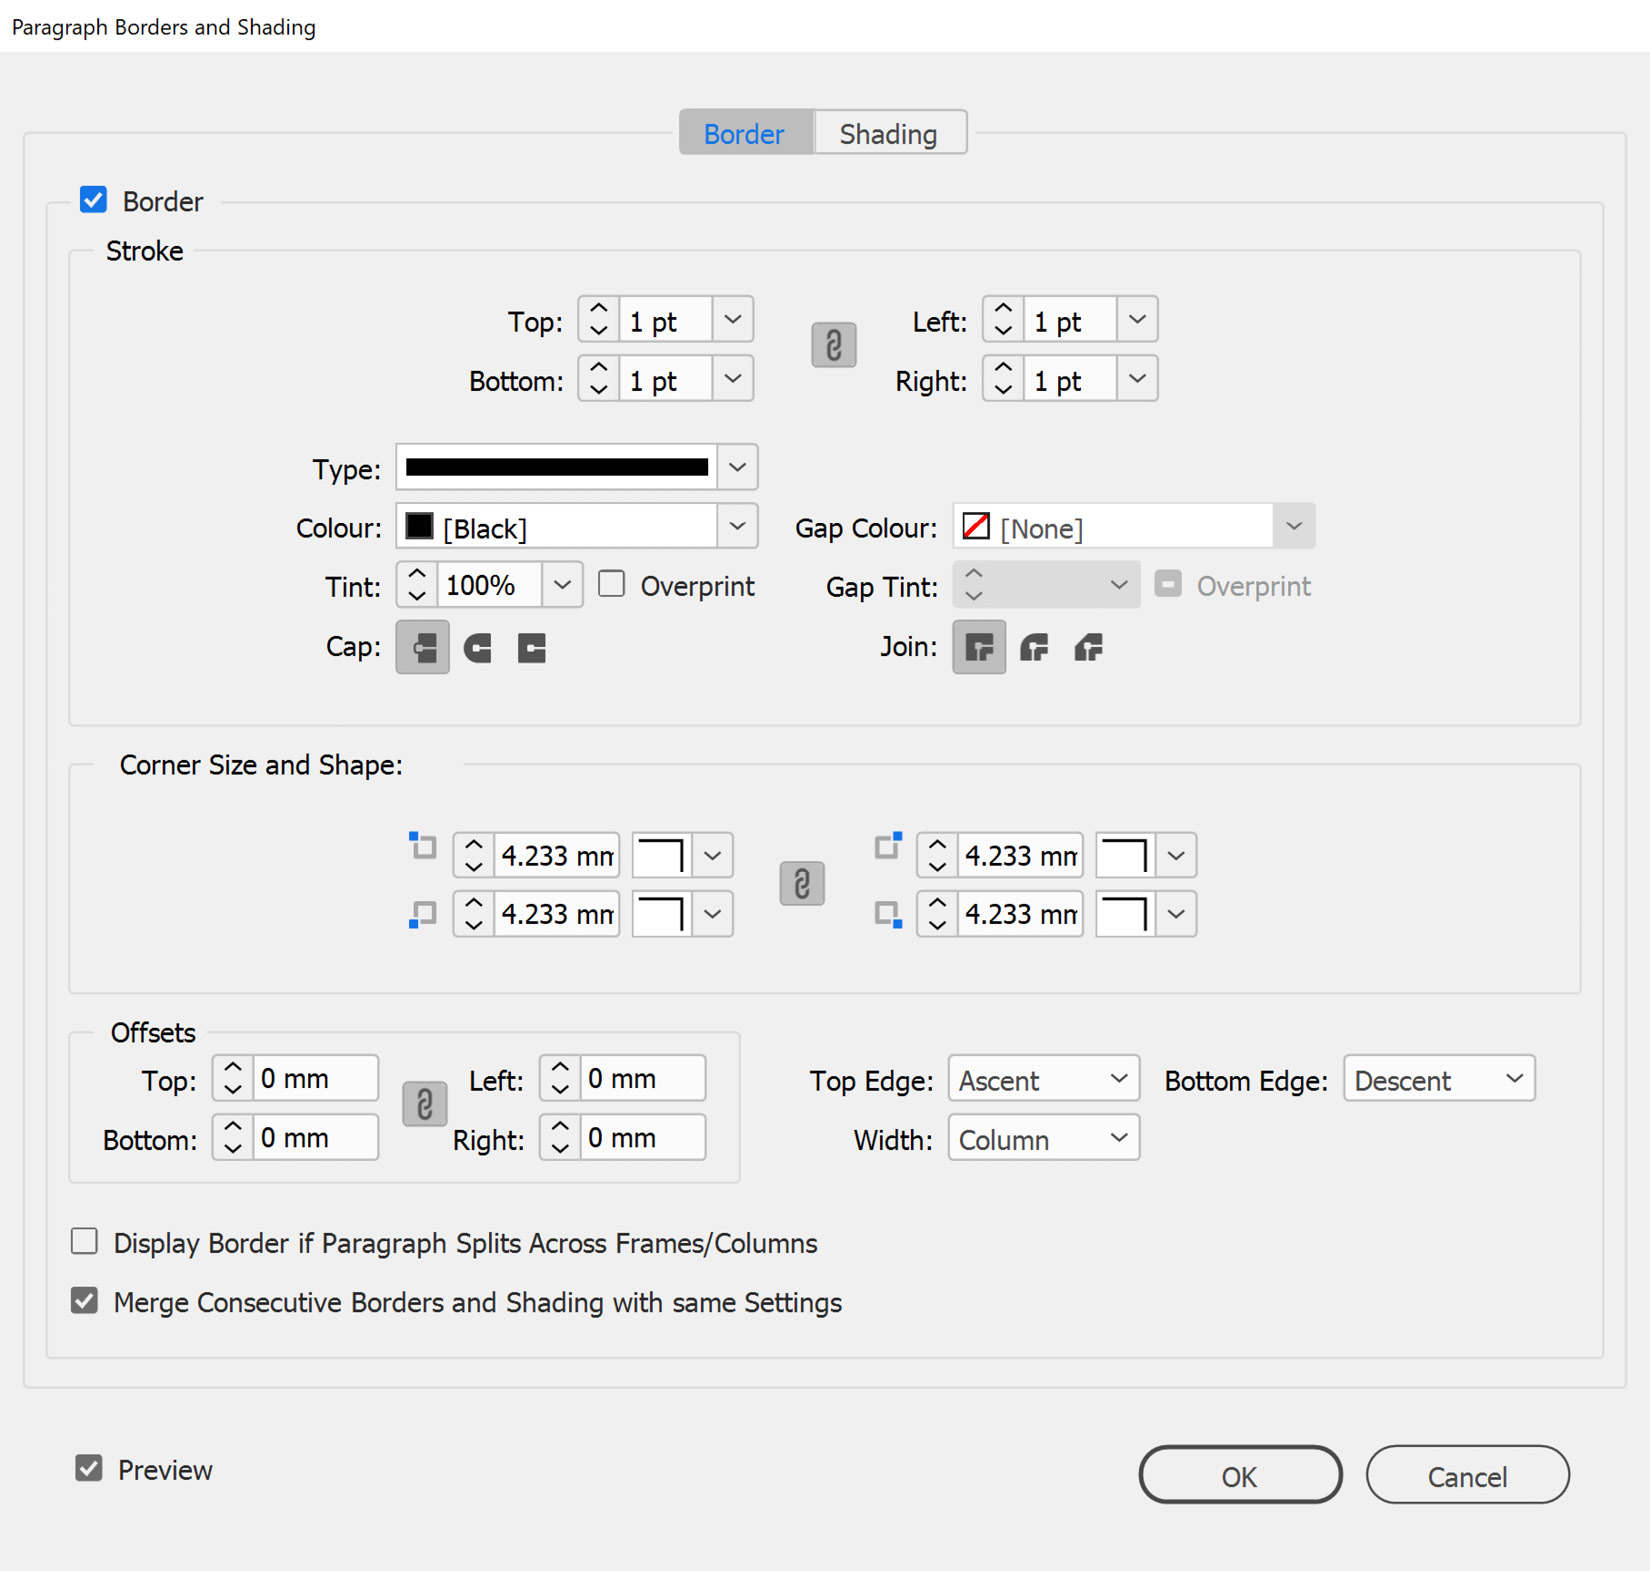
- Next, we want to customize our paragraph border, so hold down the Alt (PC) or Option (Mac) key and click the icon to the right of the word Border on the Control panel (marked as C in Figure 2.27). This will bring up the paragraph border options, which can be seen in Figure 2.29:

Figure 2.29: Paragraph Border and Shading options
The border options are more extensive than the shading options, and in addition to the properties listed in step 2 also include the following options:
- Top, Bottom, Left, Right: These let you control the stroke width on the different sides. As with the Corner Size and Shape options in step 2, the link icon allows you to control whether all 4 numbers change together or individually. We will set this to 4 pt.
- Type: Lets you choose the type of border from a range of preset border types. We will choose Dashed (3 and 2).
- Gap Color and Gap Tint: If you have applied a border type with gaps, such as a dashed line, these properties allow you to set a color and tint (lightness) for the gap. We will leave this unchanged.
- Cap: This property allows you to control the look of the dash ends. We will select Rounded.
- Join: Allows you to control the look of the corners where the sides join. We will choose Rounded.
The final two options toward the bottom of the dialog box are:
- Display Border if Paragraph Splits Across Frames/Columns: Turning this on will result in frames that split across multiple frames or columns having a border on all four sides. If it is off, the border will not be shown at the point where the frame splits.
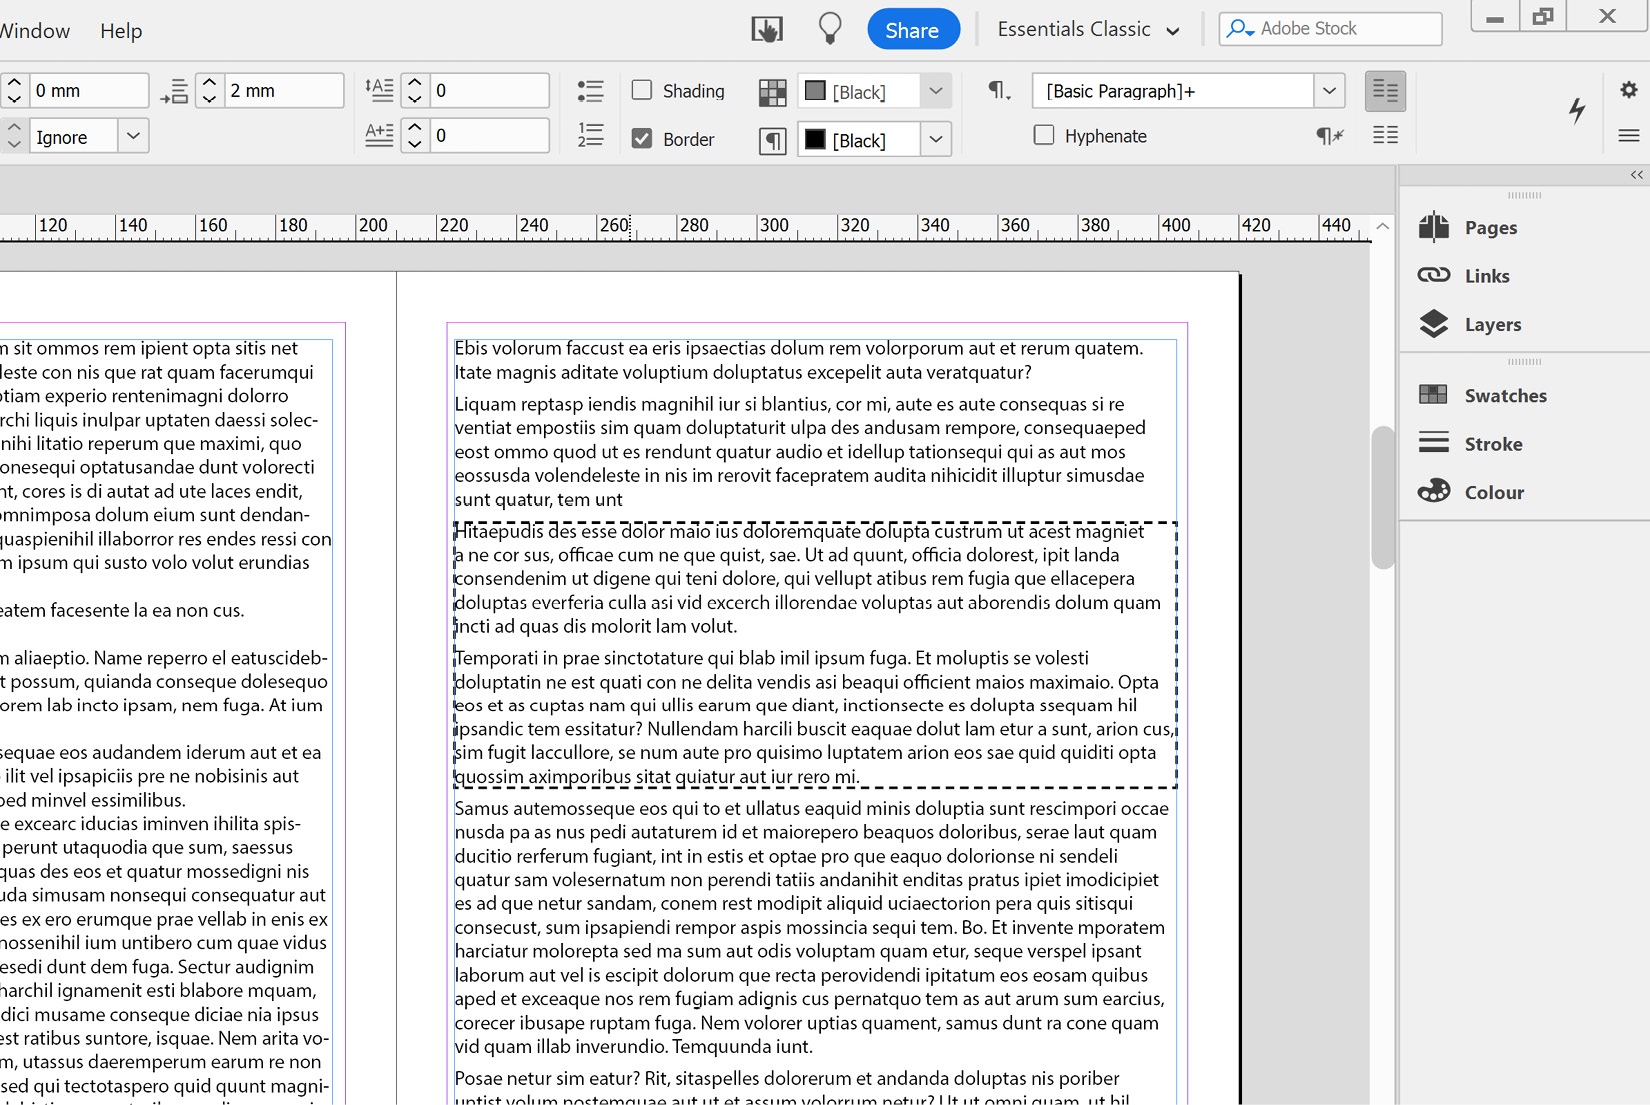
- Merge Consecutive Borders and Shading with same Settings: If this is selected border and shading effects will be merged together, where consecutive paragraphs have the exact same border and shading settings. An example of this can be seen in Figure 2.30:

Figure 2.30: Paragraph borders merged across two paragraphs


