This recipe will cover the required steps for installation of Bootstrap 4 via npm on Cloud9 IDE. In order to begin working on this recipe, it is assumed that you have already registered a c9.io account.
Installing Bootstrap 4 to Cloud9 IDE using npm
Getting ready
To begin, log in to your c9.io account, which will open your Cloud9 IDE dashboard:

Click on Create a new workspace, and a new page will appear with only a few things to fill in. You only need to add the Workspace name and Description, as you like. You can leave the Clone from Git or Mercurial URL empty, as well as leave the default HTML template selected. Finally, click on Create workspace to spin up a new container.
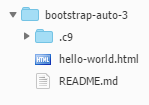
Once ready, you will be greeted with the following tree structure of your folders (displayed in the left sidebar):

The largest window (to the right from the sidebar) will have the README.md file open, but you can open any other file in that area as well. Under this largest window, you will see an open Terminal window (titled "bash - <your-project-name>"), and another tab with the JavaScript REPL.
We will make use of Node and npm to install the latest version of Bootstrap via the command line (the readily open Bash Terminal). Both Node and npm come preinstalled in Cloud9 IDE.
How to do it...
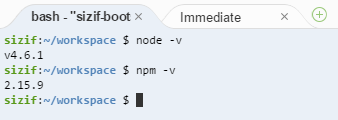
- Inspect the versions of Node and npm installed on our virtual machine:

-
Inspect the available versions of Bootstrap to be installed:

The preceding command shows us that we can either install Bootstrap 3 (latest stable version) or Bootstrap 4 (latest alpha version); we will install Bootstrap 4.
- To install the latest alpha version of Bootstrap 4, run the following command:

Running the preceding command will almost instantly install the newest version of Bootstrap 4 in our node_modules directory. Inspect the directory's contents with ll (c9), or dir (Windows).
- Navigate to the node_modules/bootstrap folder:
cd node_modules/bootstrap
- Install all the dependencies via npm install:
npm install
After running the npm install command, a number of dependencies will be installed, just as listed in the package.json file. The installation will take some time. The reason why it takes so long is mostly due to the installation of the PhantomJS headless browser, which is used for testing in Bootstrap 4.
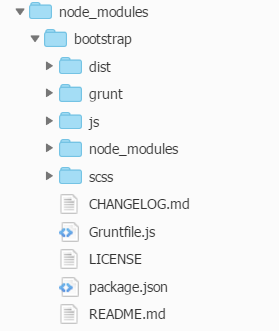
Once the installation process is completed, you will be greeted with a large number of folders and files. There are about 40 folders inside the node_modules folder. These folders house specific dependencies, such as grunt-sass or eslint. All of these dependencies are located inside the node_modules/bootstrap/node_modules path.
Here is the structure of the files installed using the npm approach:

After the installation is completed, the dist folder contains all the CSS and JavaScript needed to run a website.
All that is left now is to add HTML pages, and correctly reference the styles and scripts from the dist folder.


